Run C# scripts from the .NET CLI, define NuGet packages inline and edit/debug them in VS Code - all of that with full language services support from OmniSharp.
⚠️ If you are using C# for VS Code version 1.15.0 on Linux or Mac, make sure to update to 1.15.2. There is a bug in the version of OmniSharp that shipped with 1.15.0, that prevents C# scripting from working in non-Windows environments. You can also go to VS Code settings and set"omnisharp.path":"latest". This change will allow you to use C# 7.3 already.
| Build server | Platform | Build status |
|---|---|---|
| AppVeyor | Windows |  |
| Travis | Linux / OS X |  |
| Name | Version | Framework |
|---|---|---|
dotnet-script |
 |
netcoreapp2.1 |
Dotnet.Script |
 |
netcoreapp2.1 |
Dotnet.Script.Core |
 |
netstandard2.0 |
Dotnet.Script.DependencyModel |
 |
netstandard2.0 |
Dotnet.Script.DependencyModel.Nuget |
 |
netstandard2.0 |
The only thing we need to install is .Net Core 2.1+ SDK.
.Net Core 2.1 introduces the concept of global tools meaning that you can install dotnet-script using nothing but the .NET CLI.
dotnet tool install -g dotnet-script

You can invoke the tool using the following command: dotnet-script
Tool 'dotnet-script' (version '0.22.0') was successfully installed.
The advantage of this approach is that you can use the same command for installation across all platforms.
⚠️ In order to use the global tool you need .Net Core SDK 2.1.300 or higher. The earlier previews and release candidates of .NET Core 2.1 are not supported.
.NET Core SDK also supports viewing a list of installed tools and their uninstallation.
dotnet tool list -g

Package Id         Version      Commands
---------------------------------------------
dotnet-script      0.22.0       dotnet-script
dotnet tool uninstall dotnet-script -g
Tool 'dotnet-script' (version '0.22.0') was successfully uninstalled.choco install dotnet.scriptWe also provide a PowerShell script for installation.
(new-object Net.WebClient).DownloadString("https://raw.githubusercontent.com/filipw/dotnet-script/master/install/install.ps1") | iexcurl -s https://raw.githubusercontent.com/filipw/dotnet-script/master/install/install.sh | bashIf permission is denied we can try with sudo
curl -s https://raw.githubusercontent.com/filipw/dotnet-script/master/install/install.sh | sudo bashA Dockerfile for running dotnet-script in a Linux container is available. Build:
cd build
docker build -t dotnet-script -f Dockerfile ..
And run:
docker run -it dotnet-script --versionYou can manually download all the releases in zip format from the Github releases page.
Our typical helloworld.csx might look like this:
Console.WriteLine("Hello world!");That is all it takes and we can execute the script. Args are accessible via the global Args array.
dotnet script helloworld.csx
Simply create a folder somewhere on your system and issue the following command.
dotnet script initThis will create main.csx along with the launch configuration needed to debug the script in VS Code.
.
├── .vscode
│   └── launch.json
├── main.csx
└── omnisharp.json
We can also initialize a folder using a custom filename.
dotnet script init custom.csxInstead of main.csx which is the default, we now have a file named custom.csx.
.
├── .vscode
│   └── launch.json
├── custom.csx
└── omnisharp.json
Note: Executing
dotnet script initinside a folder that already contains one or more script files will not create themain.csxfile.
Scripts can be executed directly from the shell as if they were executables.
foo.csx arg1 arg2 arg3OSX/Linux
Just like all scripts, on OSX/Linux you need to have a !# and mark the file as executable via chmod +x foo.csx.
If you use dotnet script init to create your csx it will automatically have the !# directive and be marked as executable.
The OSX/Linux shebang directive should be #!/usr/bin/env dotnet-script
#!/usr/bin/env dotnet-script
Console.WriteLine("Hello world");
You can execute your script using dotnet script or dotnet-script, which allows you to pass arguments to control your script execution more.
foo.csx arg1 arg2 arg3
dotnet script foo.csx -- arg1 arg2 arg3
dotnet-script foo.csx -- arg1 arg2 arg3All arguments after -- are passed to the script in the following way:
dotnet script foo.csx -- arg1 arg2 arg3Then you can access the arguments in the script context using the global Args collection:
foreach (var arg in Args)
{
    Console.WriteLine(arg);
}
All arguments before -- are processed by dotnet script. For example, the following command-line
dotnet script -d foo.csx -- -dwill pass the -d before -- to dotnet script and enable the debug mode whereas the -d after -- is passed to script for its own interpretation of the argument.
dotnet script has built-in support for referencing NuGet packages directly from within the script.
#r "nuget: AutoMapper, 6.1.0"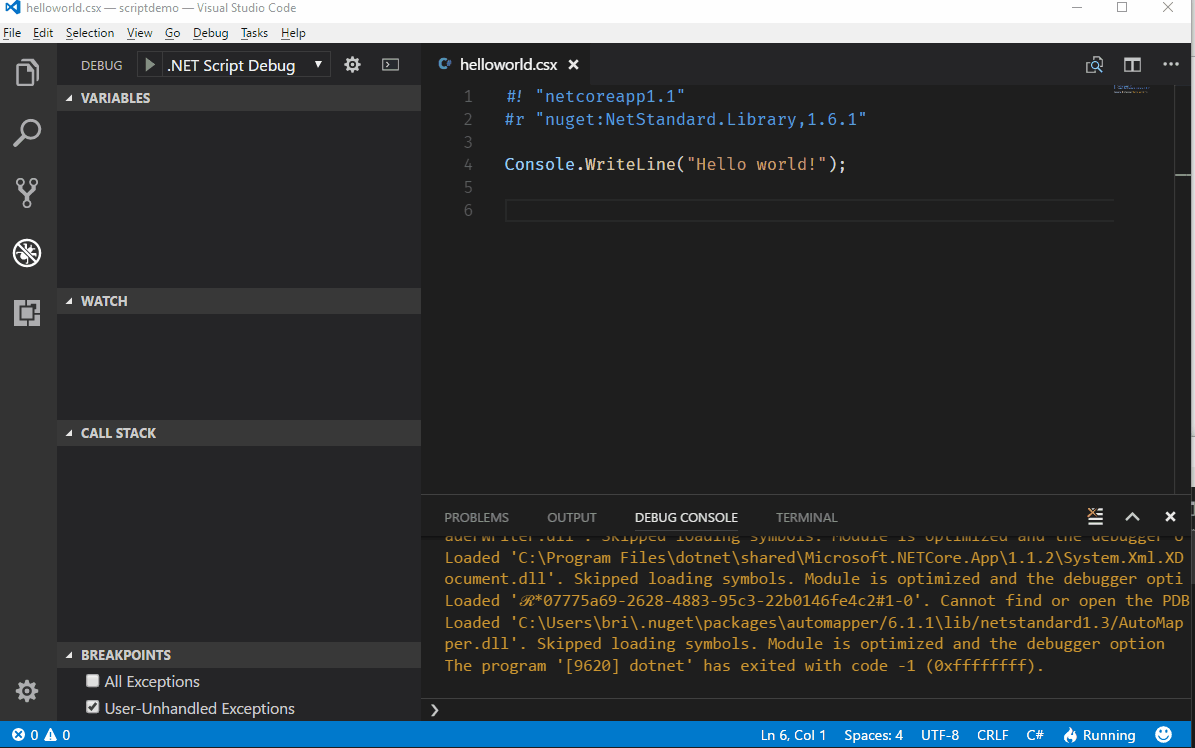
Note: Omnisharp needs to be restarted after adding a new package reference
We can define package sources using a NuGet.Config file in the script root folder. In addition to being used during execution of the script, it will also be used by OmniSharp that provides language services for packages resolved from these package sources.
As an alternative to maintaining a local NuGet.Config file we can define these package sources globally either at the user level or at the computer level as described in Configuring NuGet Behaviour
It is also possible to specify packages sources when executing the script.
dotnet script foo.csx -s https://SomePackageSourceMultiple packages sources can be specified like this:
dotnet script foo.csx -s https://SomePackageSource -s https://AnotherPackageSourceDotnet-Script can create a standalone executable or DLL for your script.
| Switch | Long switch | description |
|---|---|---|
| -o | --output | Directory where the published executable should be placed. Defaults to a 'publish' folder in the current directory. |
| -n | --name | The name for the generated DLL (executable not supported at this time). Defaults to the name of the script. |
| --dll | Publish to a .dll instead of an executable. | |
| -c | --configuration | Configuration to use for publishing the script [Release/Debug]. Default is "Debug" |
| -d | --debug | Enables debug output. |
| -r | --runtime | The runtime used when publishing the self contained executable. Defaults to your current runtime. |
The executable you can run directly independent of dotnet install, while the DLL is can be run using the dotnet CLI like this:
dotnet publish\myscript.dll -- arg1 arg2Under the hood, Dotnet-Script performs a dotnet restore to resolve the dependencies needed to execute the script(s). This is an out-of-process operation and typically takes roughly one second. The restore cache ensures that we only do a dotnet restore if the dependencies has changed. For this cache to kick in, it is required for all NuGet package references to be specified using an exact version number.
This cache an be disabled using the --nocache flag.
Dotnet-Script will automatically create a DLL on first execution of a script and as long as the source code has not changed it will continue to use that DLL significantlly speeding up the execution of your scripts (by 8x). The cached DLL's are stored in the user %tmp%/dotnet-script folder.
You can override this automatic caching by passing --nocache flag, which will cause your script to be dynamically compiled everytime you run it.
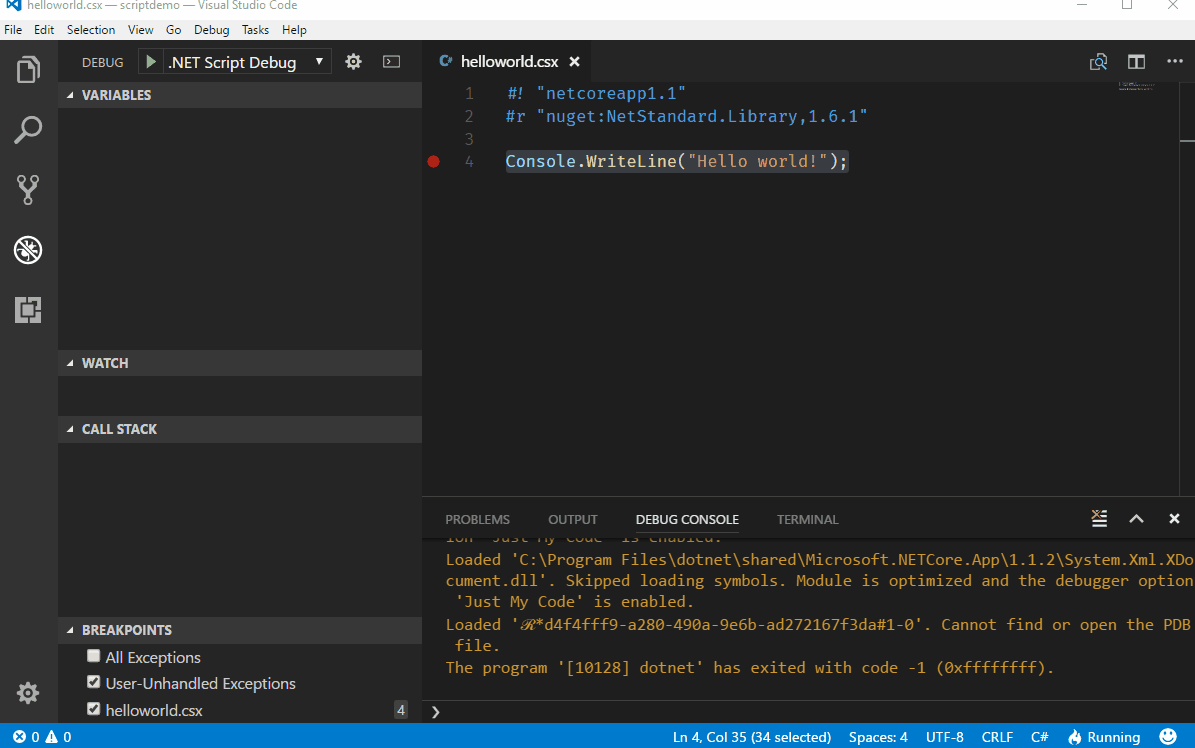
The days of debugging scripts using Console.WriteLine are over. One major feature of dotnet script is the ability to debug scripts directly in VS Code. Just set a breakpoint anywhere in your script file(s) and hit F5(start debugging)
Script packages are a way of organizing reusable scripts into NuGet packages that can be consumed by other scripts. This means that we now can leverage scripting infrastructure without the need for any kind of bootstrapping.
A script package is just a regular NuGet package that contains script files inside the content or contentFiles folder.
The following example shows how the scripts are laid out inside the NuGet package according to the standard convention .
└── contentFiles
    └── csx
        └── netstandard2.0
            └── main.csx
This example contains just the main.csx file in the root folder, but packages may have multiple script files either in the root folder or in subfolders below the root folder.
When loading a script package we will look for an entry point script to be loaded. This entry point script is identified by one of the following.
- A script called
main.csxin the root folder - A single script file in the root folder
If the entry point script cannot be determined, we will simply load all the scripts files in the package.
The advantage with using an entry point script is that we can control loading other scripts from the package.
To consume a script package all we need to do specify the NuGet package in the #load directive.
The following example loads the simple-targets package that contains script files to be included in our script.
#! "netcoreapp2.1"
#load "nuget:simple-targets-csx, 6.0.0"

using static SimpleTargets;
var targets = new TargetDictionary();

targets.Add("default", () => Console.WriteLine("Hello, world!"));

Run(Args, targets);
Note: Debugging also works for script packages so that we can easily step into the scripts that are brought in using the
#loaddirective.
Scripts don't actually have to exist locally on the machine. We can also execute scripts that are made available on an http(s) endpoint.
This means that we can create a Gist on Github and execute it just by providing the URL to the Gist.
This Gist contains a script that prints out "Hello World"
We can execute the script like this
dotnet script https://gist.githubusercontent.com/seesharper/5d6859509ea8364a1fdf66bbf5b7923d/raw/0a32bac2c3ea807f9379a38e251d93e39c8131cb/HelloWorld.csxThat is a pretty long URL, so why don't make it a TinyURL like this:
dotnet script https://tinyurl.com/y8cda9ztA pretty common scenario is that we have logic that is relative to the script path. We don't want to require the user to be in a certain directory for these paths to resolve correctly so here is how to provide the script path and the script folder regardless of the current working directory.
public static string GetScriptPath([CallerFilePath] string path = null) => path;
public static string GetScriptFolder([CallerFilePath] string path = null) => Path.GetDirectoryName(path);
Tip: Put these methods as top level methods in a separate script file and
#loadthat file wherever access to the script path and/or folder is needed.
This release contains a C# REPL (Read-Evaluate-Print-Loop). The REPL mode ("interactive mode") is started by executing dotnet-script without any arguments.
The interactive mode allows you to supply individual C# code blocks and have them executed as soon as you press Enter. The REPL is configured with the same default set of assembly references and using statements as regular CSX script execution.
Once dotnet-script starts you will see a prompt for input. You can start typing C# code there.
~$ dotnet script
> var x = 1;
> x+x
2
If you submit an unterminated expression into the REPL (no ; at the end), it will be evaluated and the result will be serialized using a formatter and printed in the output. This is a bit more interesting than just calling ToString() on the object, because it attempts to capture the actual structure of the object. For example:
~$ dotnet script
> var x = new List<string>();
> x.Add("foo");
> x
List<string>(1) { "foo" }
> x.Add("bar");
> x
List<string>(2) { "foo", "bar" }
>
REPL also supports inline Nuget packages - meaning the Nuget packages can be installed into the REPL from within the REPL. This is done via our #r and #load from Nuget support and uses identical syntax.
~$ dotnet script
> #r "nuget: Automapper, 6.1.1"
> using AutoMapper;
> typeof(MapperConfiguration)
[AutoMapper.MapperConfiguration]
> #load "nuget: simple-targets-csx, 6.0.0";
> using static SimpleTargets;
> typeof(TargetDictionary)
[Submission#0+SimpleTargets+TargetDictionary]
Using Roslyn syntax parsing, we also support multiline REPL mode. This means that if you have an uncompleted code block and press Enter, we will automatically enter the multiline mode. The mode is indicated by the * character. This is particularly useful for declaring classes and other more complex constructs.
~$ dotnet script
> class Foo {
* public string Bar {get; set;}
* }
> var foo = new Foo();
Aside from the regular C# script code, you can invoke the following commands (directives) from within the REPL:
| Command | Description |
|---|---|
#load |
Load a script into the REPL (same as #load usage in CSX) |
#r |
Load an assembly into the REPL (same as #r usage in CSX) |
#reset |
Reset the REPL back to initial state (without restarting it) |
#cls |
Clear the console screen without resetting the REPL state |
#exit |
Exits the REPL |
You can execute a CSX script and, at the end of it, drop yourself into the context of the REPL. This way, the REPL becomes "seeded" with your code - all the classes, methods or variables are available in the REPL context. This is achieved by running a script with an -i flag.
For example, given the following CSX script:
var msg = "Hello World";
Console.WriteLine(msg);
When you run this with the -i flag, Hello World is printed, REPL starts and msg variable is available in the REPL context.
~$ dotnet script foo.csx -i
Hello World
>
You can also seed the REPL from inside the REPL - at any point - by invoking a #load directive pointed at a specific file. For example:
~$ dotnet script
> #load "foo.csx"
Hello World
>
The following example shows how we can pipe data in and out of a script.
The UpperCase.csx script simply converts the standard input to upper case and writes it back out to standard output.
#! "netcoreapp2.1"
using (var streamReader = new StreamReader(Console.OpenStandardInput()))
{
    Write(streamReader.ReadToEnd().ToUpper());
}
We can now simply pipe the output from one command into our script like this.
echo "This is some text" | dotnet script UpperCase.csx
THIS IS SOME TEXTThe first thing we need to do add the following to the launch.config file that allows VS Code to debug a running process.
{
    "name": ".NET Core Attach",
    "type": "coreclr",
    "request": "attach",
    "processId": "${command:pickProcess}"
}
To debug this script we need a way to attach the debugger in VS Code and to the simplest thing we can do here is to wait for the debugger to attach by adding this method somewhere.
public static void WaitForDebugger()
{
    Console.WriteLine("Attach Debugger (VS Code)");
    while(!Debugger.IsAttached)
    {
    }
}
To debug the script when executing it from the command line we can do something like
#! "netcoreapp2.0"
#r "nuget: NetStandard.Library, 2.0.0"
WaitForDebugger();
using (var streamReader = new StreamReader(Console.OpenStandardInput()))
{
    Write(streamReader.ReadToEnd().ToUpper()); // <- SET BREAKPOINT HERE
}
Now when we run the script from the command line we will get
$ echo "This is some text" | dotnet script UpperCase.csx
Attach Debugger (VS Code)
This now gives us a chance to attach the debugger before stepping into the script and from VS Code, select the .NET Core Attach debugger and pick the process that represents the executing script.
Once that is done we should see out breakpoint being hit.
By default, scripts will be compiled using the debug configuration. This is to ensure that we can debug a script in VS Code as well as attaching a debugger for long running scripts.
There are however situations where we might need to execute a script that is compiled with the release configuration. For instance, running benchmarks using BenchmarkDotNet is not possible unless the script is compiled with the release configuration.
We can specify this when executing the script.
dotnet script foo.csx -c release