This web app allows the creation of a Service Principal using Azure Active Directory Graph APIs. It implements an OAuth Grant-Flow that allows the creation of Service Principals in target directories of their End-Users if the Users do have the required permissions in that target directory.
I've currently deployed the app in my Azure Subscription as a Web App in free tier so you can use it for creating service principals in your own AD tenants. I try to keep it up'n'running as long as possible (hence free tier) and will try to improve the user experience over time (at the moment it's very simplictic).
Important Note: The app requires executing actions against Graph API under the name of the signed-in user. That means, you either need to be a Global Admin or a Global Admin needs to on-board the app with an Admin Consent before other users can make use of this app (without them being required to consent, again)! Please see the next section below in this doc!
To use it follow these steps:
- Note: SSL/https is a must, otherwise the sign-in will fail!
- Important: When using "Microsoft Accounts" (MSA, formerly live ID), you need to start your browser in-private and manually consent by entering a TenantID/Tenant Domain (see step 4).
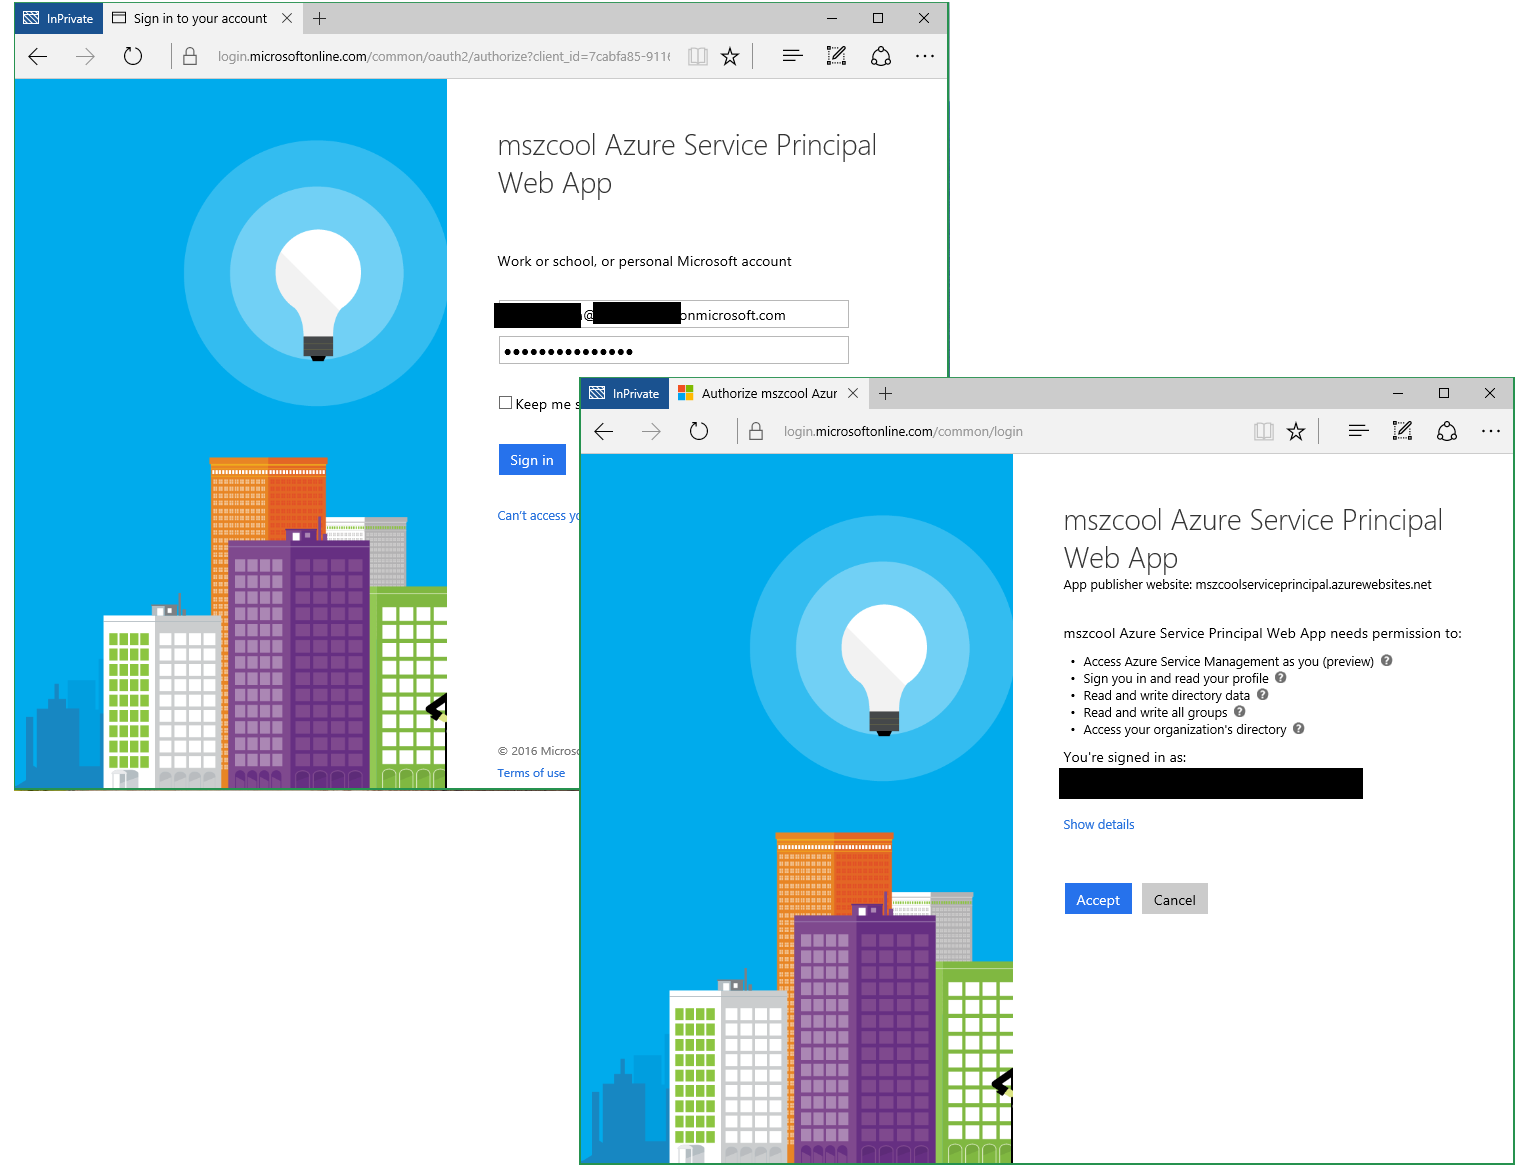
- Accept the consent dialog when signing into the application!
-
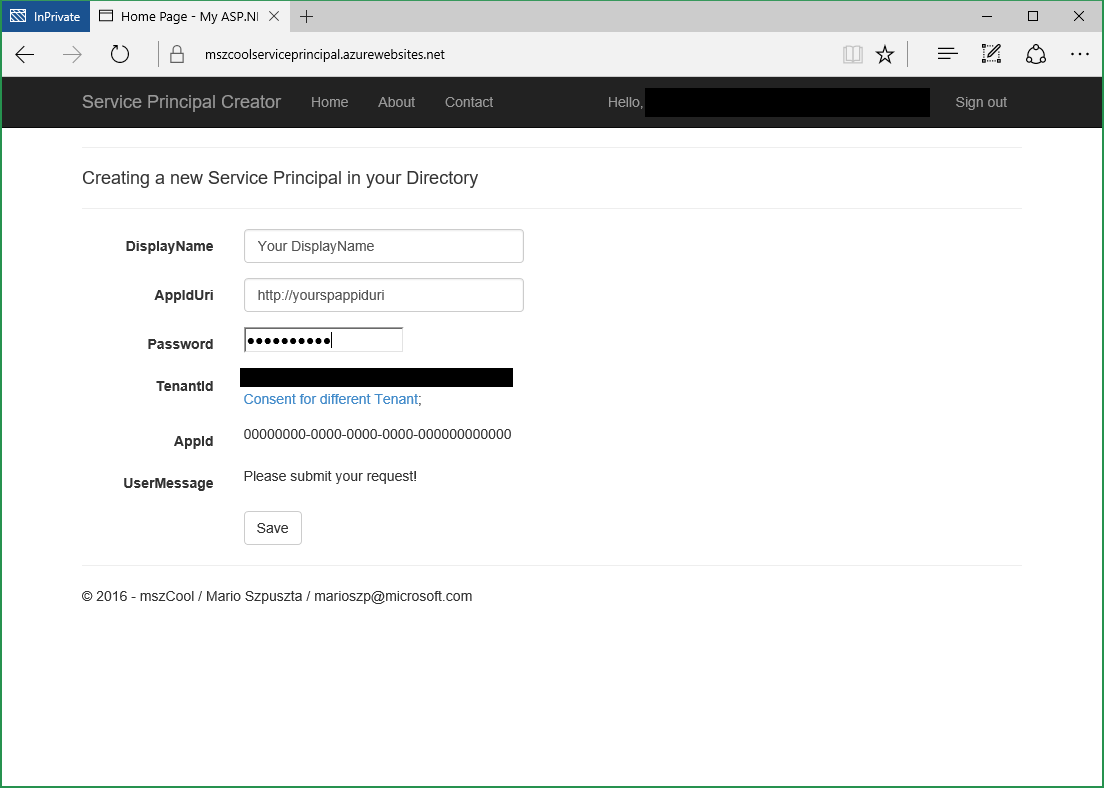
Enter the data and hit save to create a new service principal.
- Important Notes:
- After you hit save, the AppId will be displayed. For using the Service Principal with e.g. Azure xPlat CLI you need the AppId, the TenantId and the password to sign-in!
- A Serivce Principal is always attached to an App-Object in Azure AD. Hence an App will be created as well.
- If you enter the URI of an existing App, DisplayName will be ignored and the existing App will be updated!
- If both, the App and Service Principal did exist, only a new password will be added!
- Always remember the password, there's no option to display the password at any time in the future, anymore!
- DisplayName: that's the name of the App that is created to back the service principal in your AD. You'll see that in your Azure AD Portal.
- AppIdUri: the unique URI for identifying the App in your directory.
- Password: a password to use for the service principal.
- Important Notes:
-
The service principal web app tries to use your default tenant. If you want to switch the tenant, an additional consent is needed. Click the link 'Consent for different Tenant" below the Tenant ID!
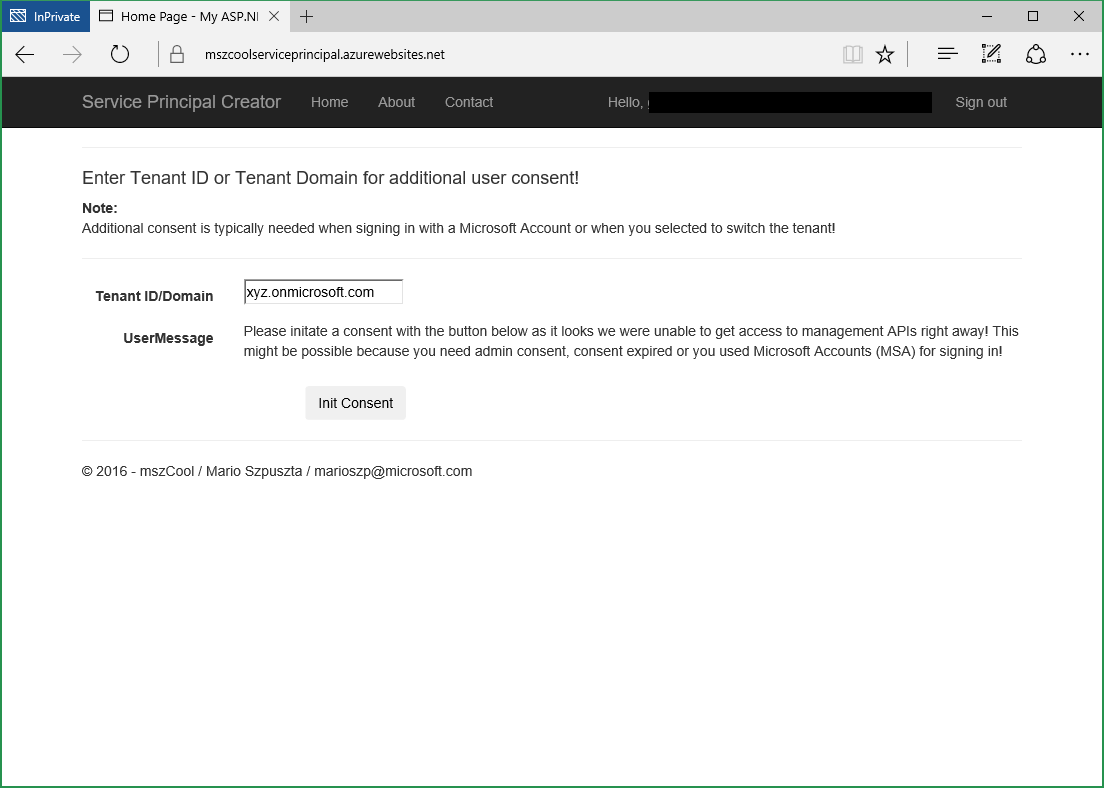
- This will redirect you to a view that allows entering a different tenant domain or ID.
- You can use both, the tenant ID (00000000-0000-0000-0000-000000000000) or a tenant-domain (custom domain or xyz.onmicrosoft.com).
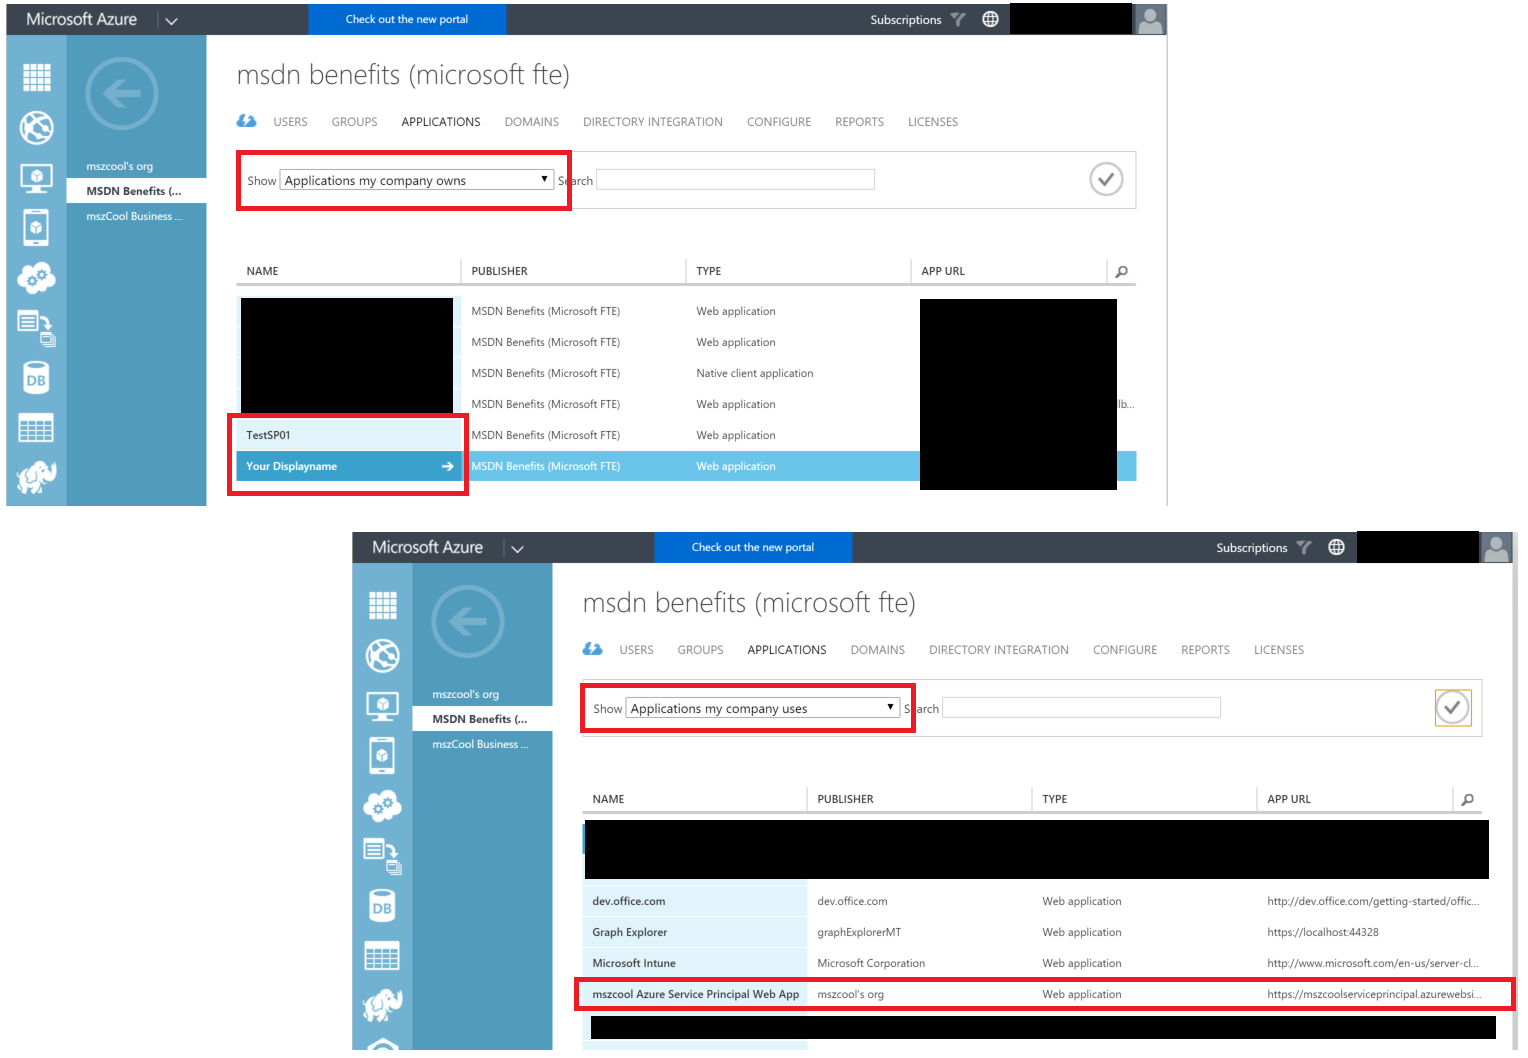
- You can find both, the created service principal as well as the service principal web app registered in your tenant through the Azure AD portal.
- The service principal web app will show up under "Applications my company uses"
- The created service principals will show up under "Applications my company owns"
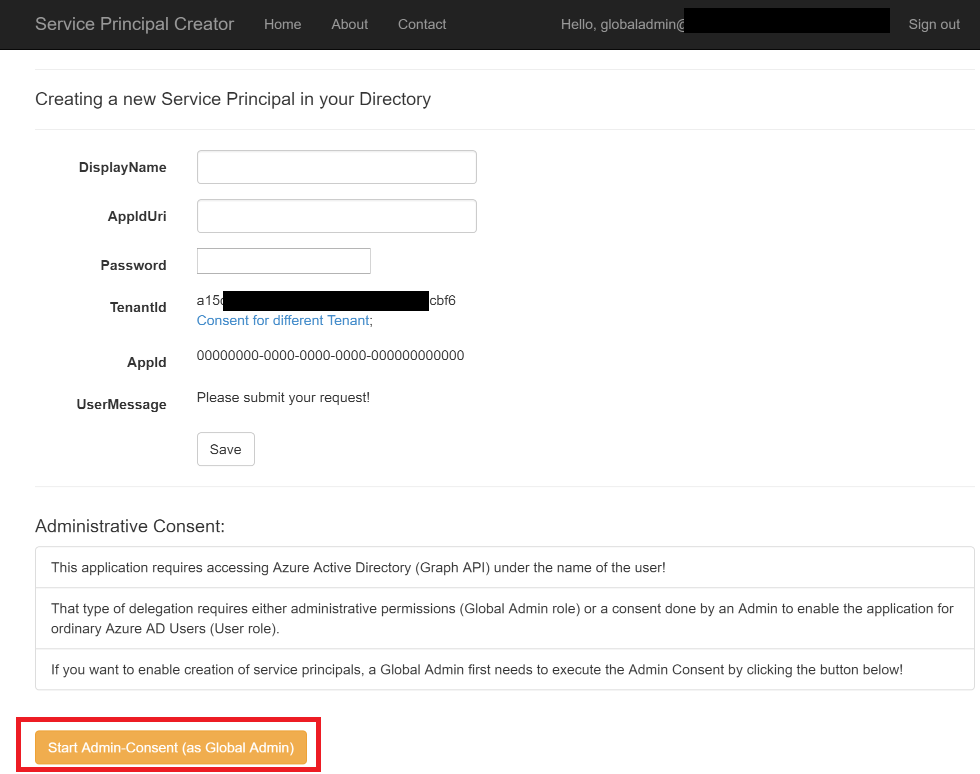
If you want to make the app available to all users in your organization and want users to be able to create their own Service Principals, first a Global Admin needs to perfom an "Admin Consent" to make the application available in your organization. Please follow these steps for doing so:
-
Log-on into the Service Principal App as an Administrator (Global Admin).
-
I've added a new section that allows initating the Admin-Consent:
- This button is only visible if the app was able to detect a default tenant.
- If it did not detect a default tenant, then execute a manual consent first (typically needed when logging-in with a Microsoft Account)
- The button does not detect, if you are really an admin. If you try the consent without being an admin, Azure AD will deny the consent.
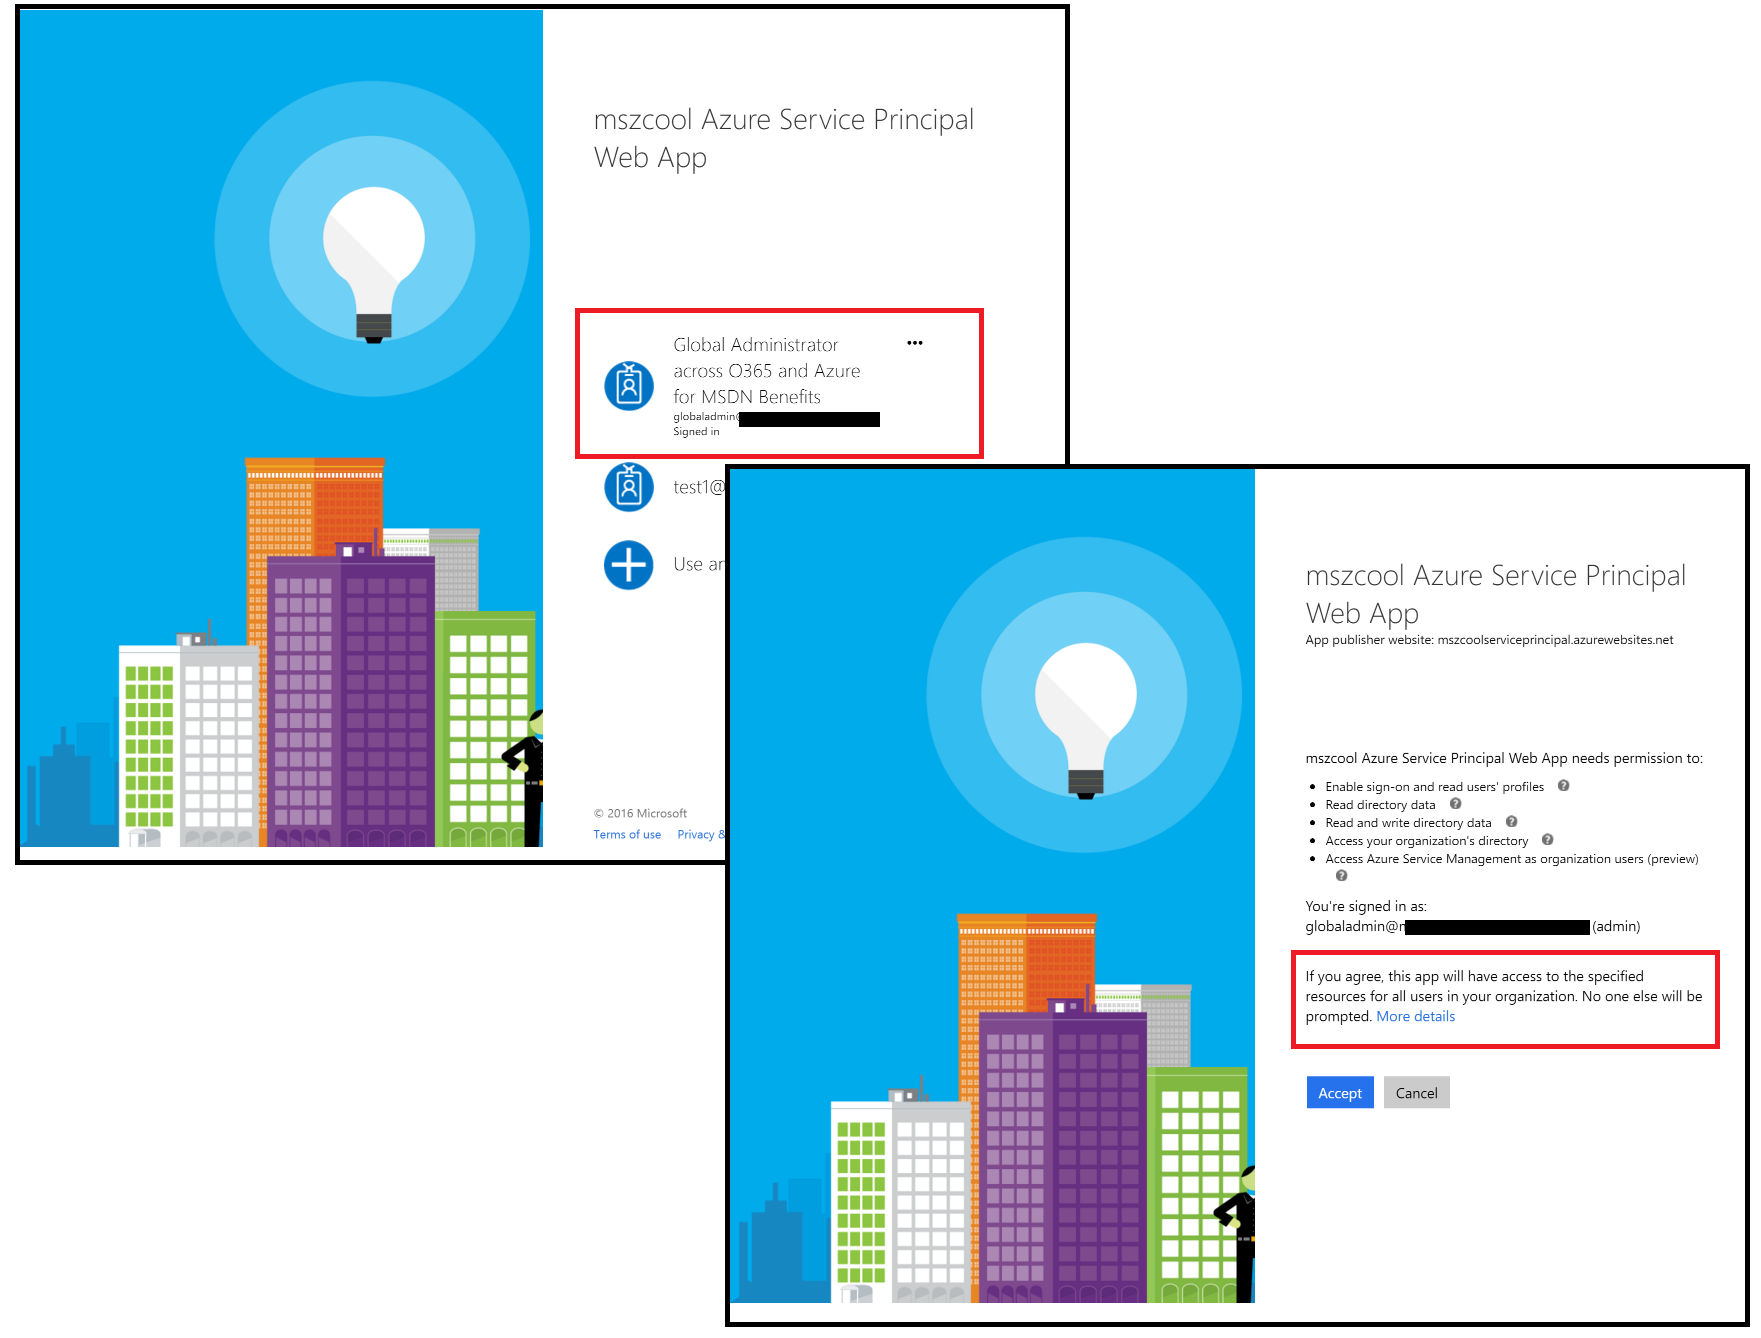
- On the next two screens, sign-in as the Global Admin for the target tenant and accept the consent.
- This will make the app available to all users in your tenant.
- No other user will be prompted with a consent-dialog after using the app, anymore!
You might want to remove the app from your tenant. For doing so, follow these steps:
-
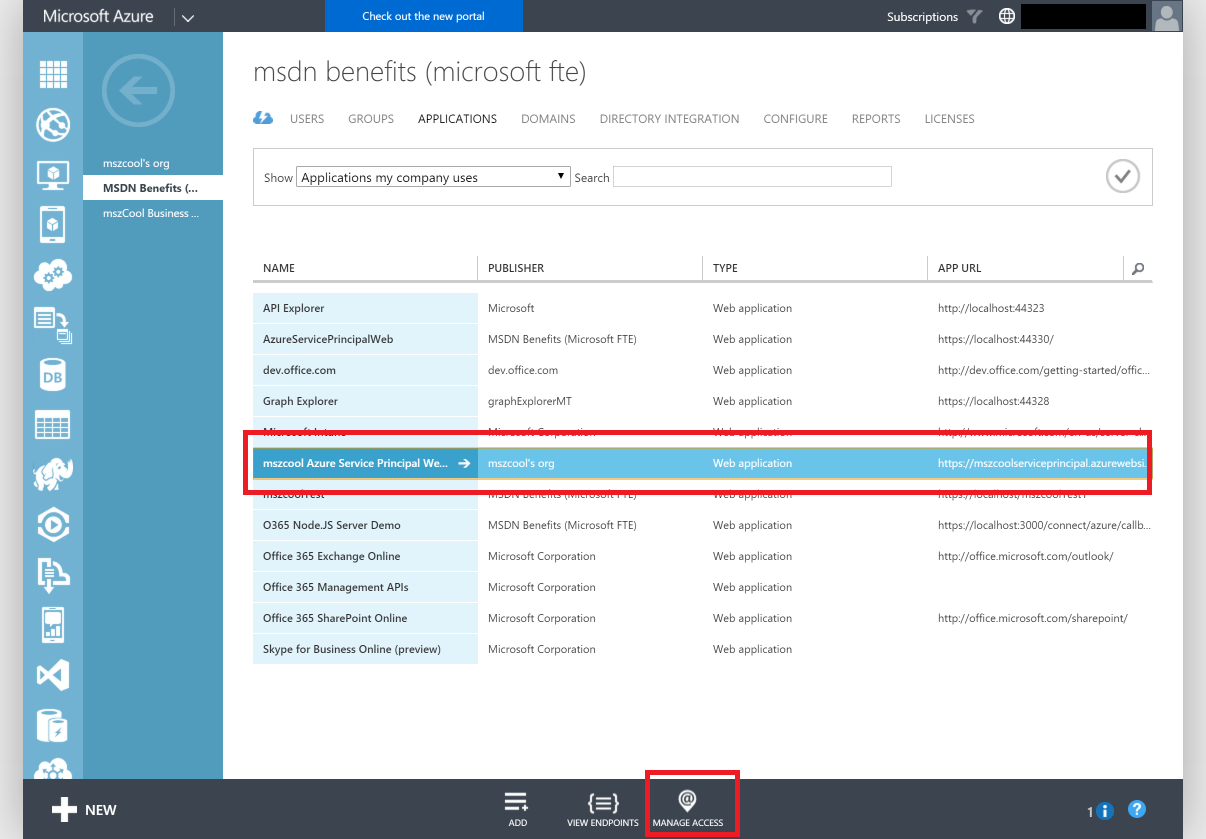
Navigate to the Azure AD management portal.
-
Navigate to the "Applications" tab and select the application in the list.
-
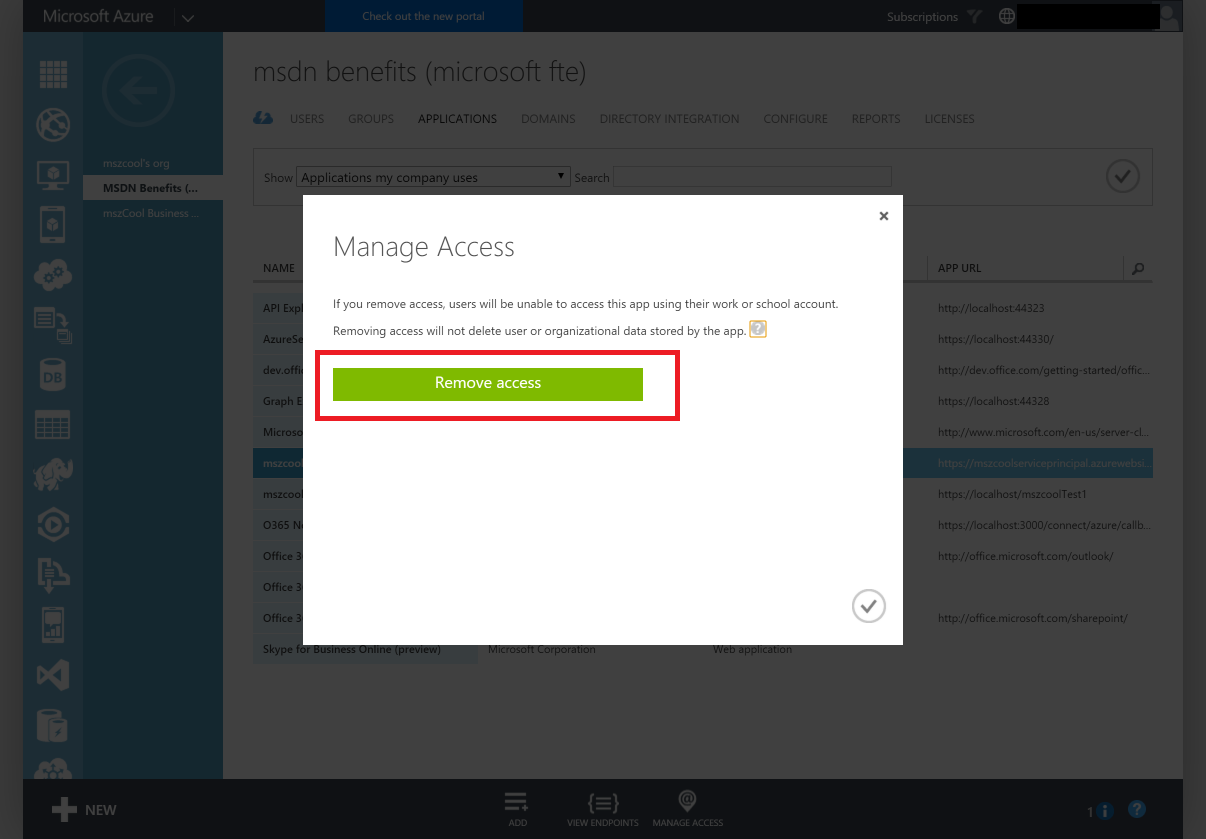
Click "Manage Access" in the bottom toolbar.
- Click "Remove Access" in the dialog that's popping up.
You can always clone this repository and run the application in your own tenant. These are the steps for setting up the App in your own Azure Active Directory Tenant.
-
Navigate to the classic Azure Management Portal.
-
In the left navigation bar, scroll down and select Azure Active Directory.
-
Select your target Azure AD in the list of AD tenants.
-
Switch to the Applications-Tab in your tenant.
-
Add a new Application and follow the steps in the Wizard:
- Select "Add an application my organization is developing"
- Give the Application a Display Name, e.g. "AzureServicePrincipalWeb"
- As Application-Type, select "Web Application And/Or Web API"
- Enter a Sign-On URL that matches the final target URL. E.g. if you plan to deploy it as an Azure Web App, then select "https://yourazurewebapp.azurewebsites.net/".
- Enter an App ID URI that fits in your Azure AD Tenant Domain or a custom domain you're using. E.g. if your tenant is called "mytenant.onmicrosoft.com" select something like "https://mytenant.onmicrosoft.com/yourappname".
-
After you've created the app, open it in the Azure AD Portal and switch to the configure tab.
-
Make sure you have configured the app as a multi-tenant app!
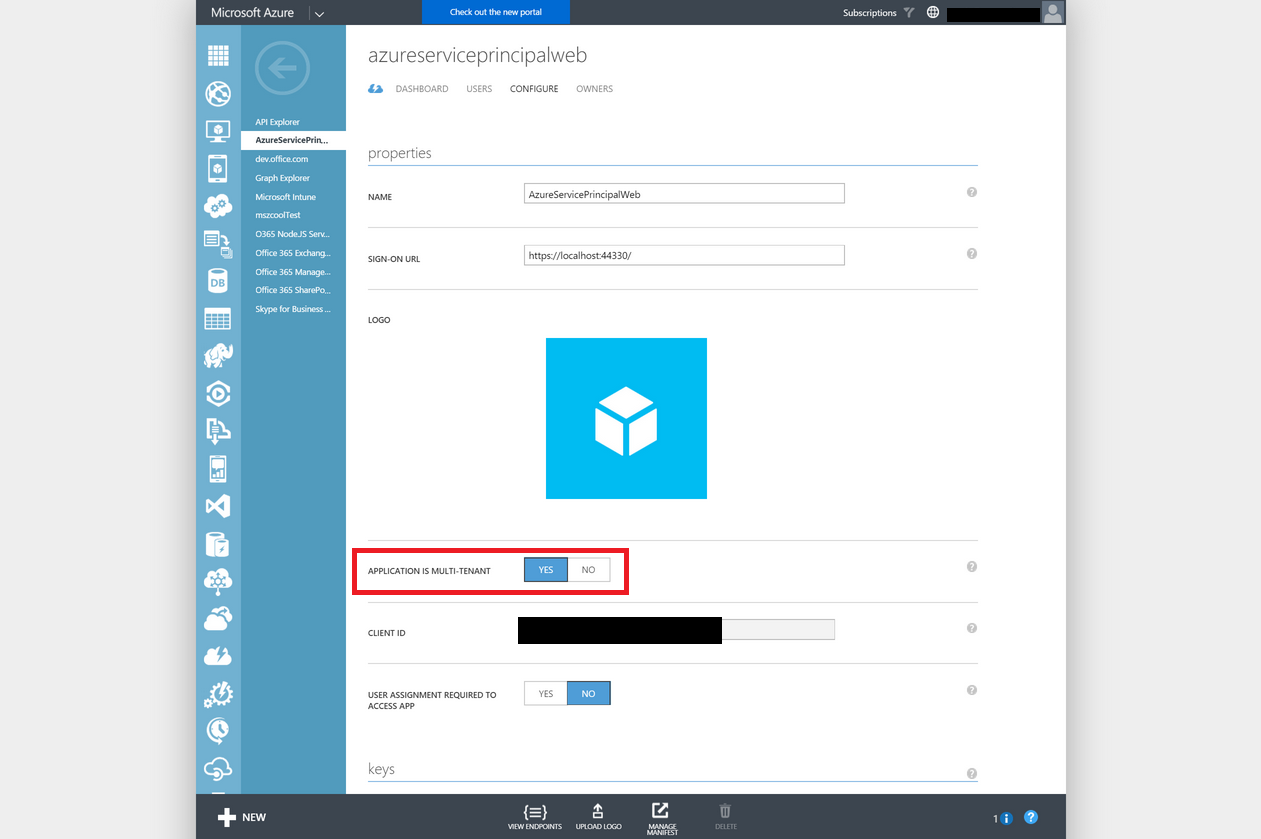
-
Next check the permissions for your app. For creating a Service Principal the following permissions are needed. Also check your App ID URI and whether it matches the Azure AD Tenant Domain (or a custom, verified domain you own):
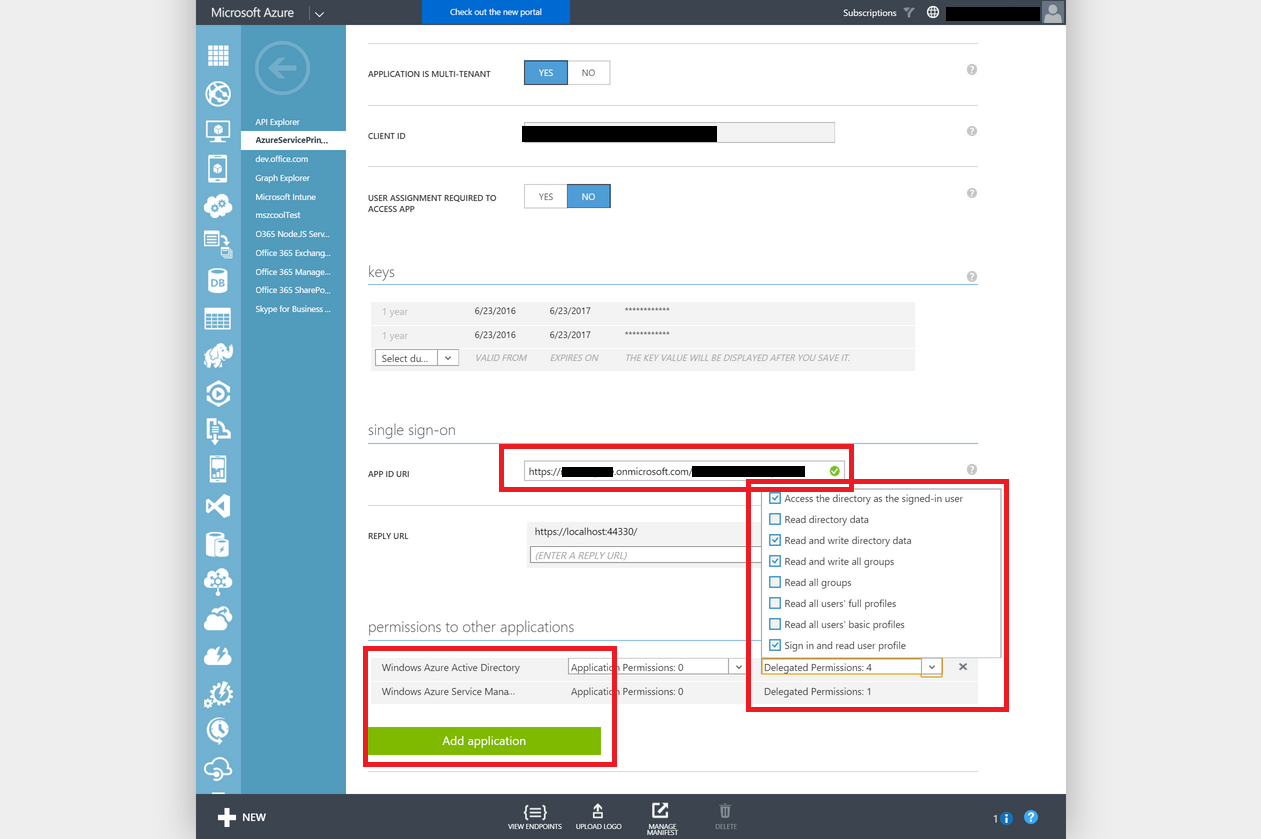
-
Now create a secret key for the app in the Azure AD admin portal. Take note of the key because the portal won't display it afterwards, again!
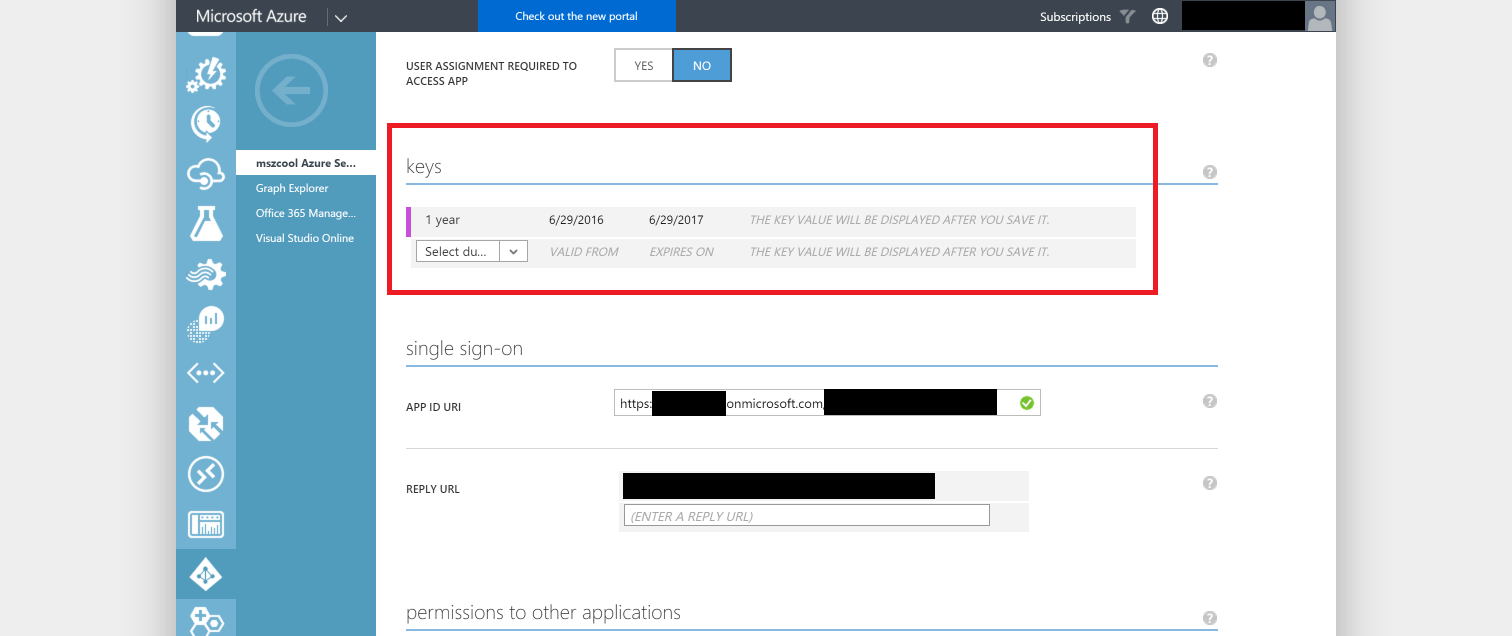
-
Take note of the Client ID (see Figure at point 7. above) as well.
-
Now Open up the web.config of the cloned source code repository. Update the following configuration settings:
<add key="ida:ClientId" value="your client secret goes here" /><add key="ida:AppKey" value="your app key (from step 9.) goes here" />
-
Finally you are ready to deploy your web app wherever you want to run it.
- Make sure the reply URL in the Azure AD config matches your target host/DNS-name!
- When using localhost (for local debugging), make sure the reply URL and IIS Express Ports do match!