ChatdollKit enables you to make your 3D model into a voice-enabled chatbot.
You can learn how to setup ChatdollKit by watching this 2 minutes video: https://www.youtube.com/watch?v=aJ0iDZ0o4Es
-
📦Import packages
- Import JSON .NET For Unity and Oculus LipSync Unity
- Import ChatdollKit.unitypackage
-
🐟Resource preparation
- Import 3D model and put it on the scene
- Put animation clips to animations directory 👉 For tutorial Anime Girls Idle Animations Free
- Get API Key for Azure Speech Services or Google Cloud Speech API
-
🍣Setup
- Add Echo example to your 3D model and set API key on inspector
- Run
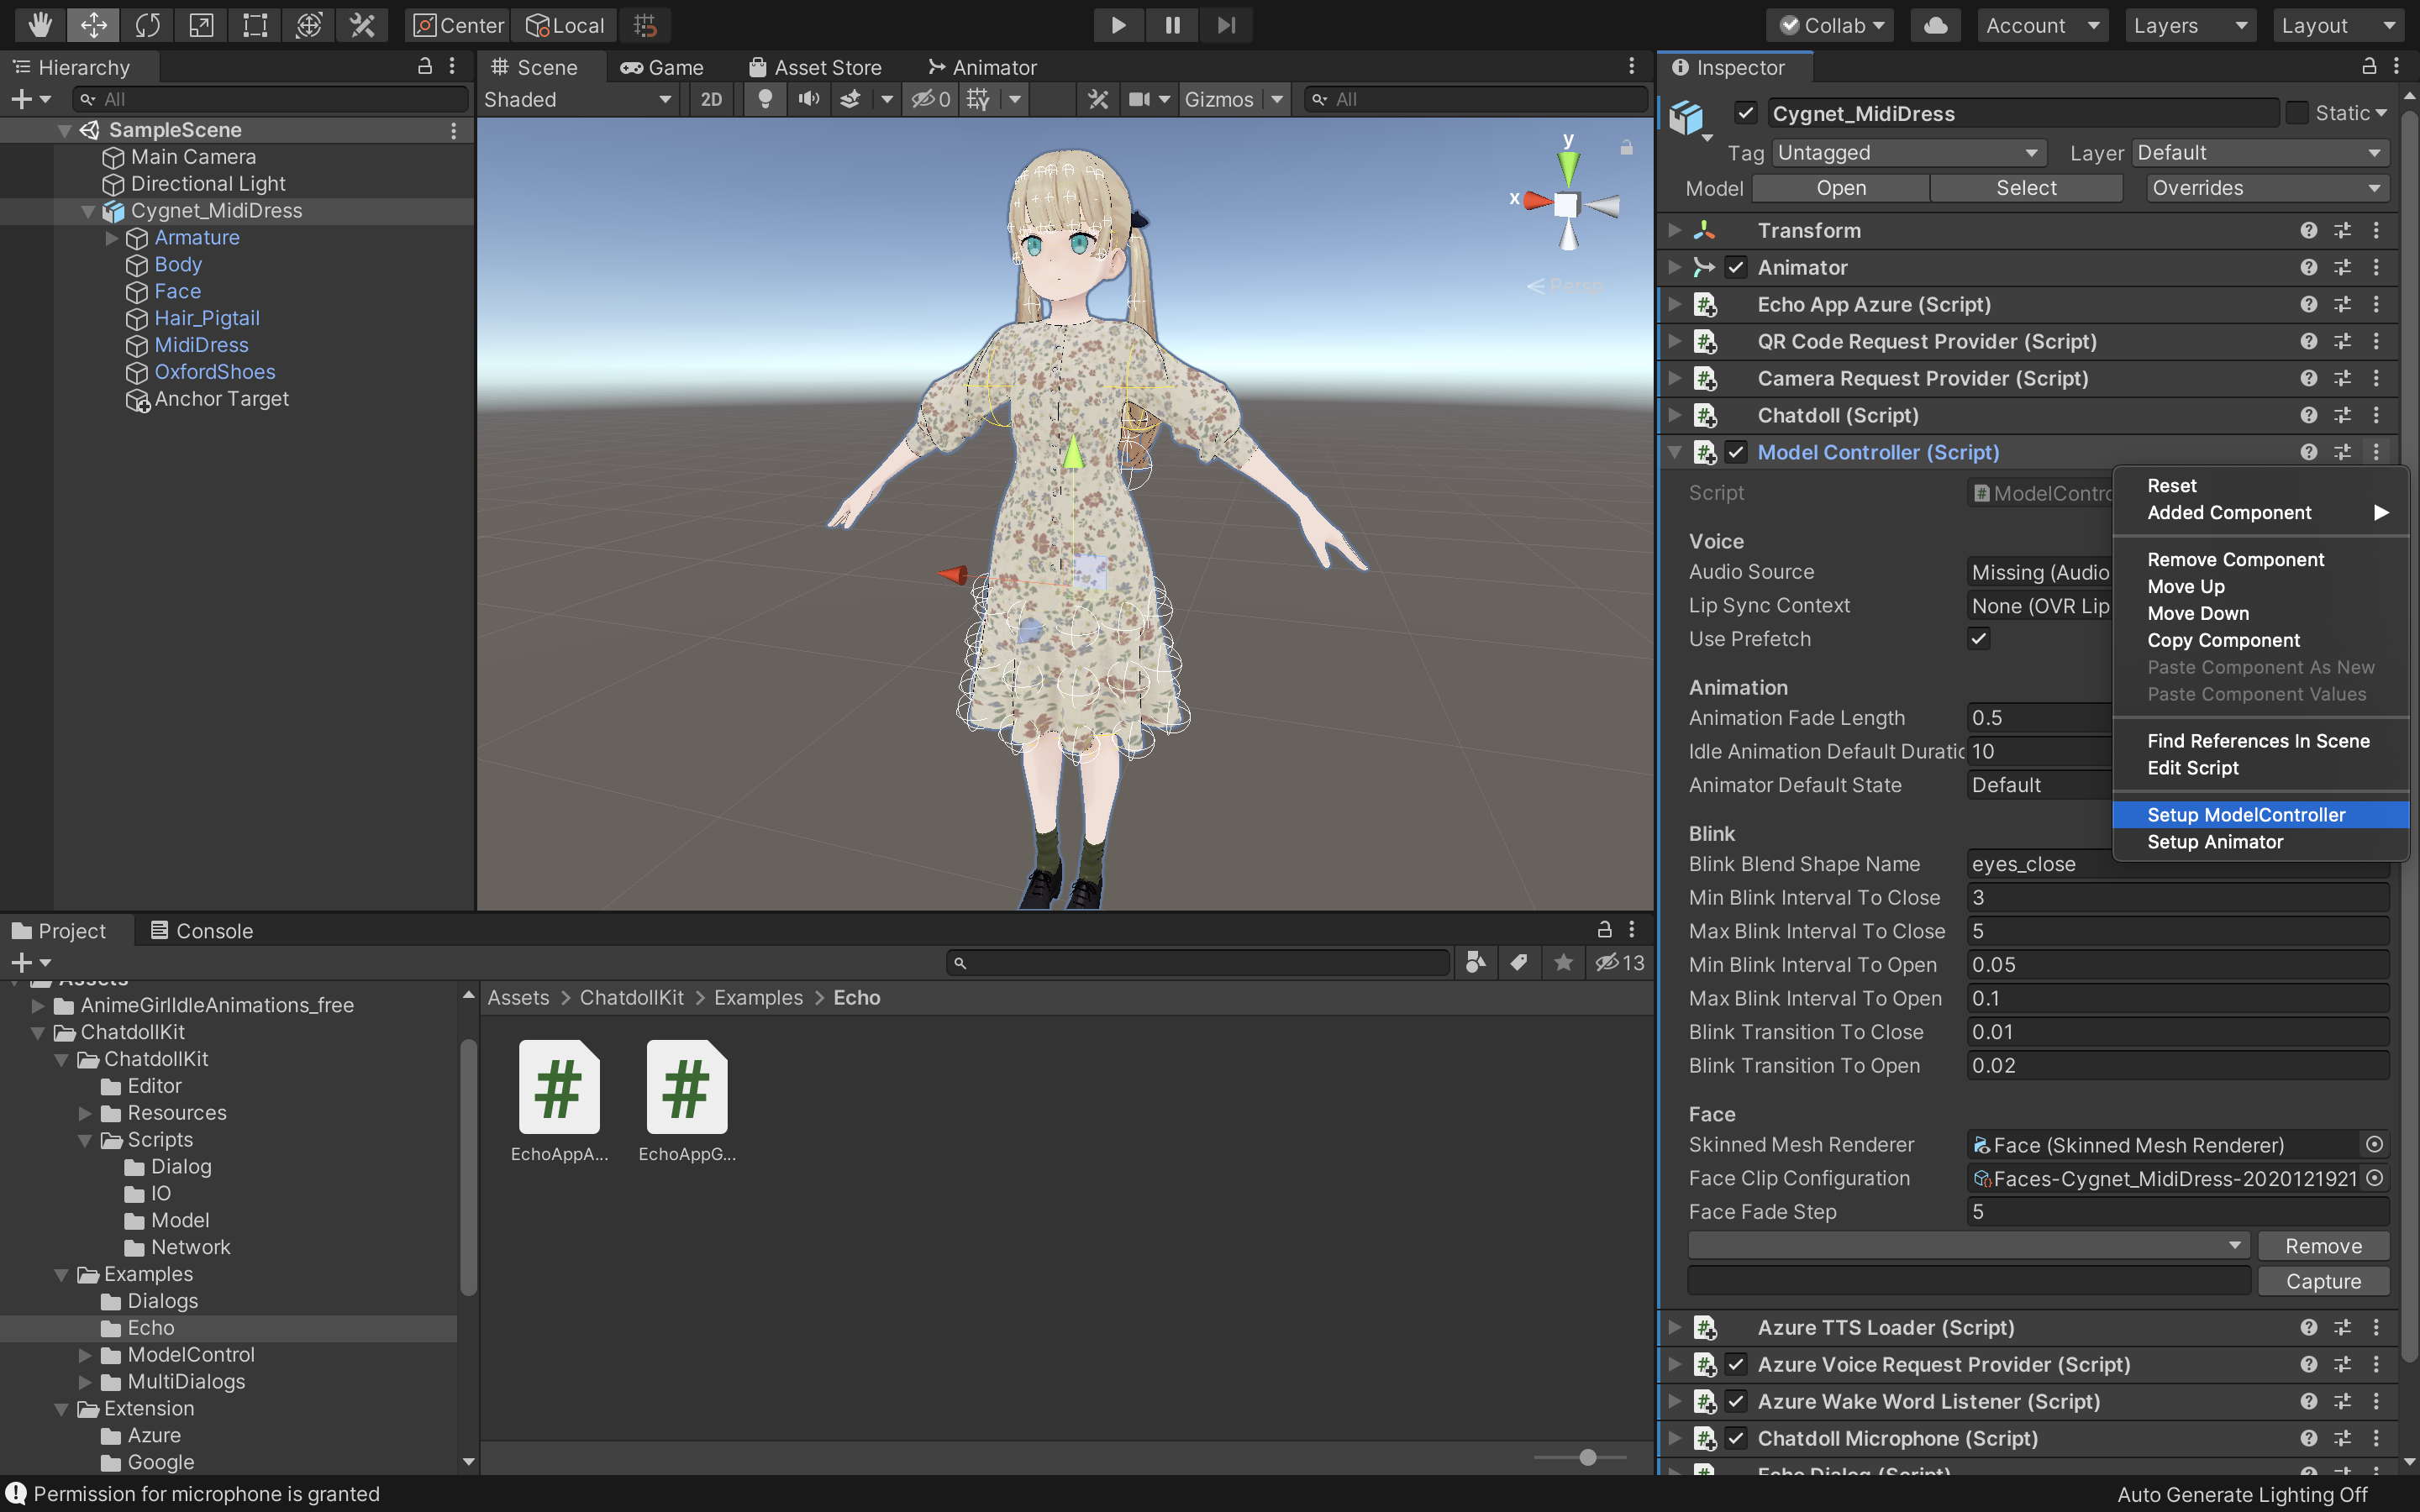
Setup ModelControllerandSetup Animatorin the context menu on inspector
Download the latest version of ChatdollKit.unitypackage and import it into your Unity project after import dependencies;
If you want to create Gatebox application also import ChatdollKit Gatebox Extension.
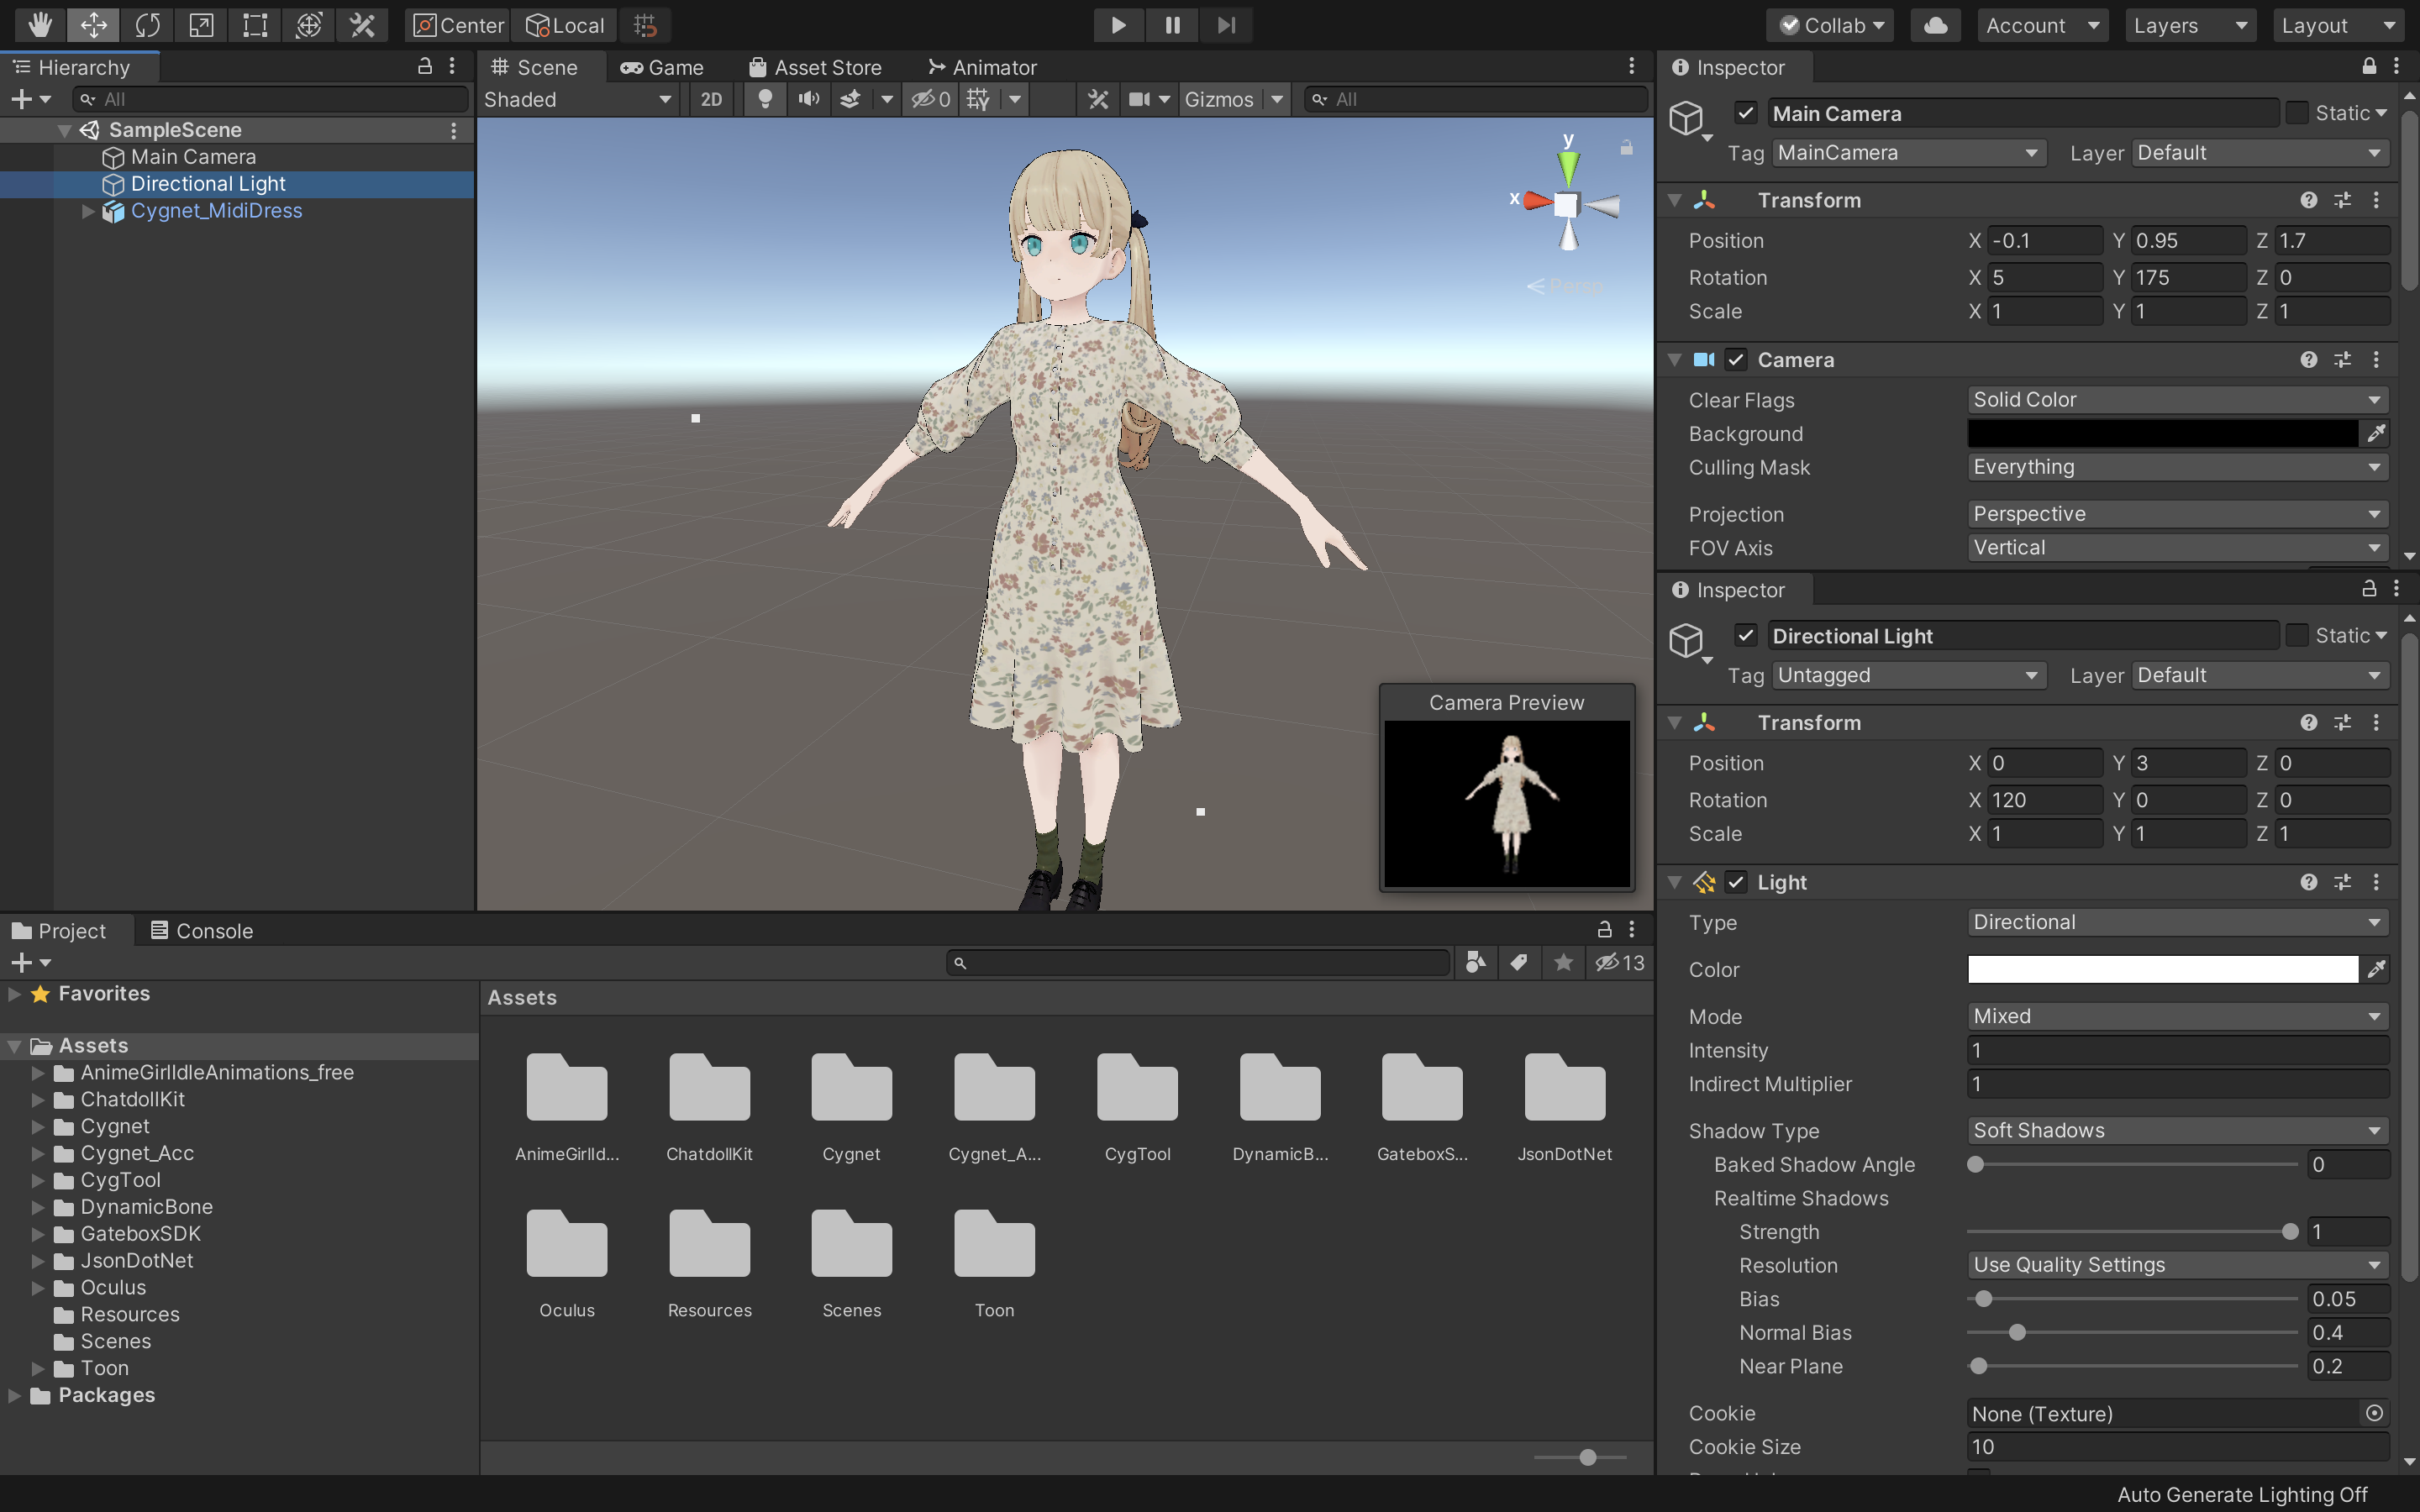
Add 3D model to the scene and adjust as you like. Also install required resources for the 3D model like shaders, Dynamic Bone etc. In this README, I use Cygnet-chan that we can perchase at Booth. https://booth.pm/ja/items/1870320
Create /Animations folder and put animation clips.
In this README, I use Anime Girls Idle Animations Free. I believe it is worth for you to purchase the pro edition.
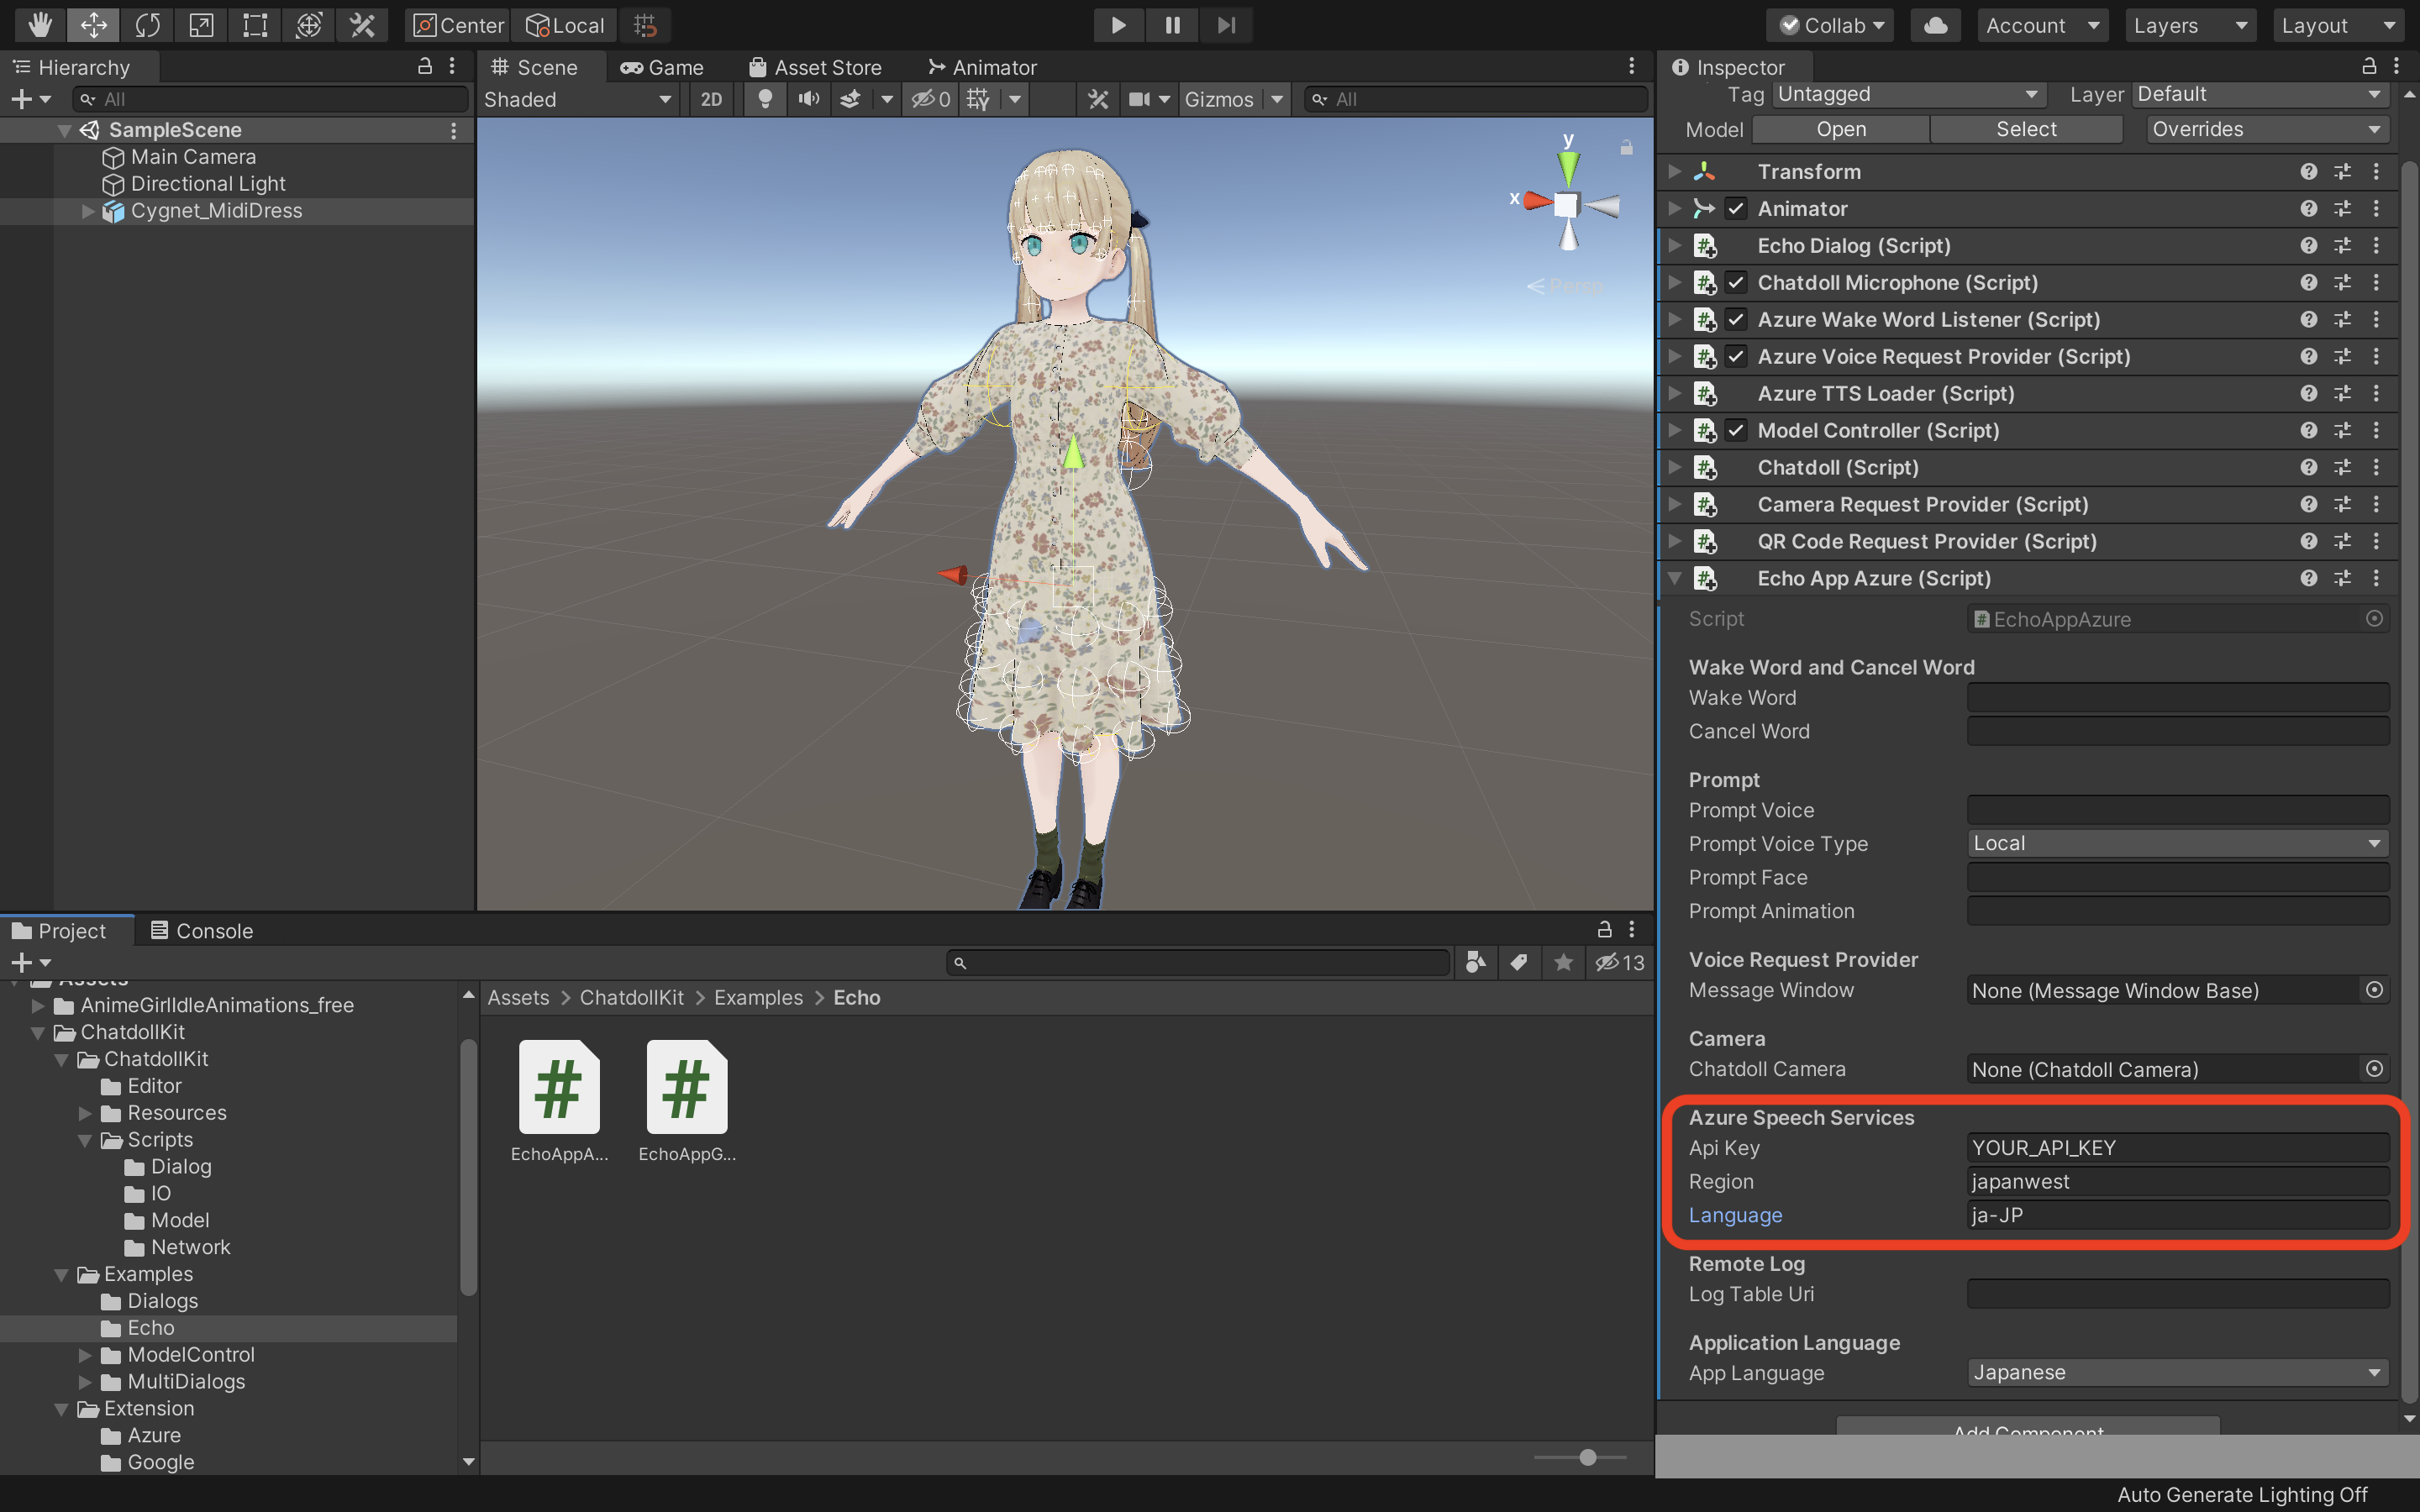
Add EchoAppAzure or EchoAppGoogle from ChatdollKit/Excamples/Echo to the 3D model. The required components will be added automatically, including ModelController, that controls animations, voices and face expressions of 3D model.
At least API Key, Region (e.g. japanwest, only Azure) and Language (e.g. ja-JP) should be set on inspector of EchoAppAzure or EchoAppGoogle.
Select Setup ModelController in the context menu of ModelController and set the name of shapekey for blink to Blink Blend Shape Name if it is not set after setup.
If you want to setup manually, go to Appendix1. Setup ModelController manually
Select Setup Animator in the context menu of ModelController and select the folder that contains animation clips. If subfolders are included, layers with the same name as the subfolders are created in the AnimatorController, and clips in each subfolders are put on each layers.
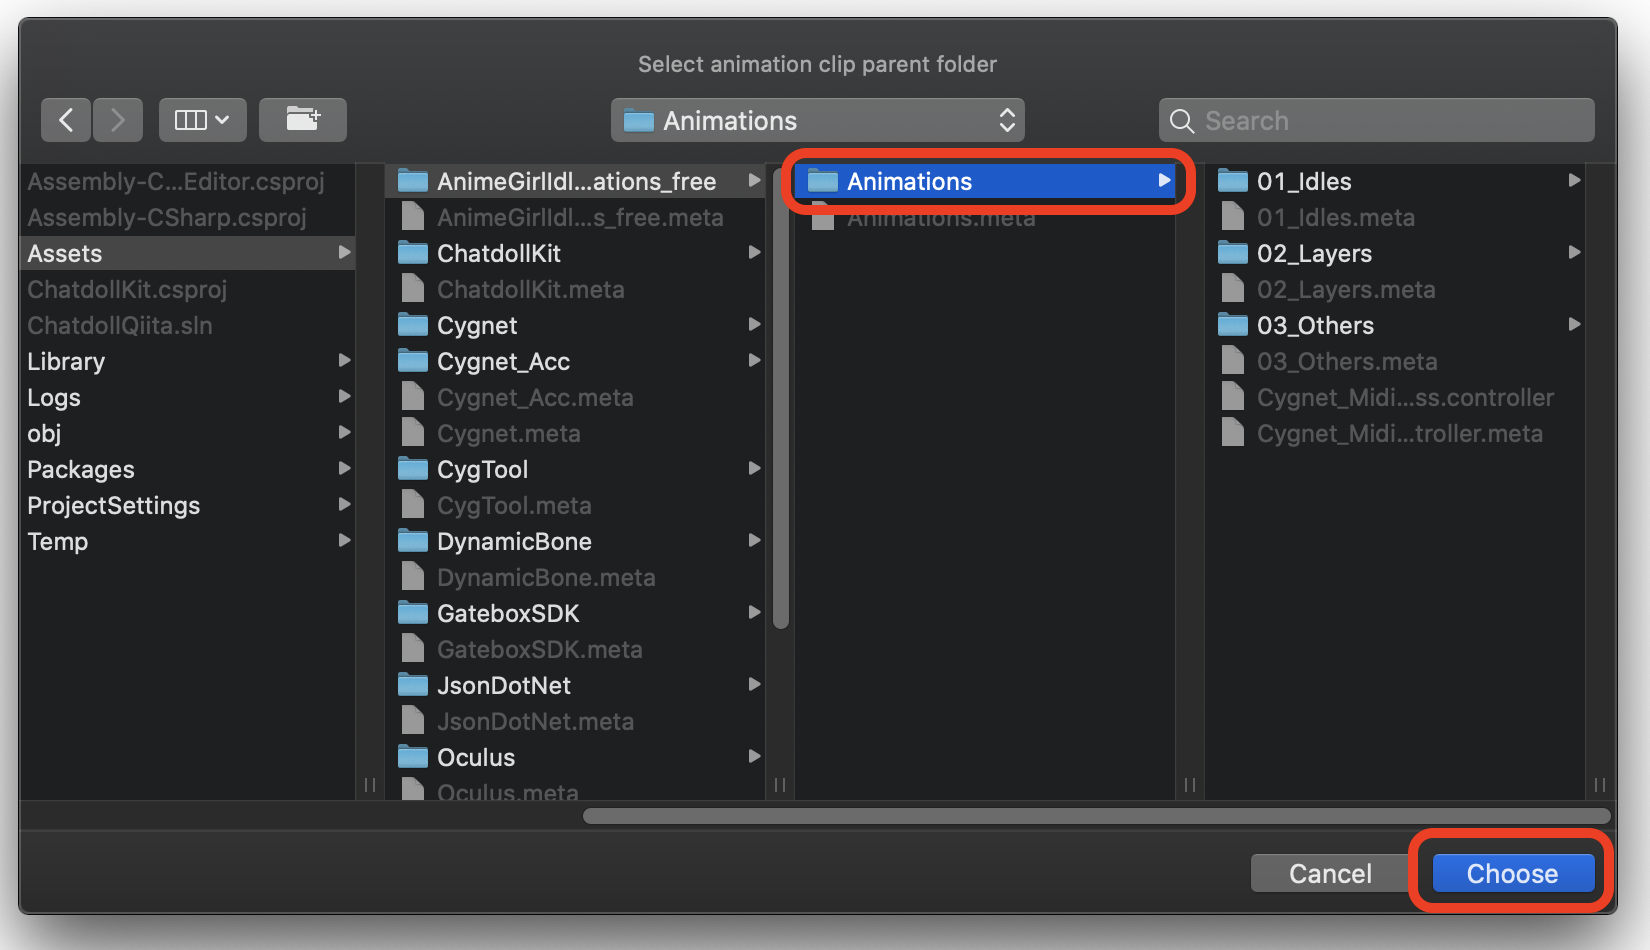
In this case you can select to put clips on Base Layer or create layers named 01_Idles, 02_Layers and 03_Others and put on them.
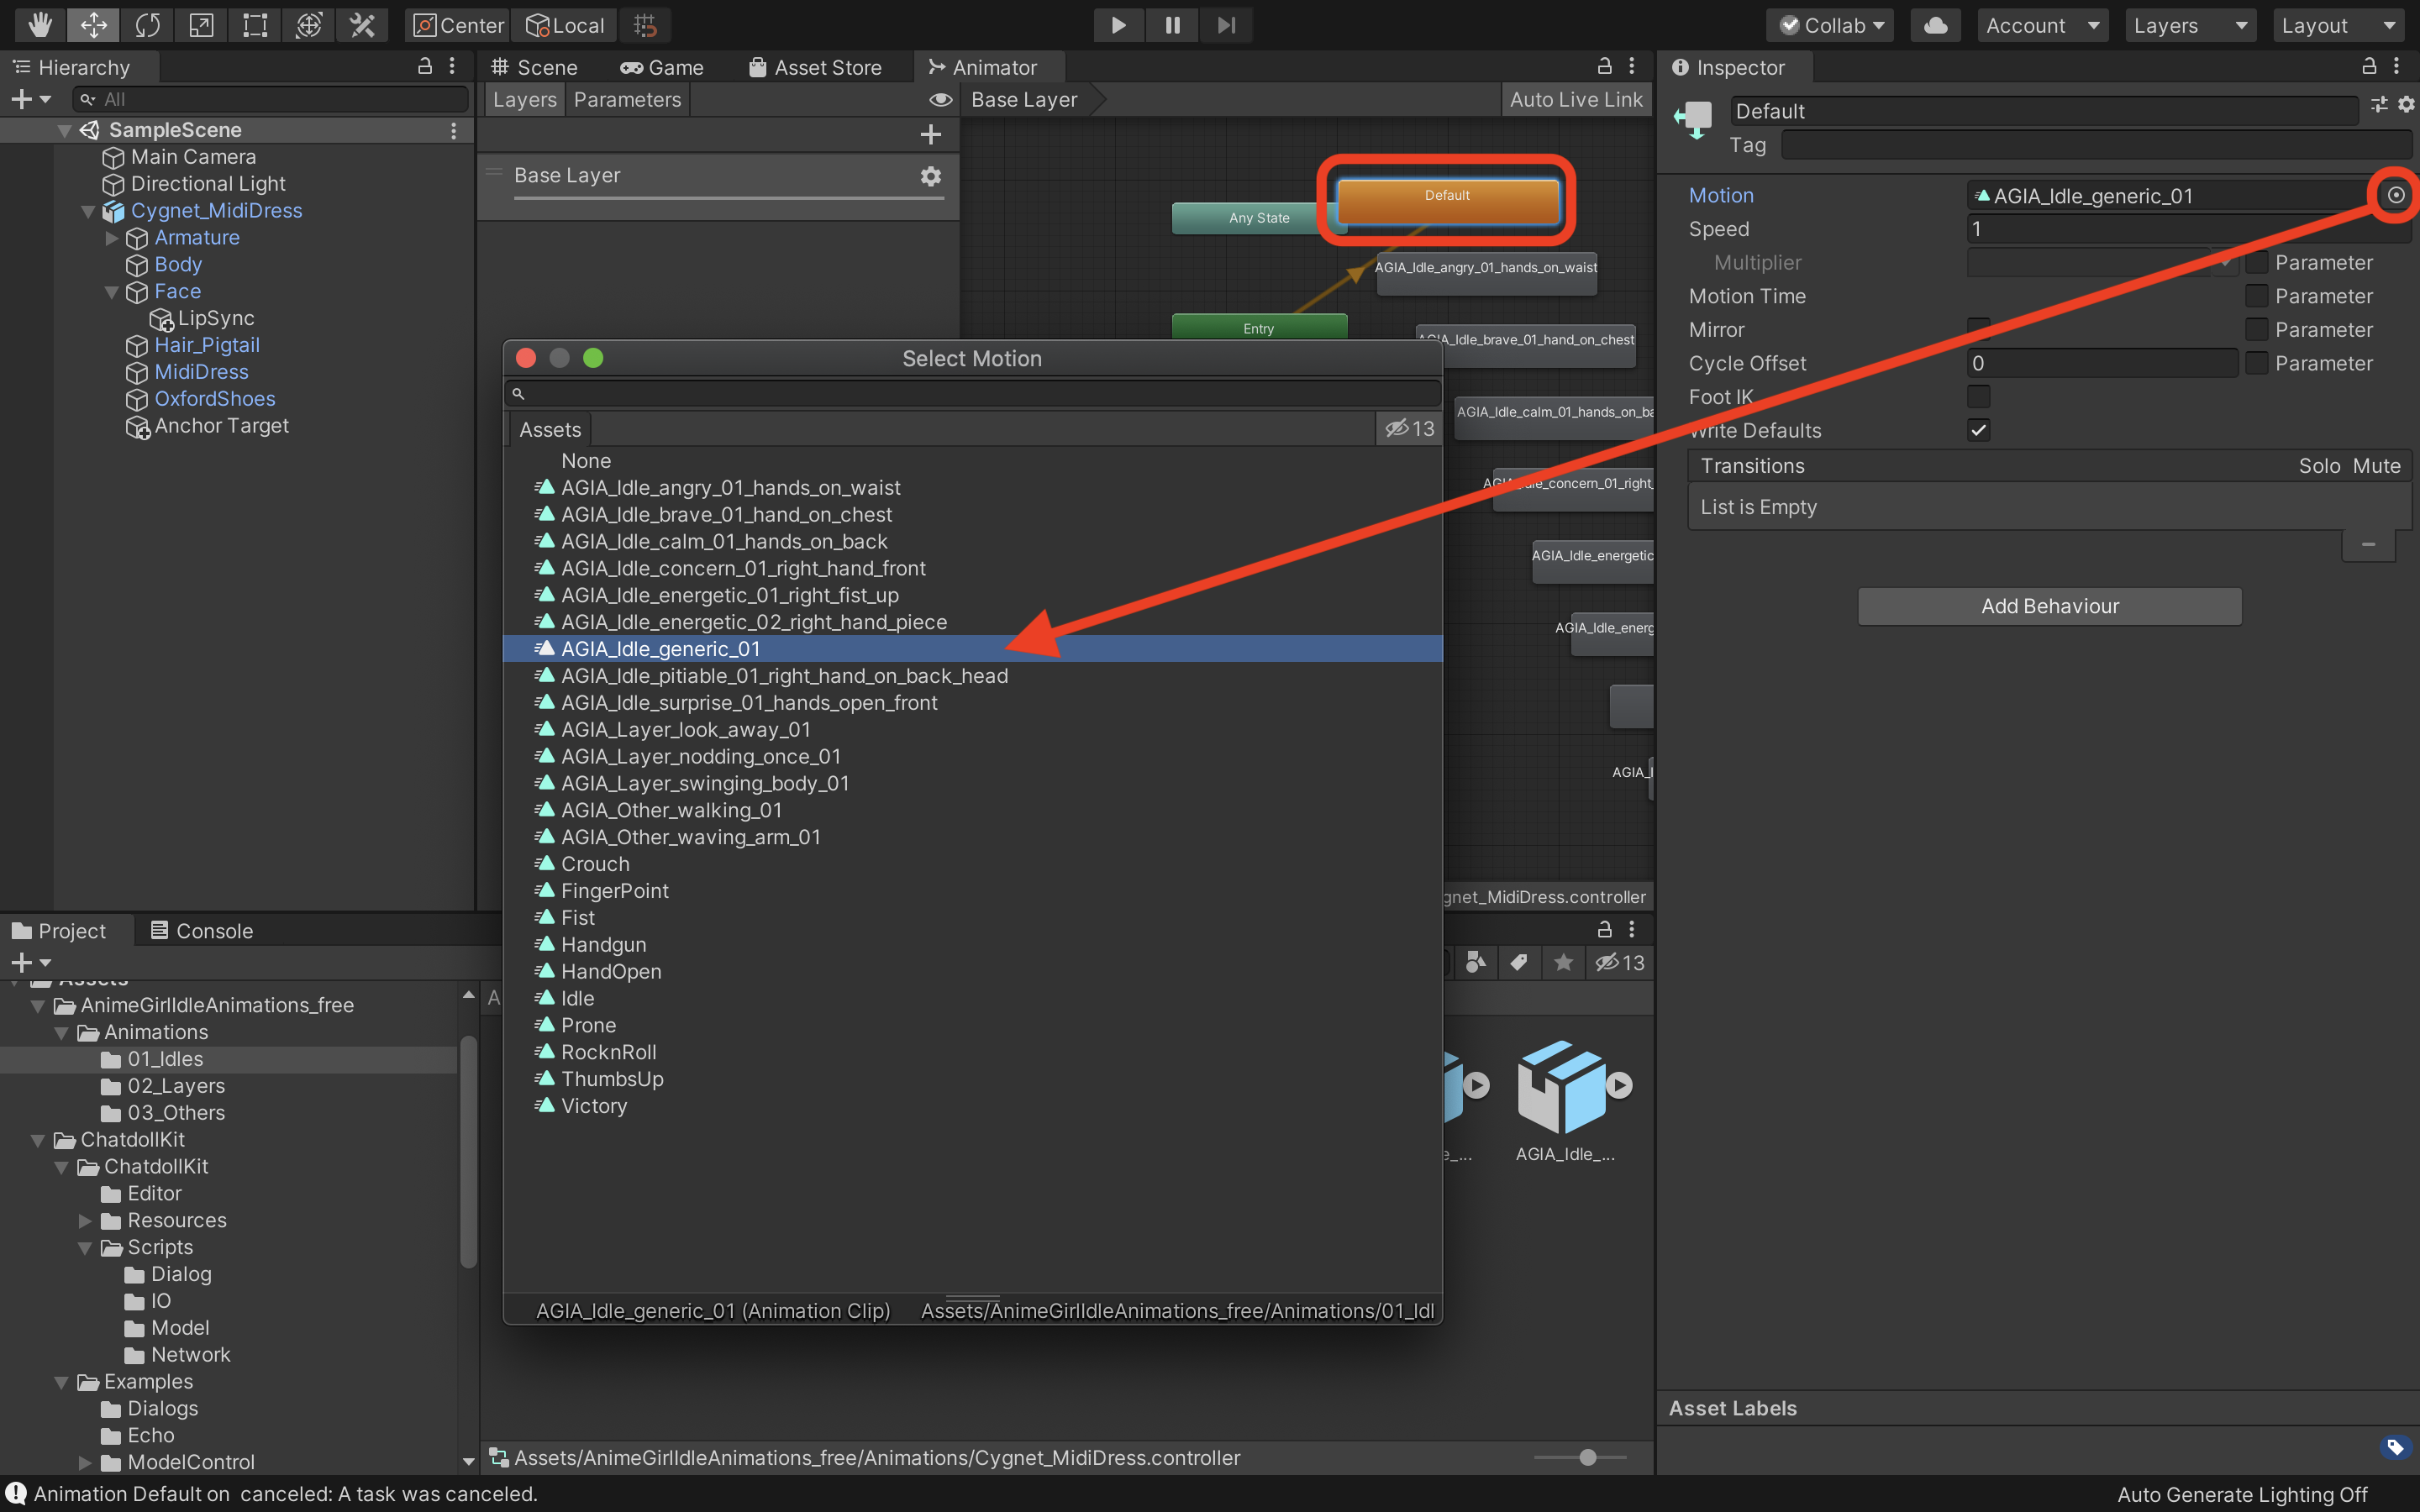
After creating Animator Controller you can select default idle animation by editing Default status if you want to change.
If you want to setup manually, go to Appendix2. Setup Animator manually
Press Play button of Unity editor. You can see the model starts with idling animation and blinking.
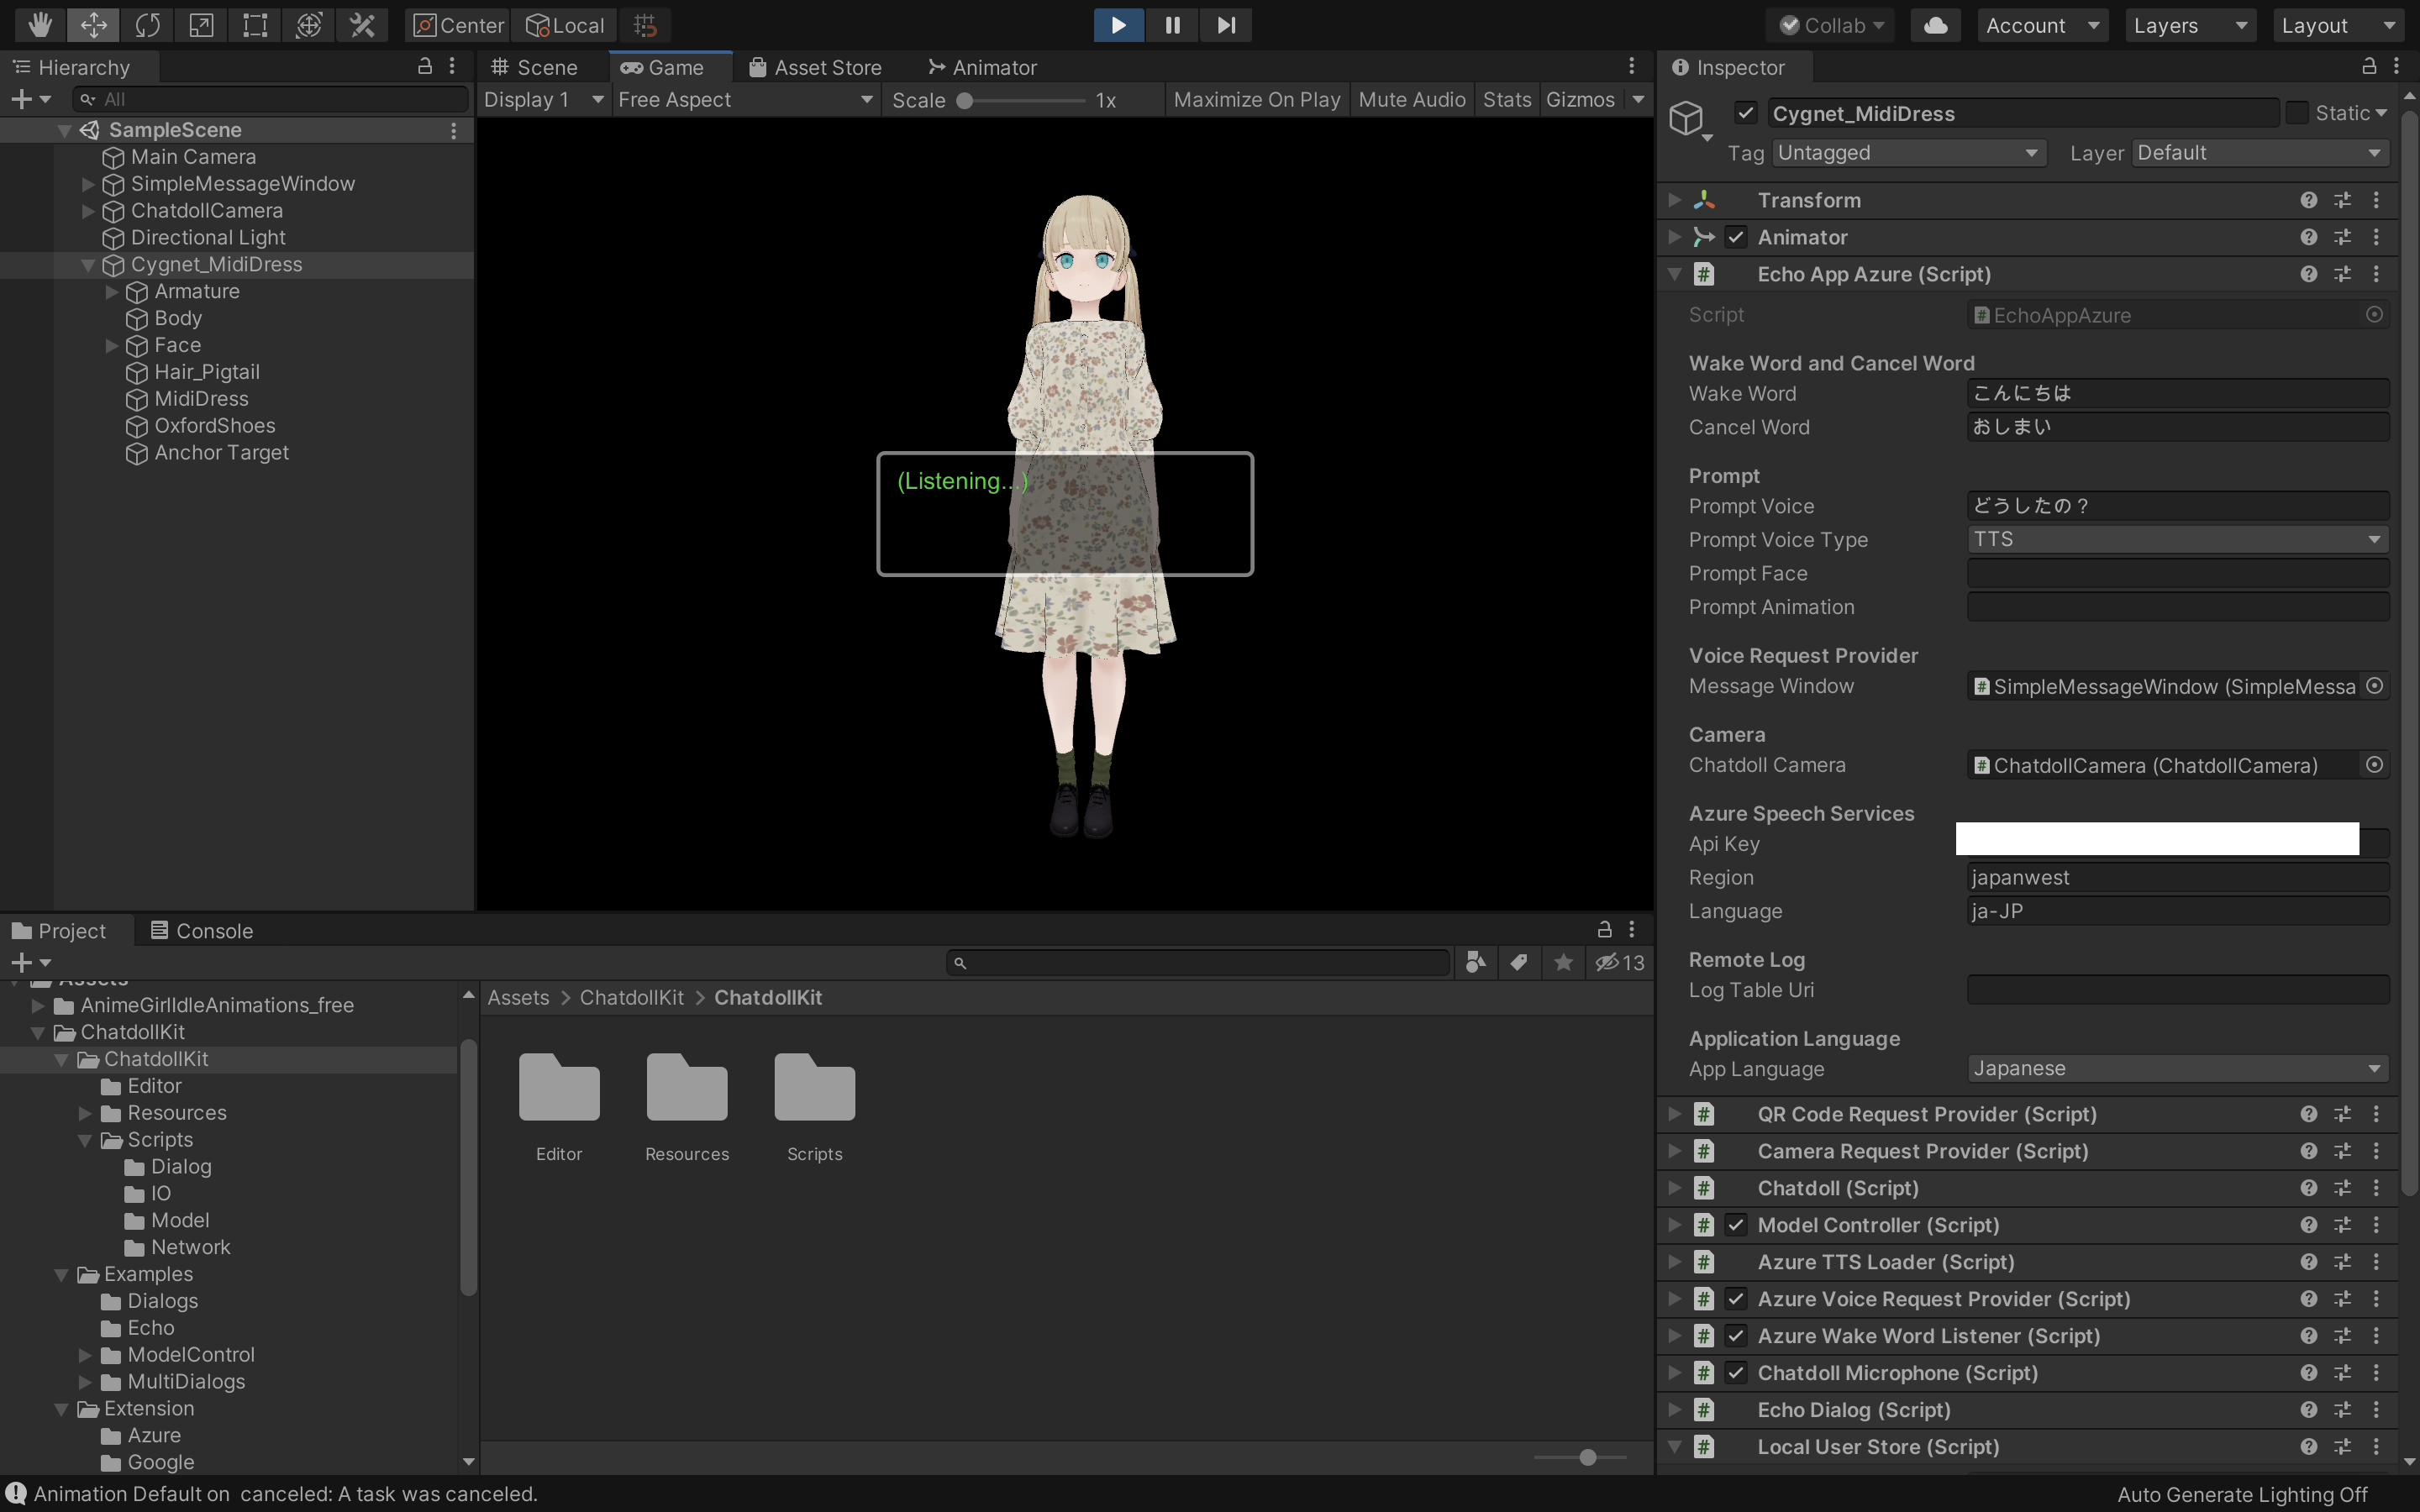
Okay, let's start chatting with your chatdoll now.
- Say "hello" or the word you set to
Wake Wordon inspector - Your model will be reply "what's up?" or the word you set to
Prompt Voiceon inspector - Say something you want to echo like "Hello world!"
- Your model will be reply "Hello world"
See the MultiDialog example. That is more rich application including:
- Dialog Routing:
Routeris an example of how to decide the topic user want to talk - Processing dialog:
TranslateDialogis an example that shows how to process dialog
We are now preparing contents to create more rich virtual assistant using ChatdollKit.
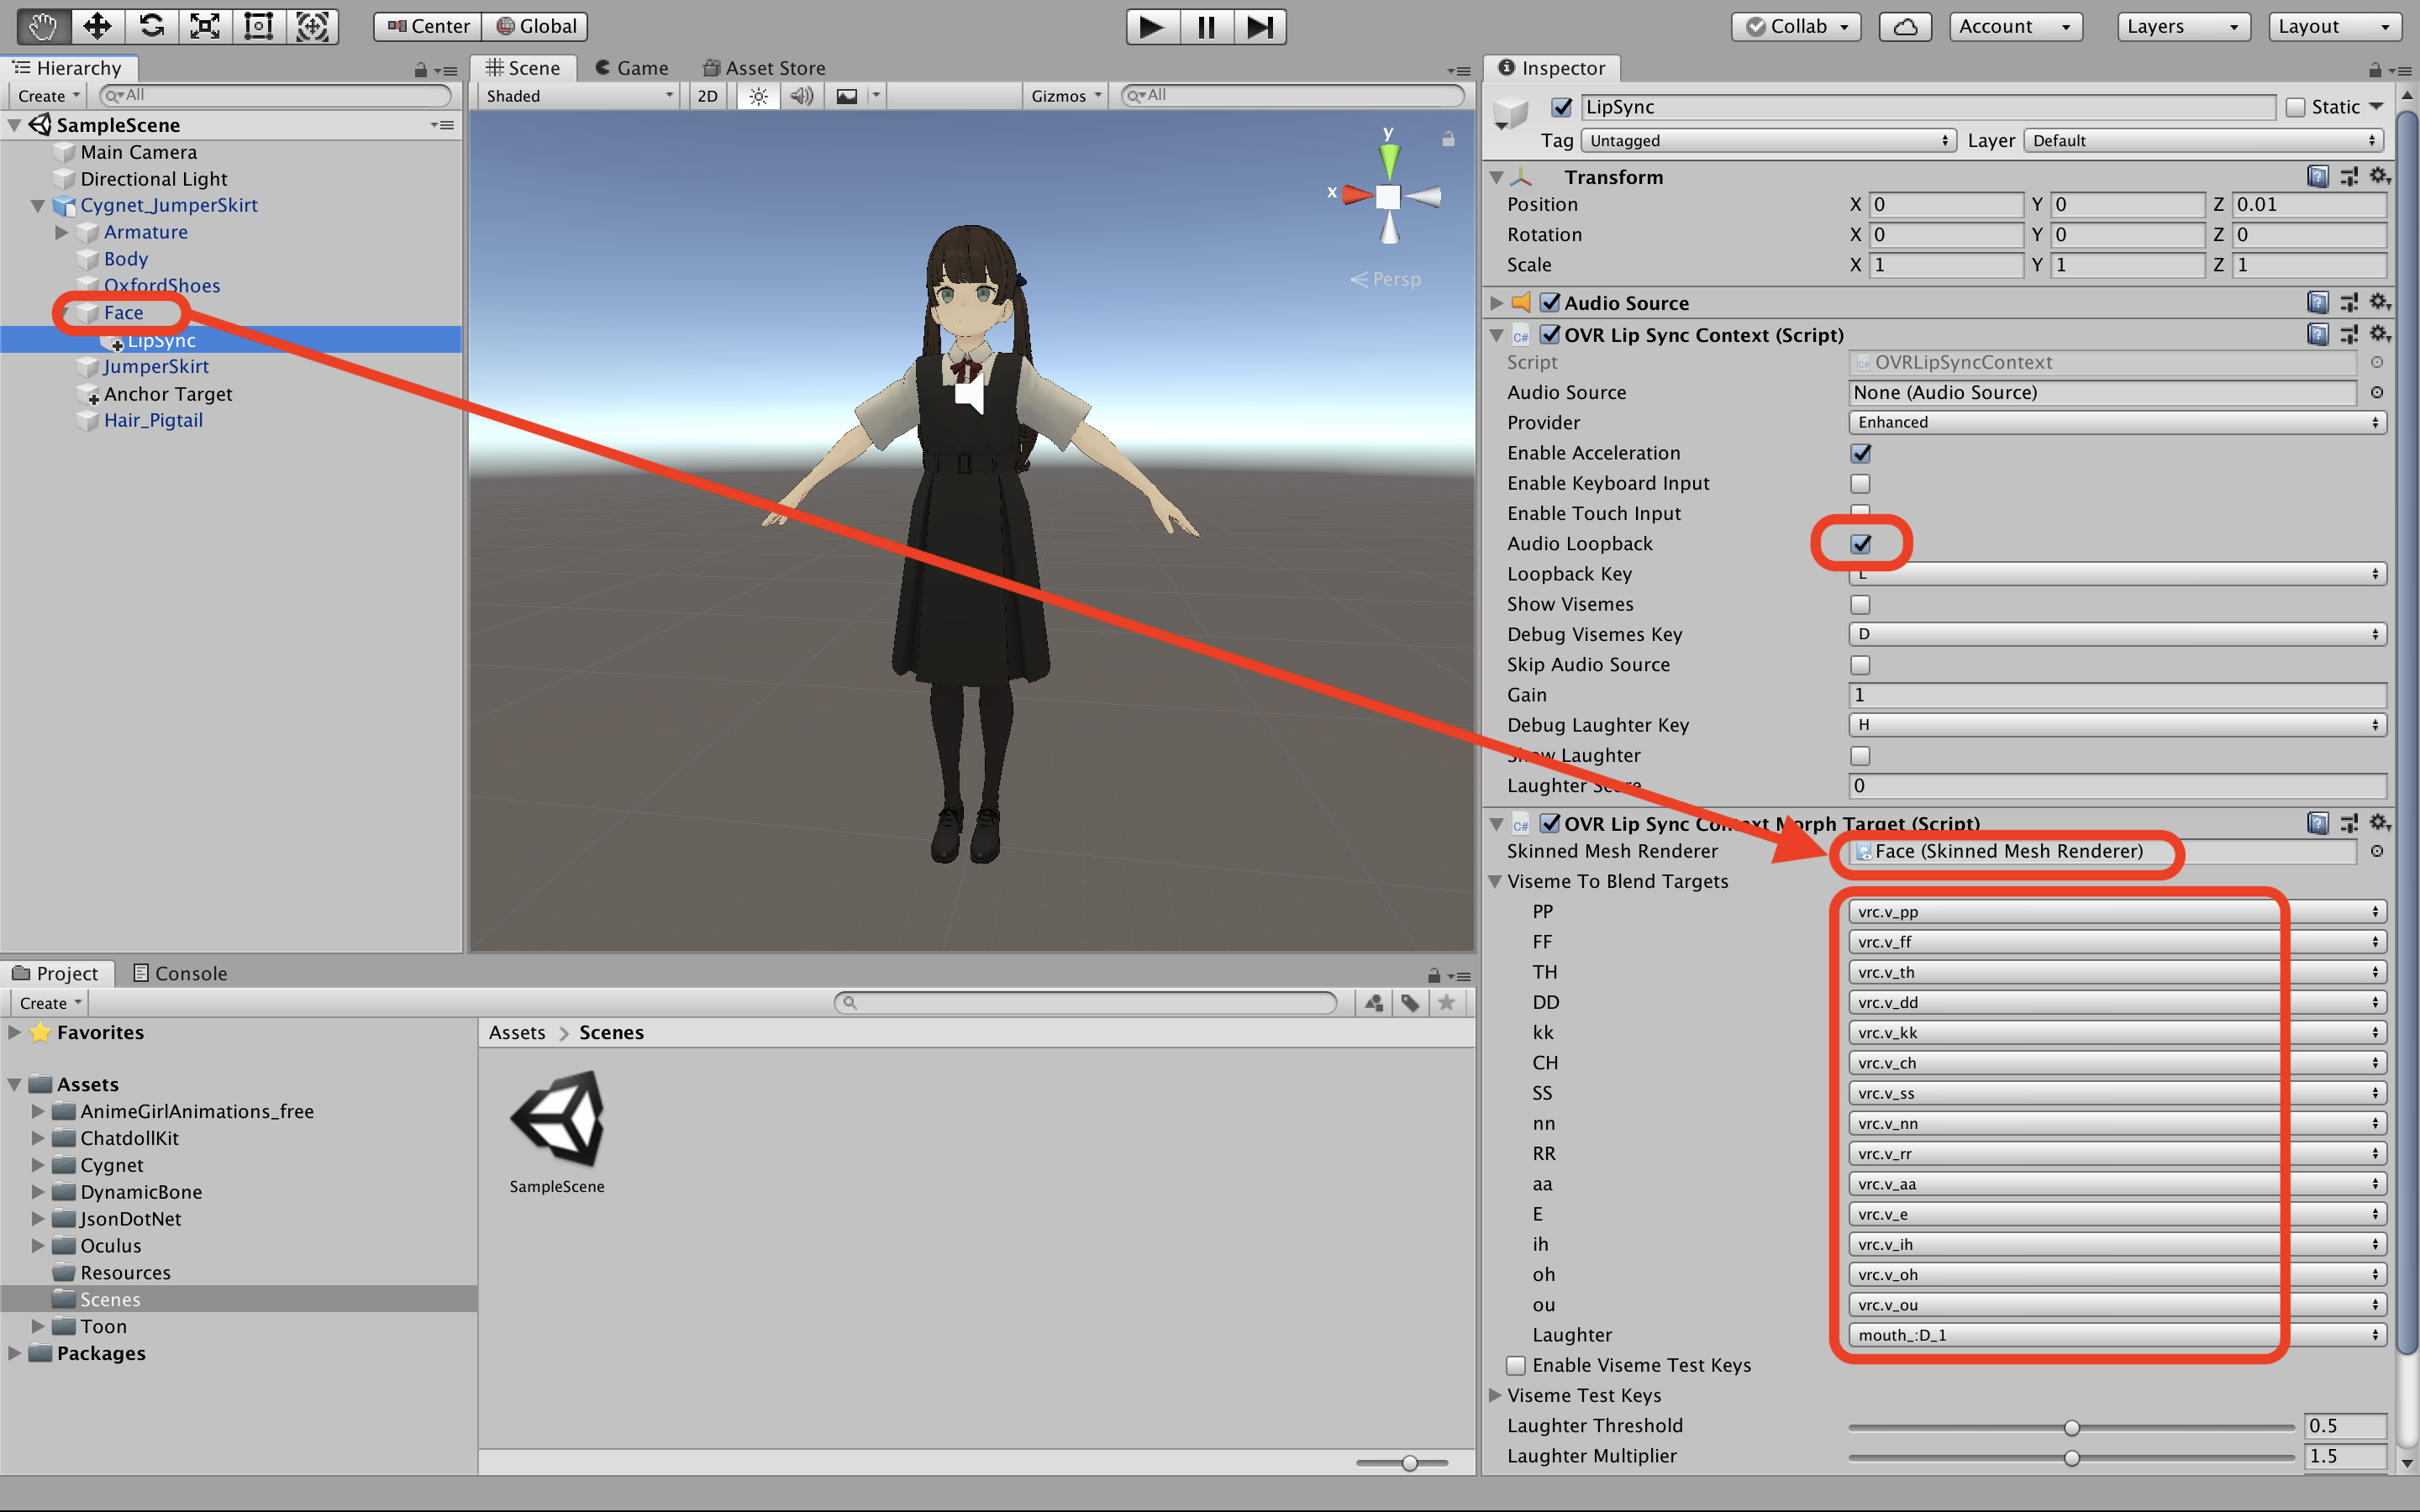
Create a new empty GameObject attach OVR Lip Sync Context and OVR Lip Sync Context Morph Target.
- Then turn on
Audio LoopbackinOVR Lip Sync Context - Set the object that has the shapekeys for face expressions to
Skinned Mesh RendererinOVR Lip Sync Context Morph Target - Configure viseme to blend targets in
OVR Lip Sync Context Morph Target
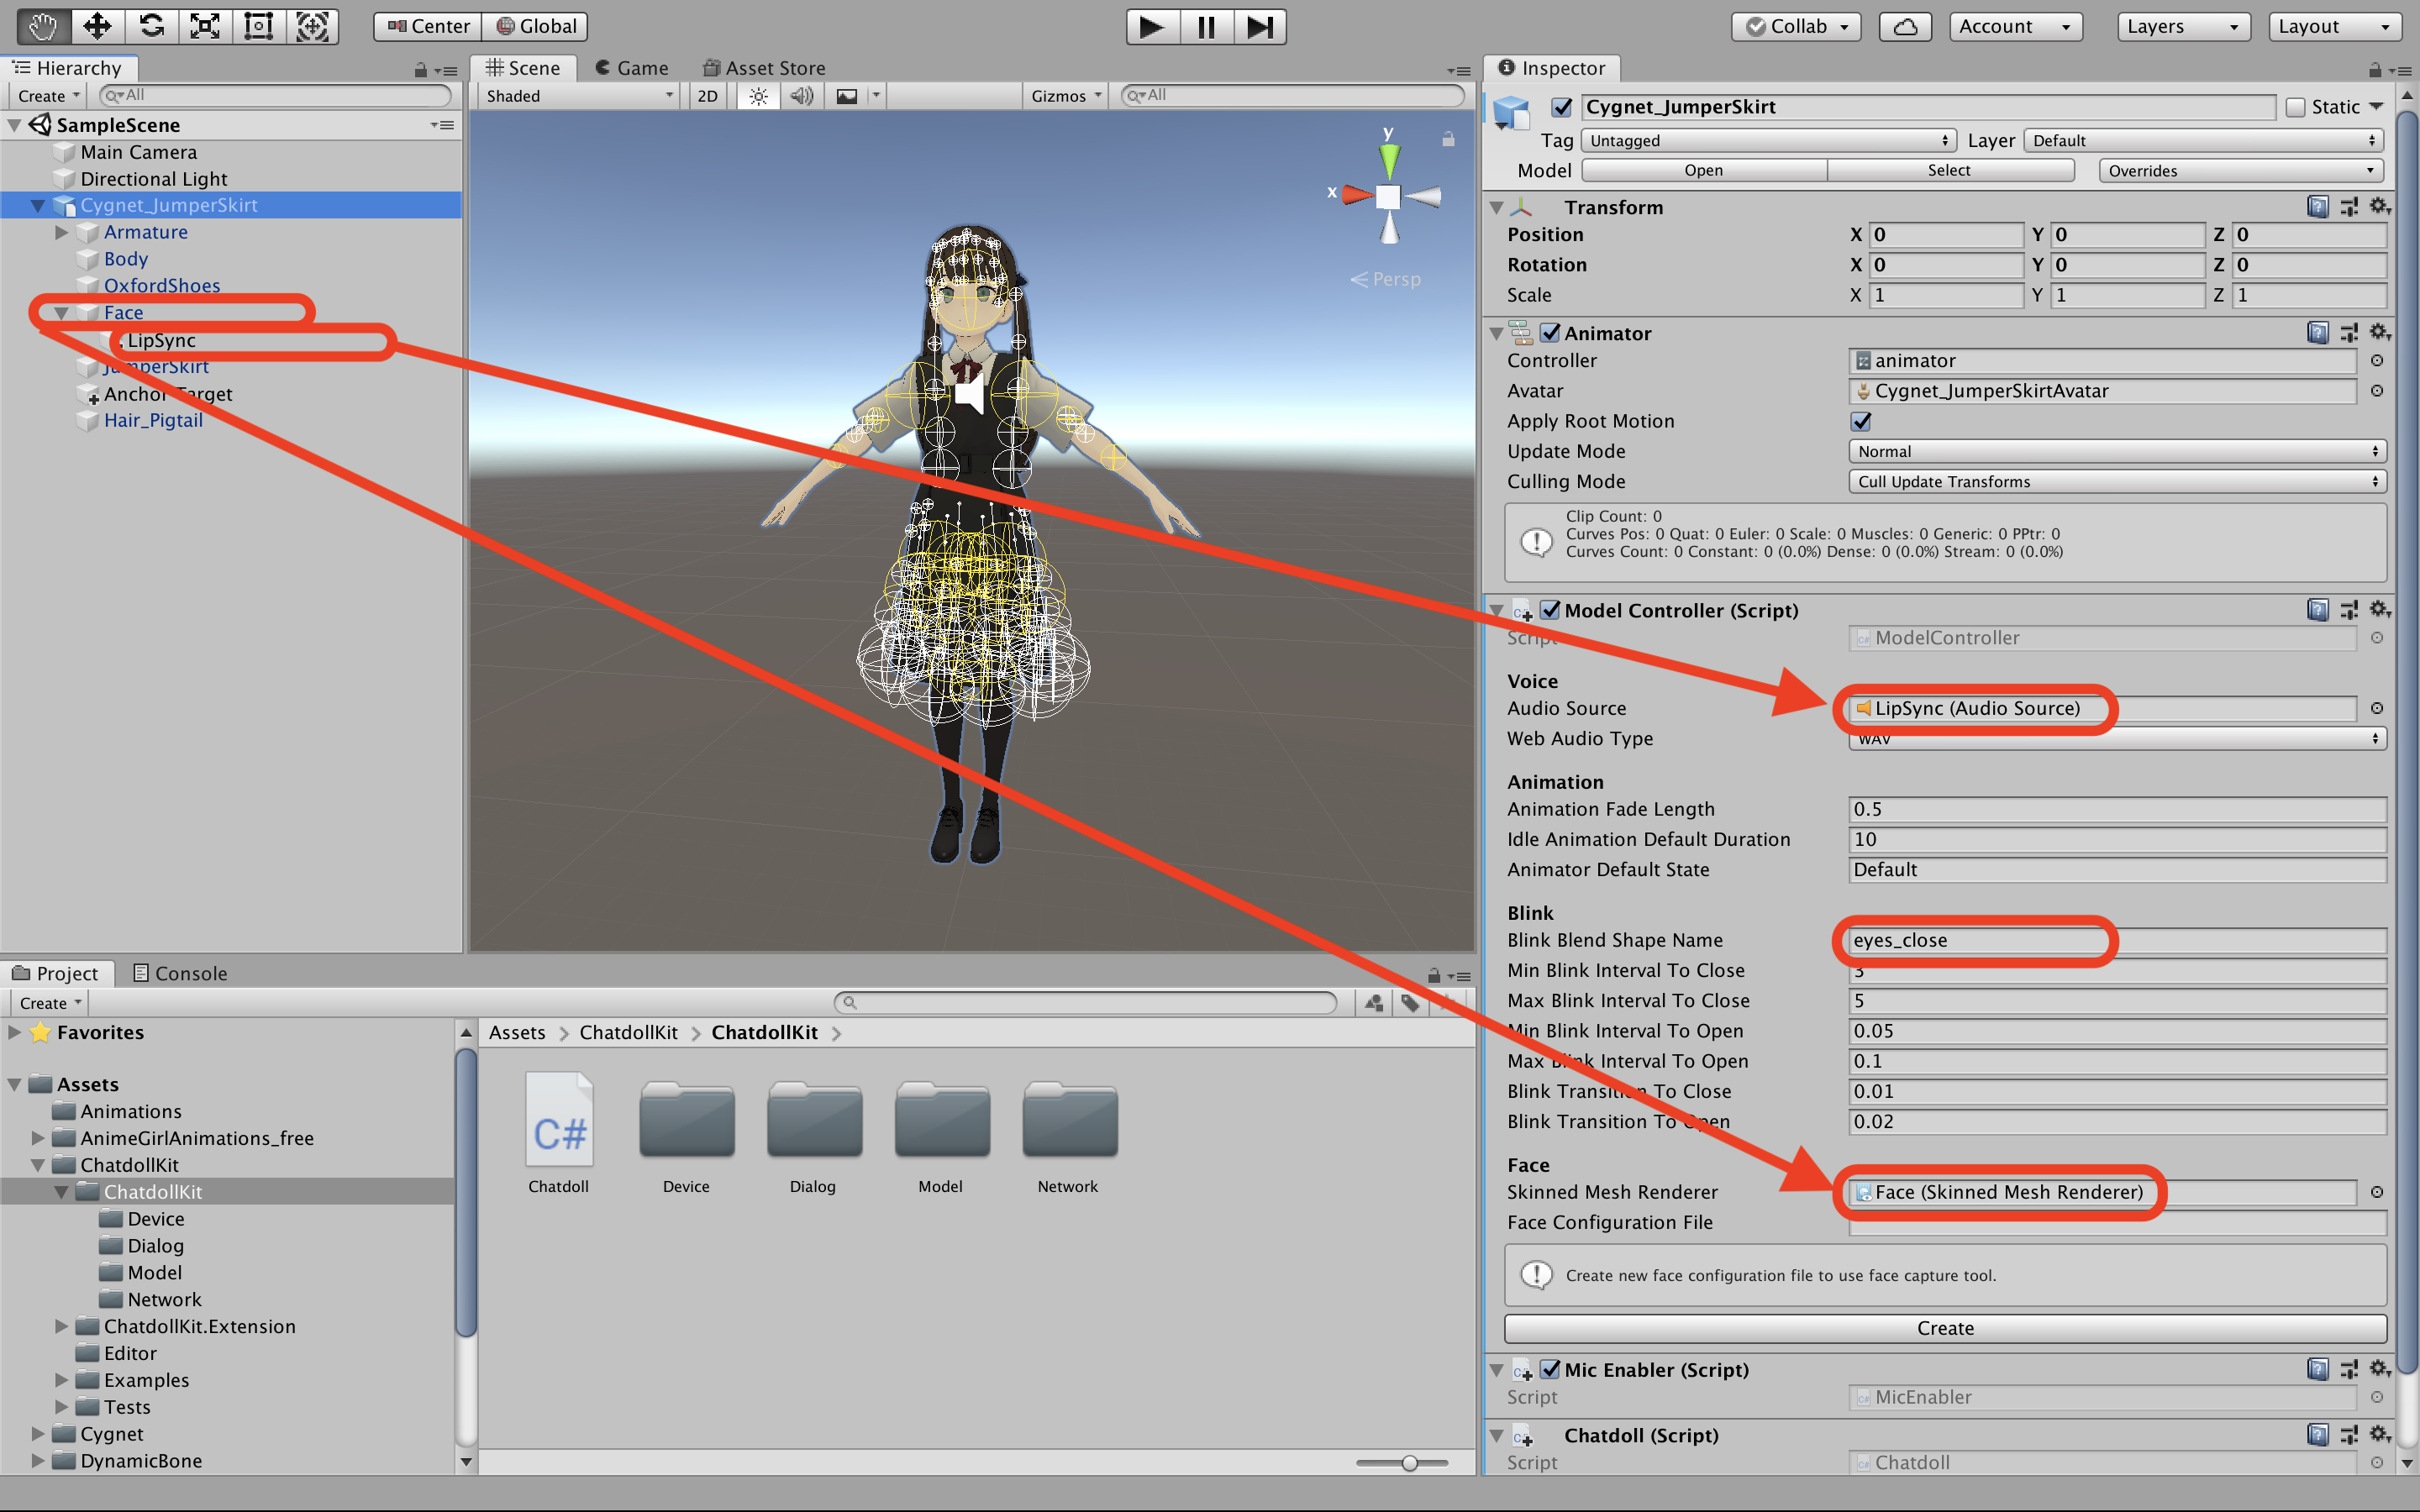
After that, select root GameObject to which ModelController is attached.
- Set LipSync object to
Audio Source - Set the object that has the shape keys for face expression to
Skinned Mesh Renderer - Set the shape key that close the eyes for blink to
Blink Blend Shape Name.
Create Animator Controller and create Default state on the Base Layer, then put animations. Lastly set a motion you like to the Default state. You can create other layers and put animations at this time. Note that every layers should have the Default state and None should be set to their motion except for the Base Layer.
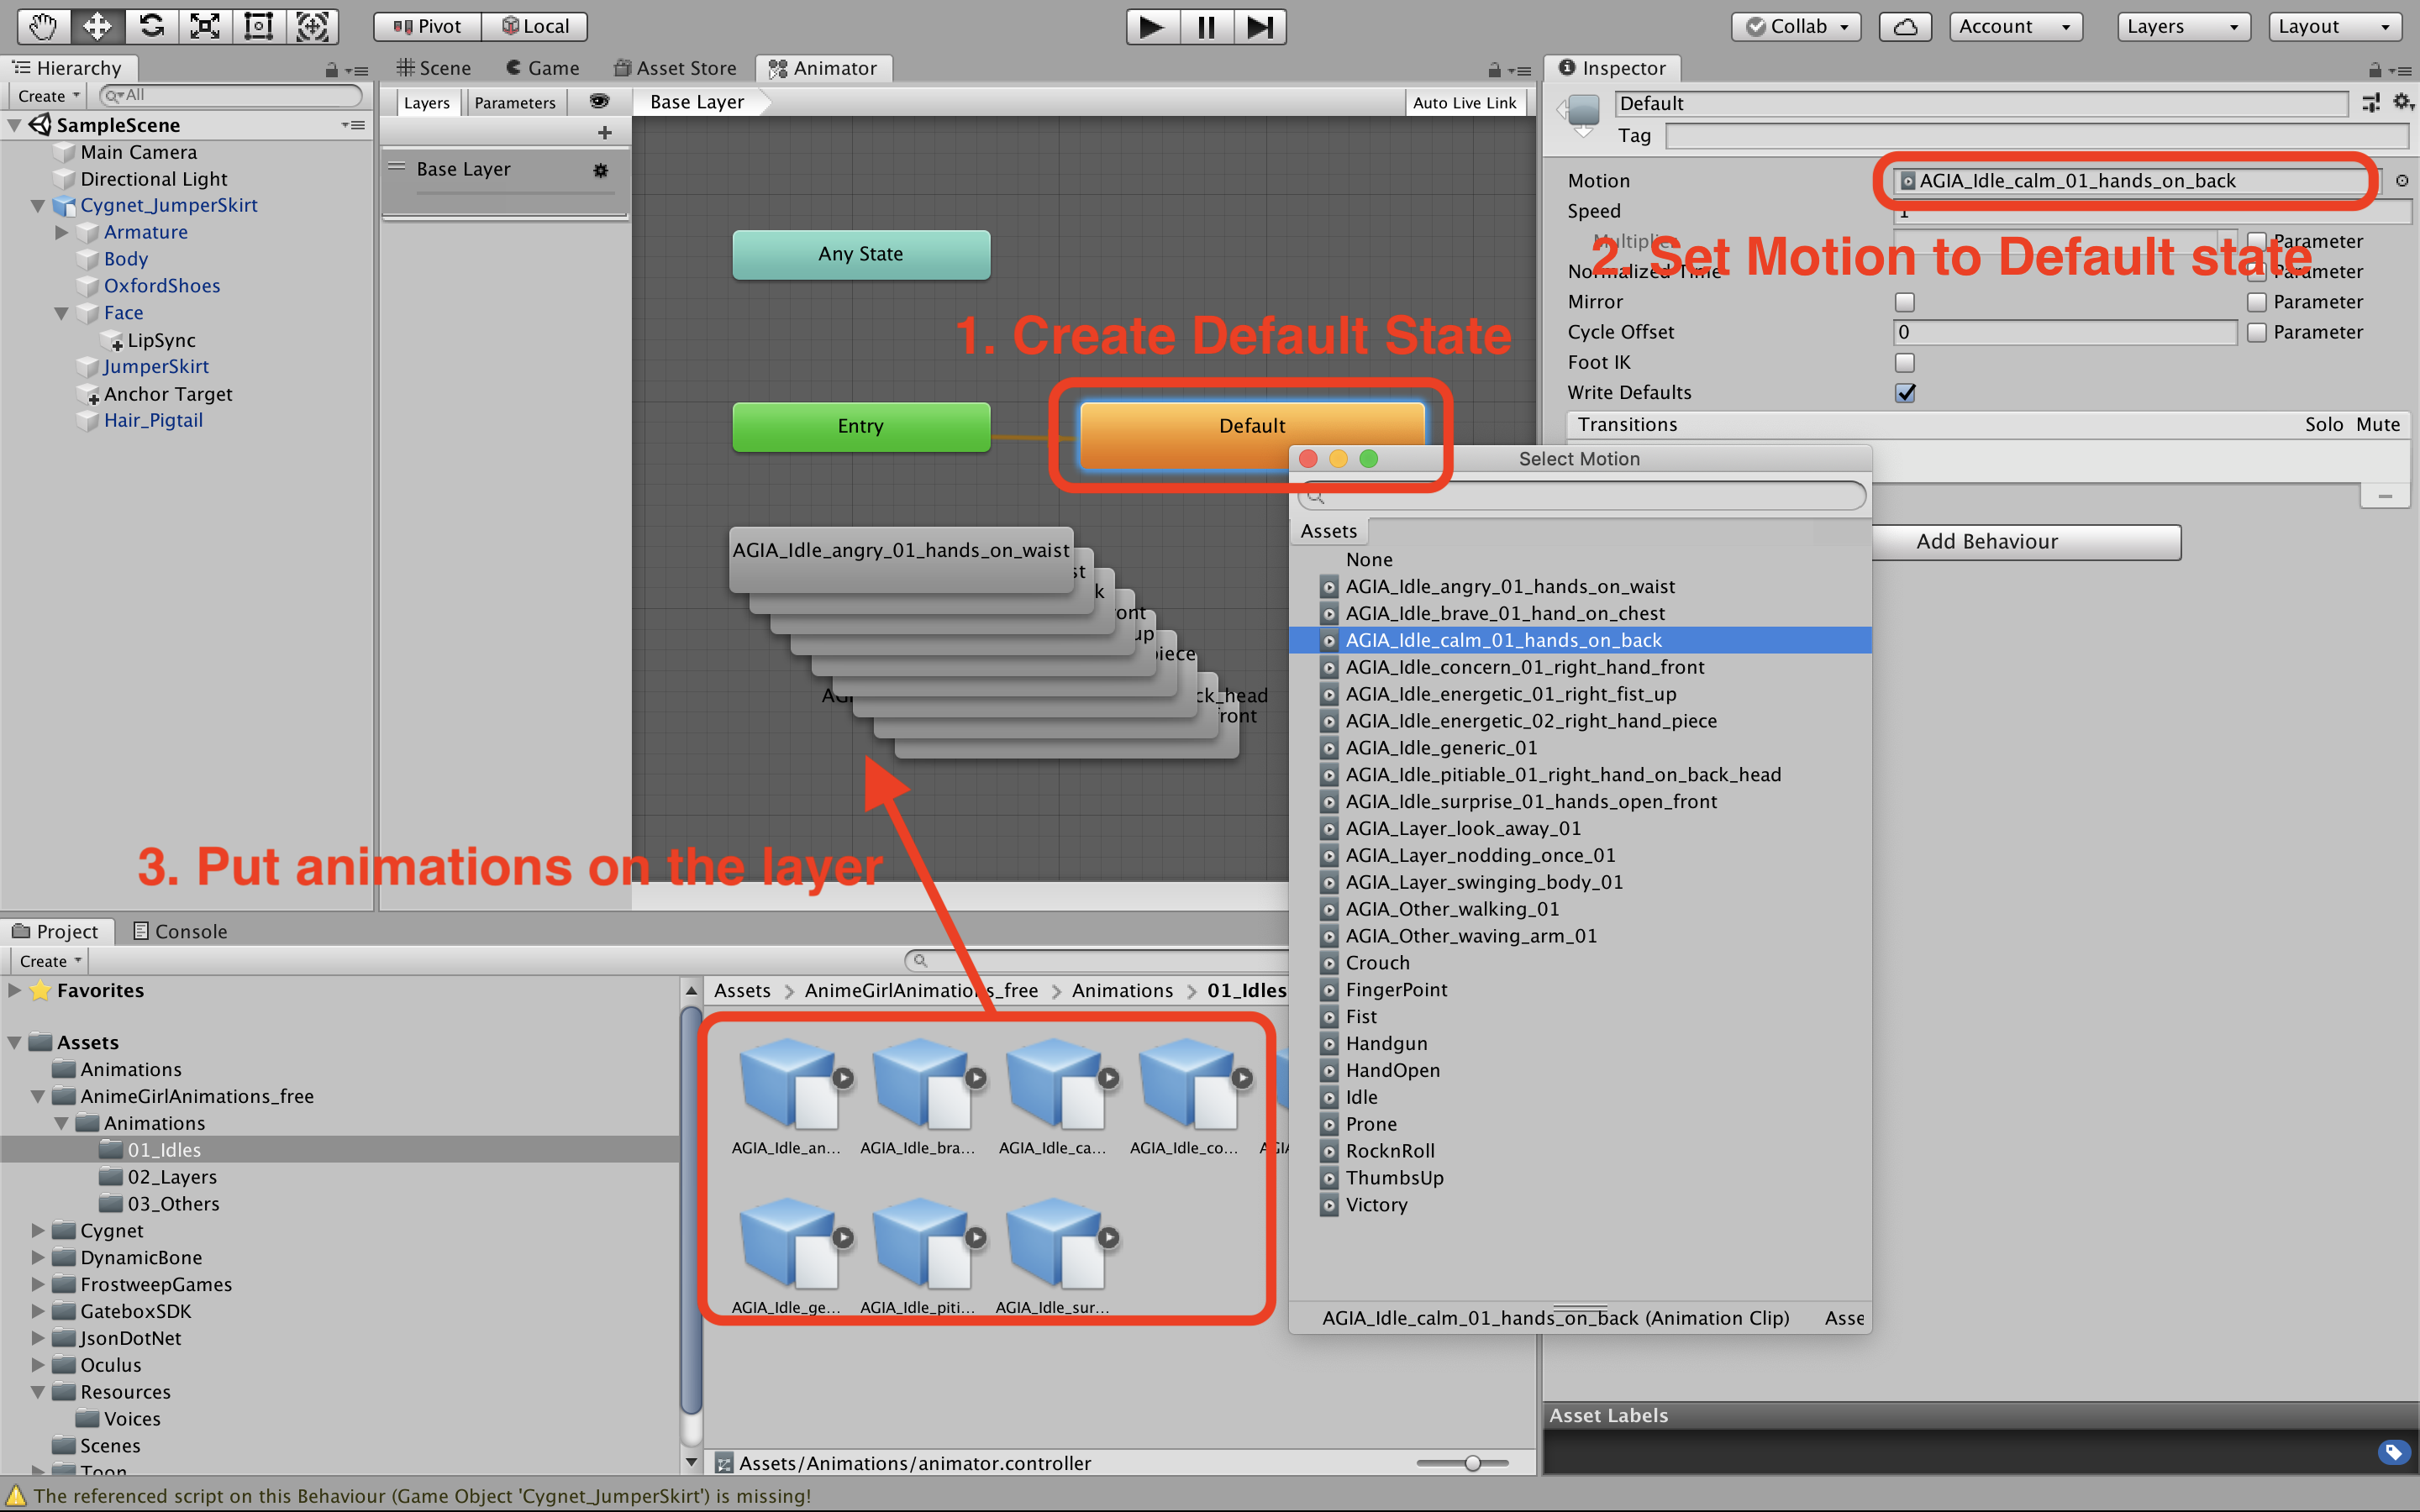
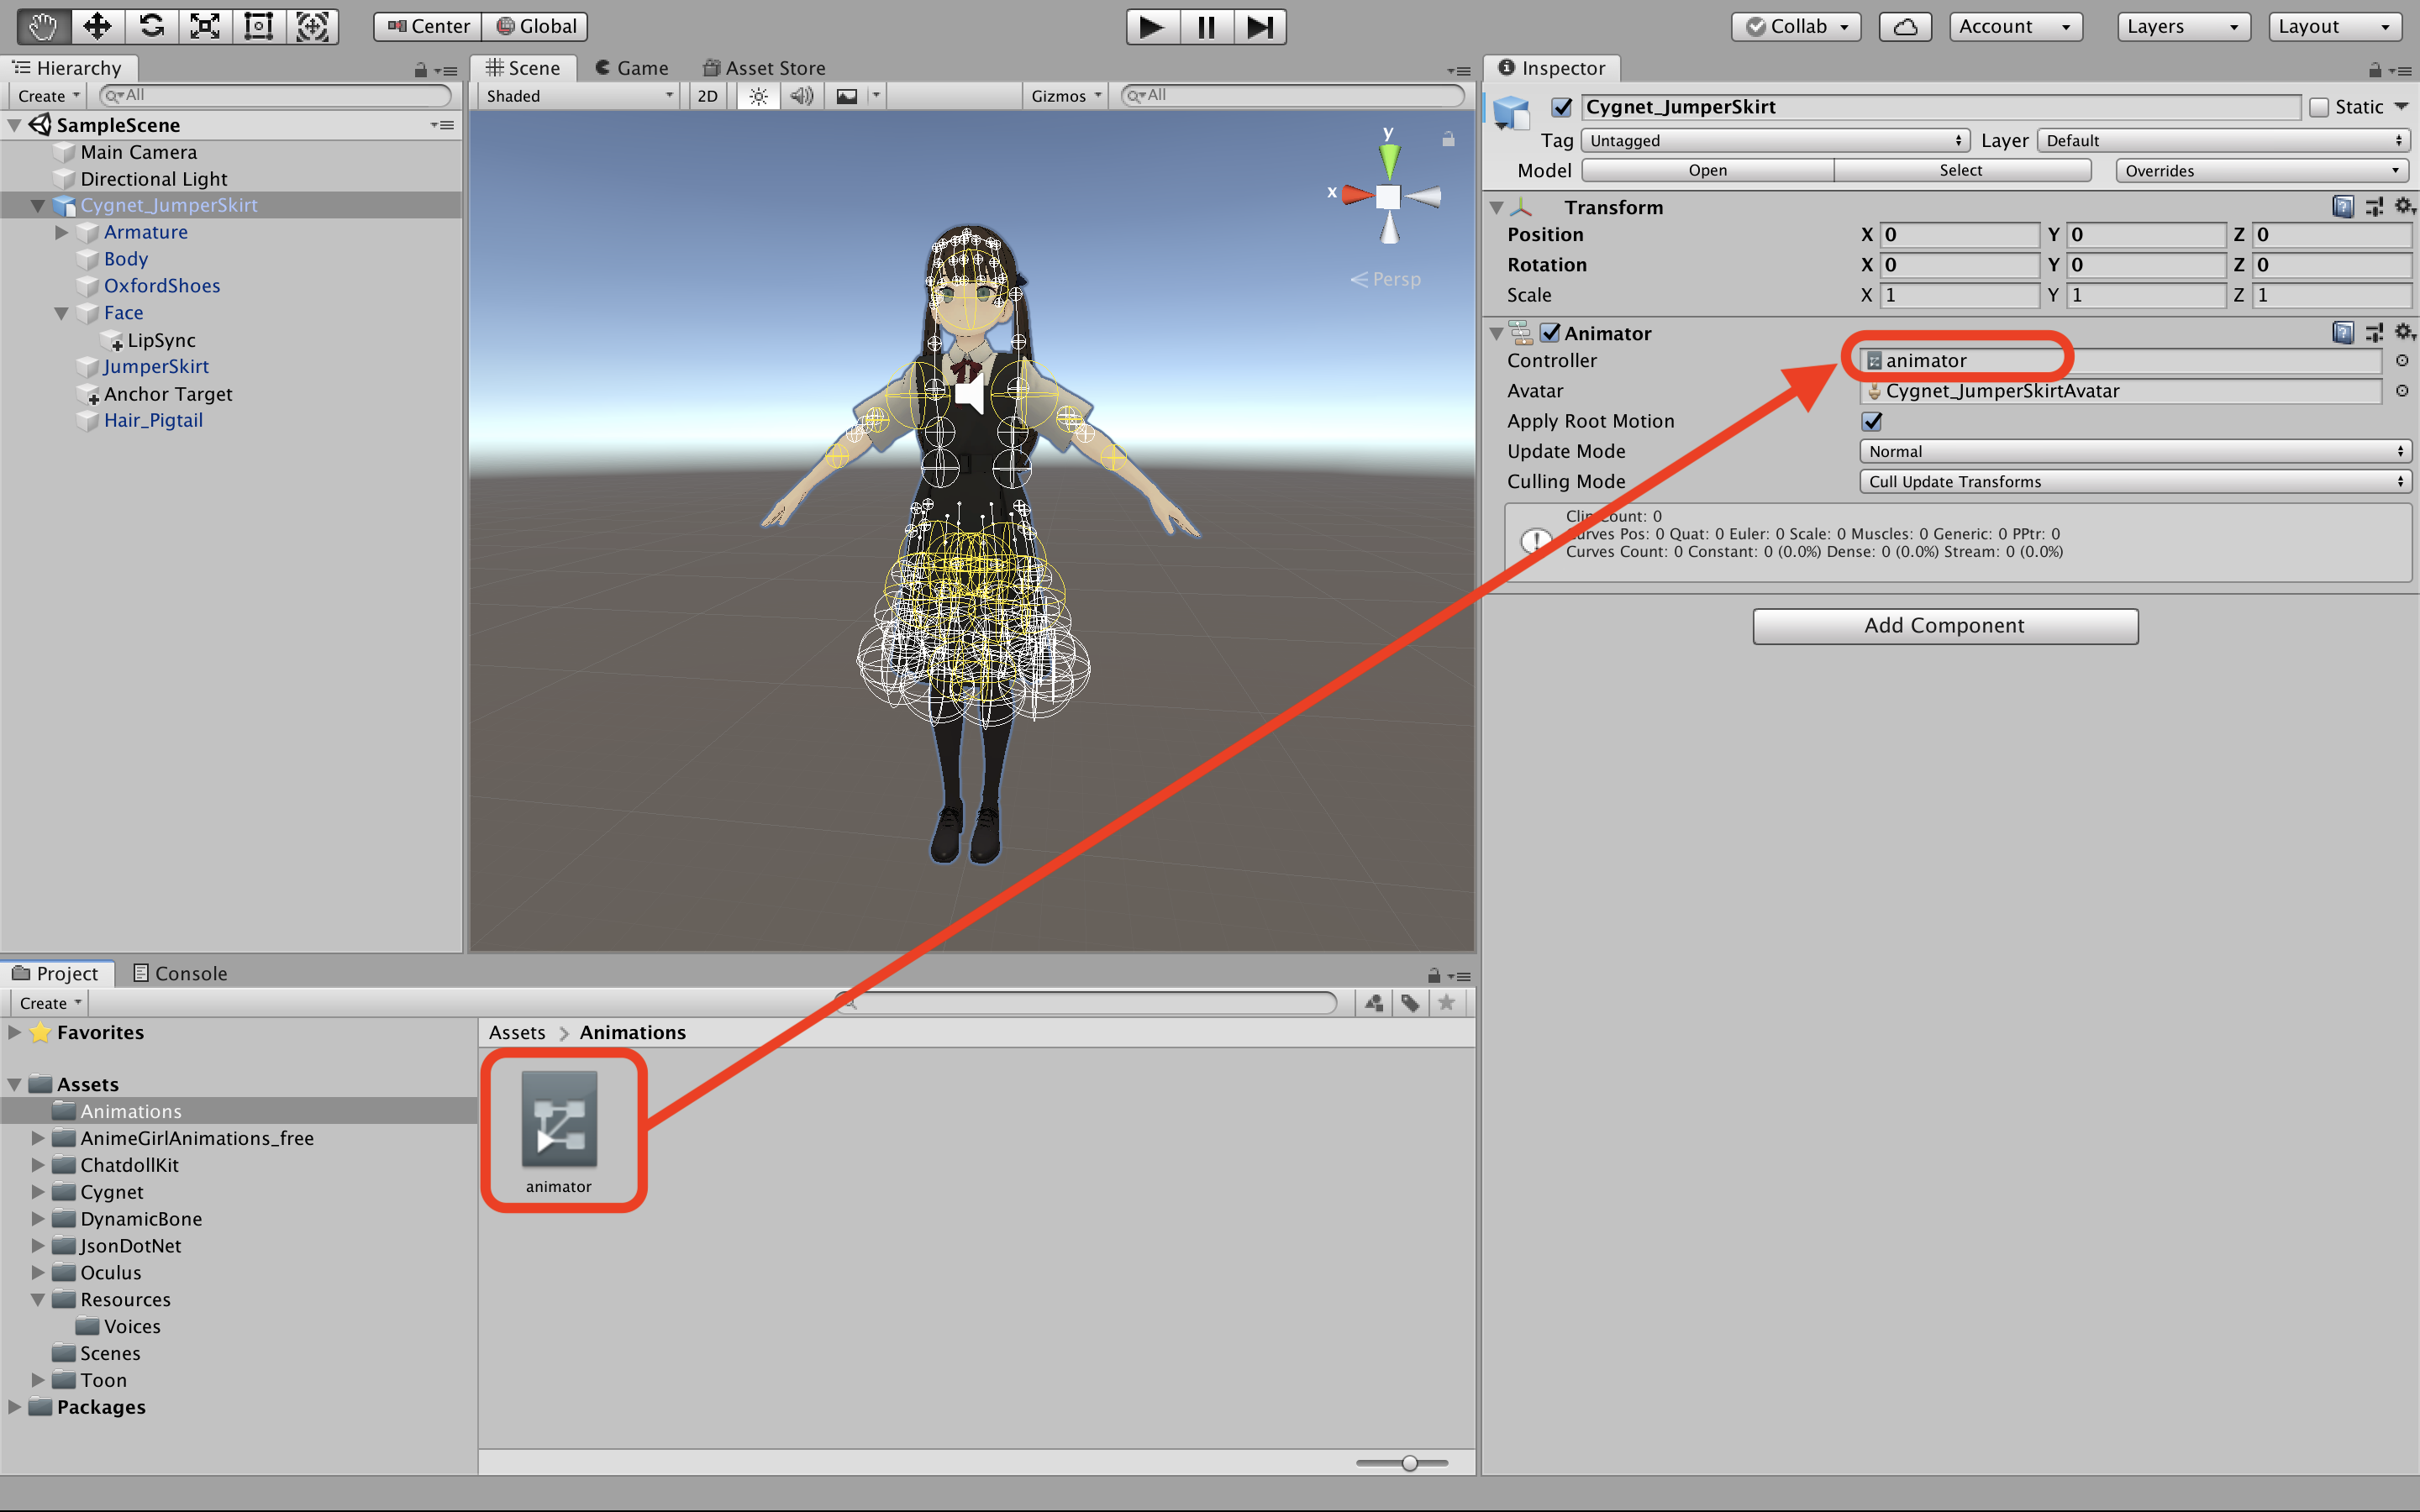
After configuration set the Animator Controller as a Controller of Animator component of the 3D model.