Control your favorite FPS games with a gyroscopic glove. This project uses C# on the ESP32 via NanoFramework. Client/Server integration is achieved via the ArdNet IoT framework.
- 1x Glove
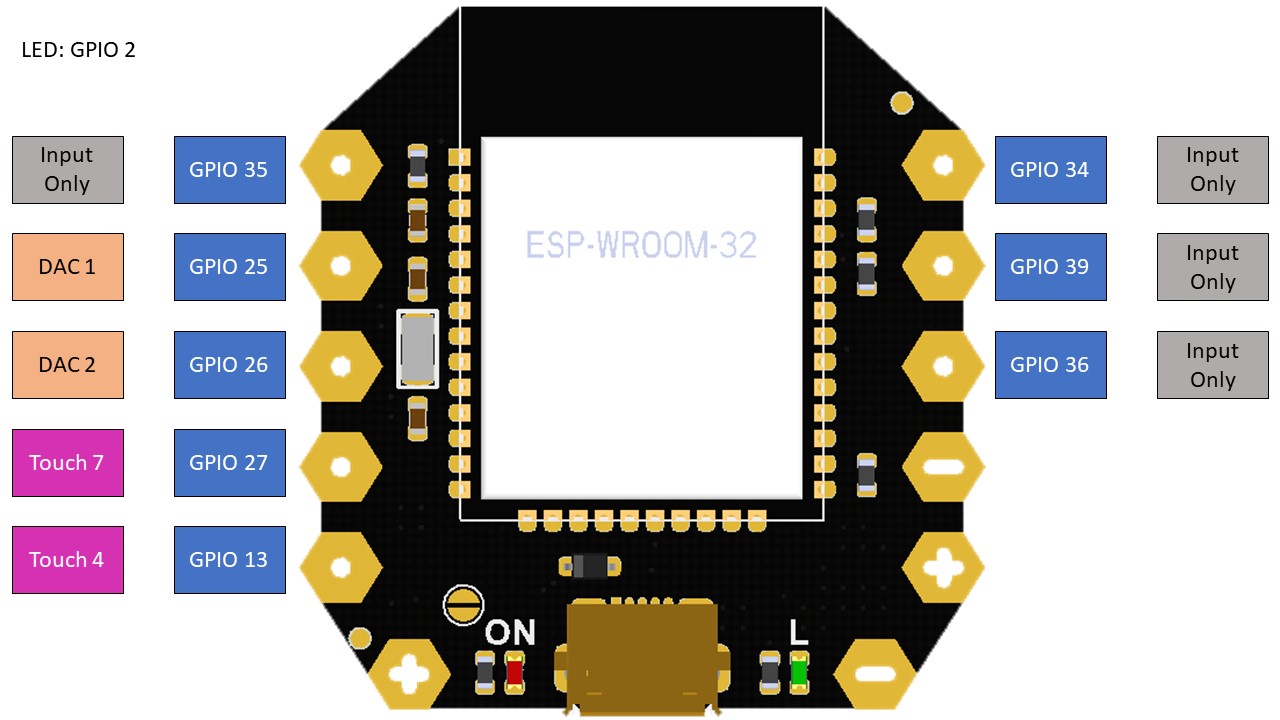
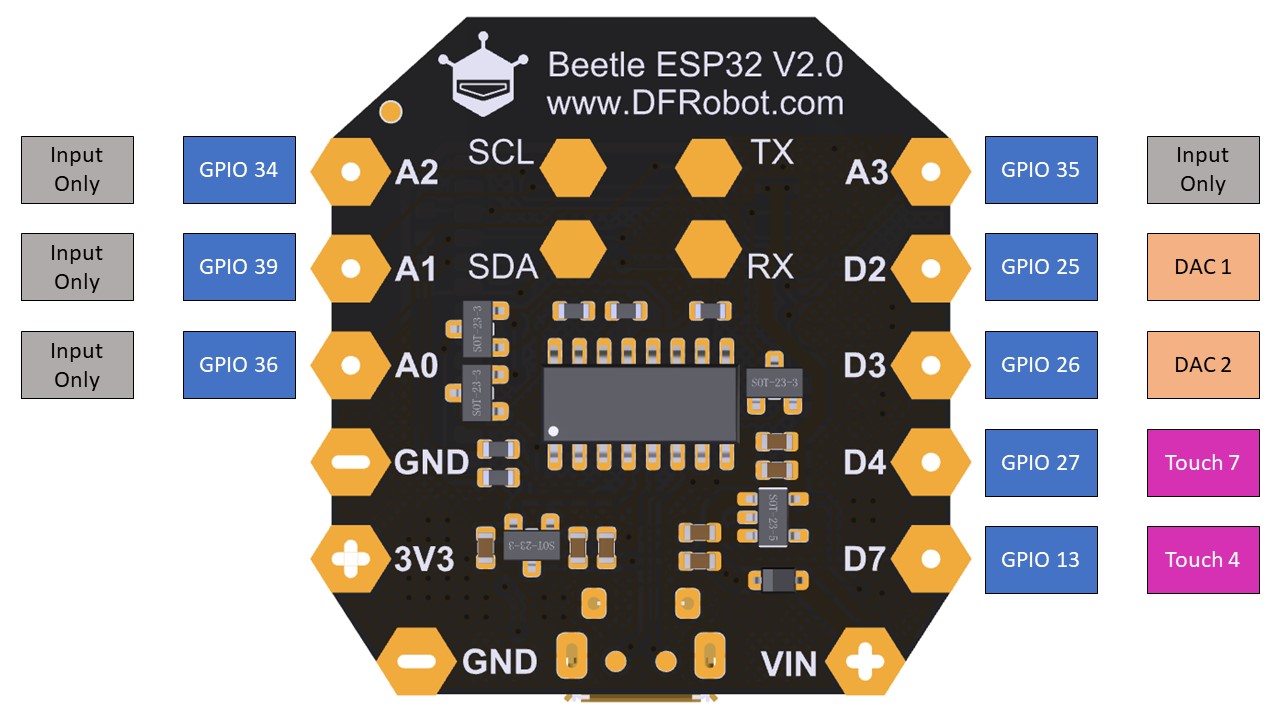
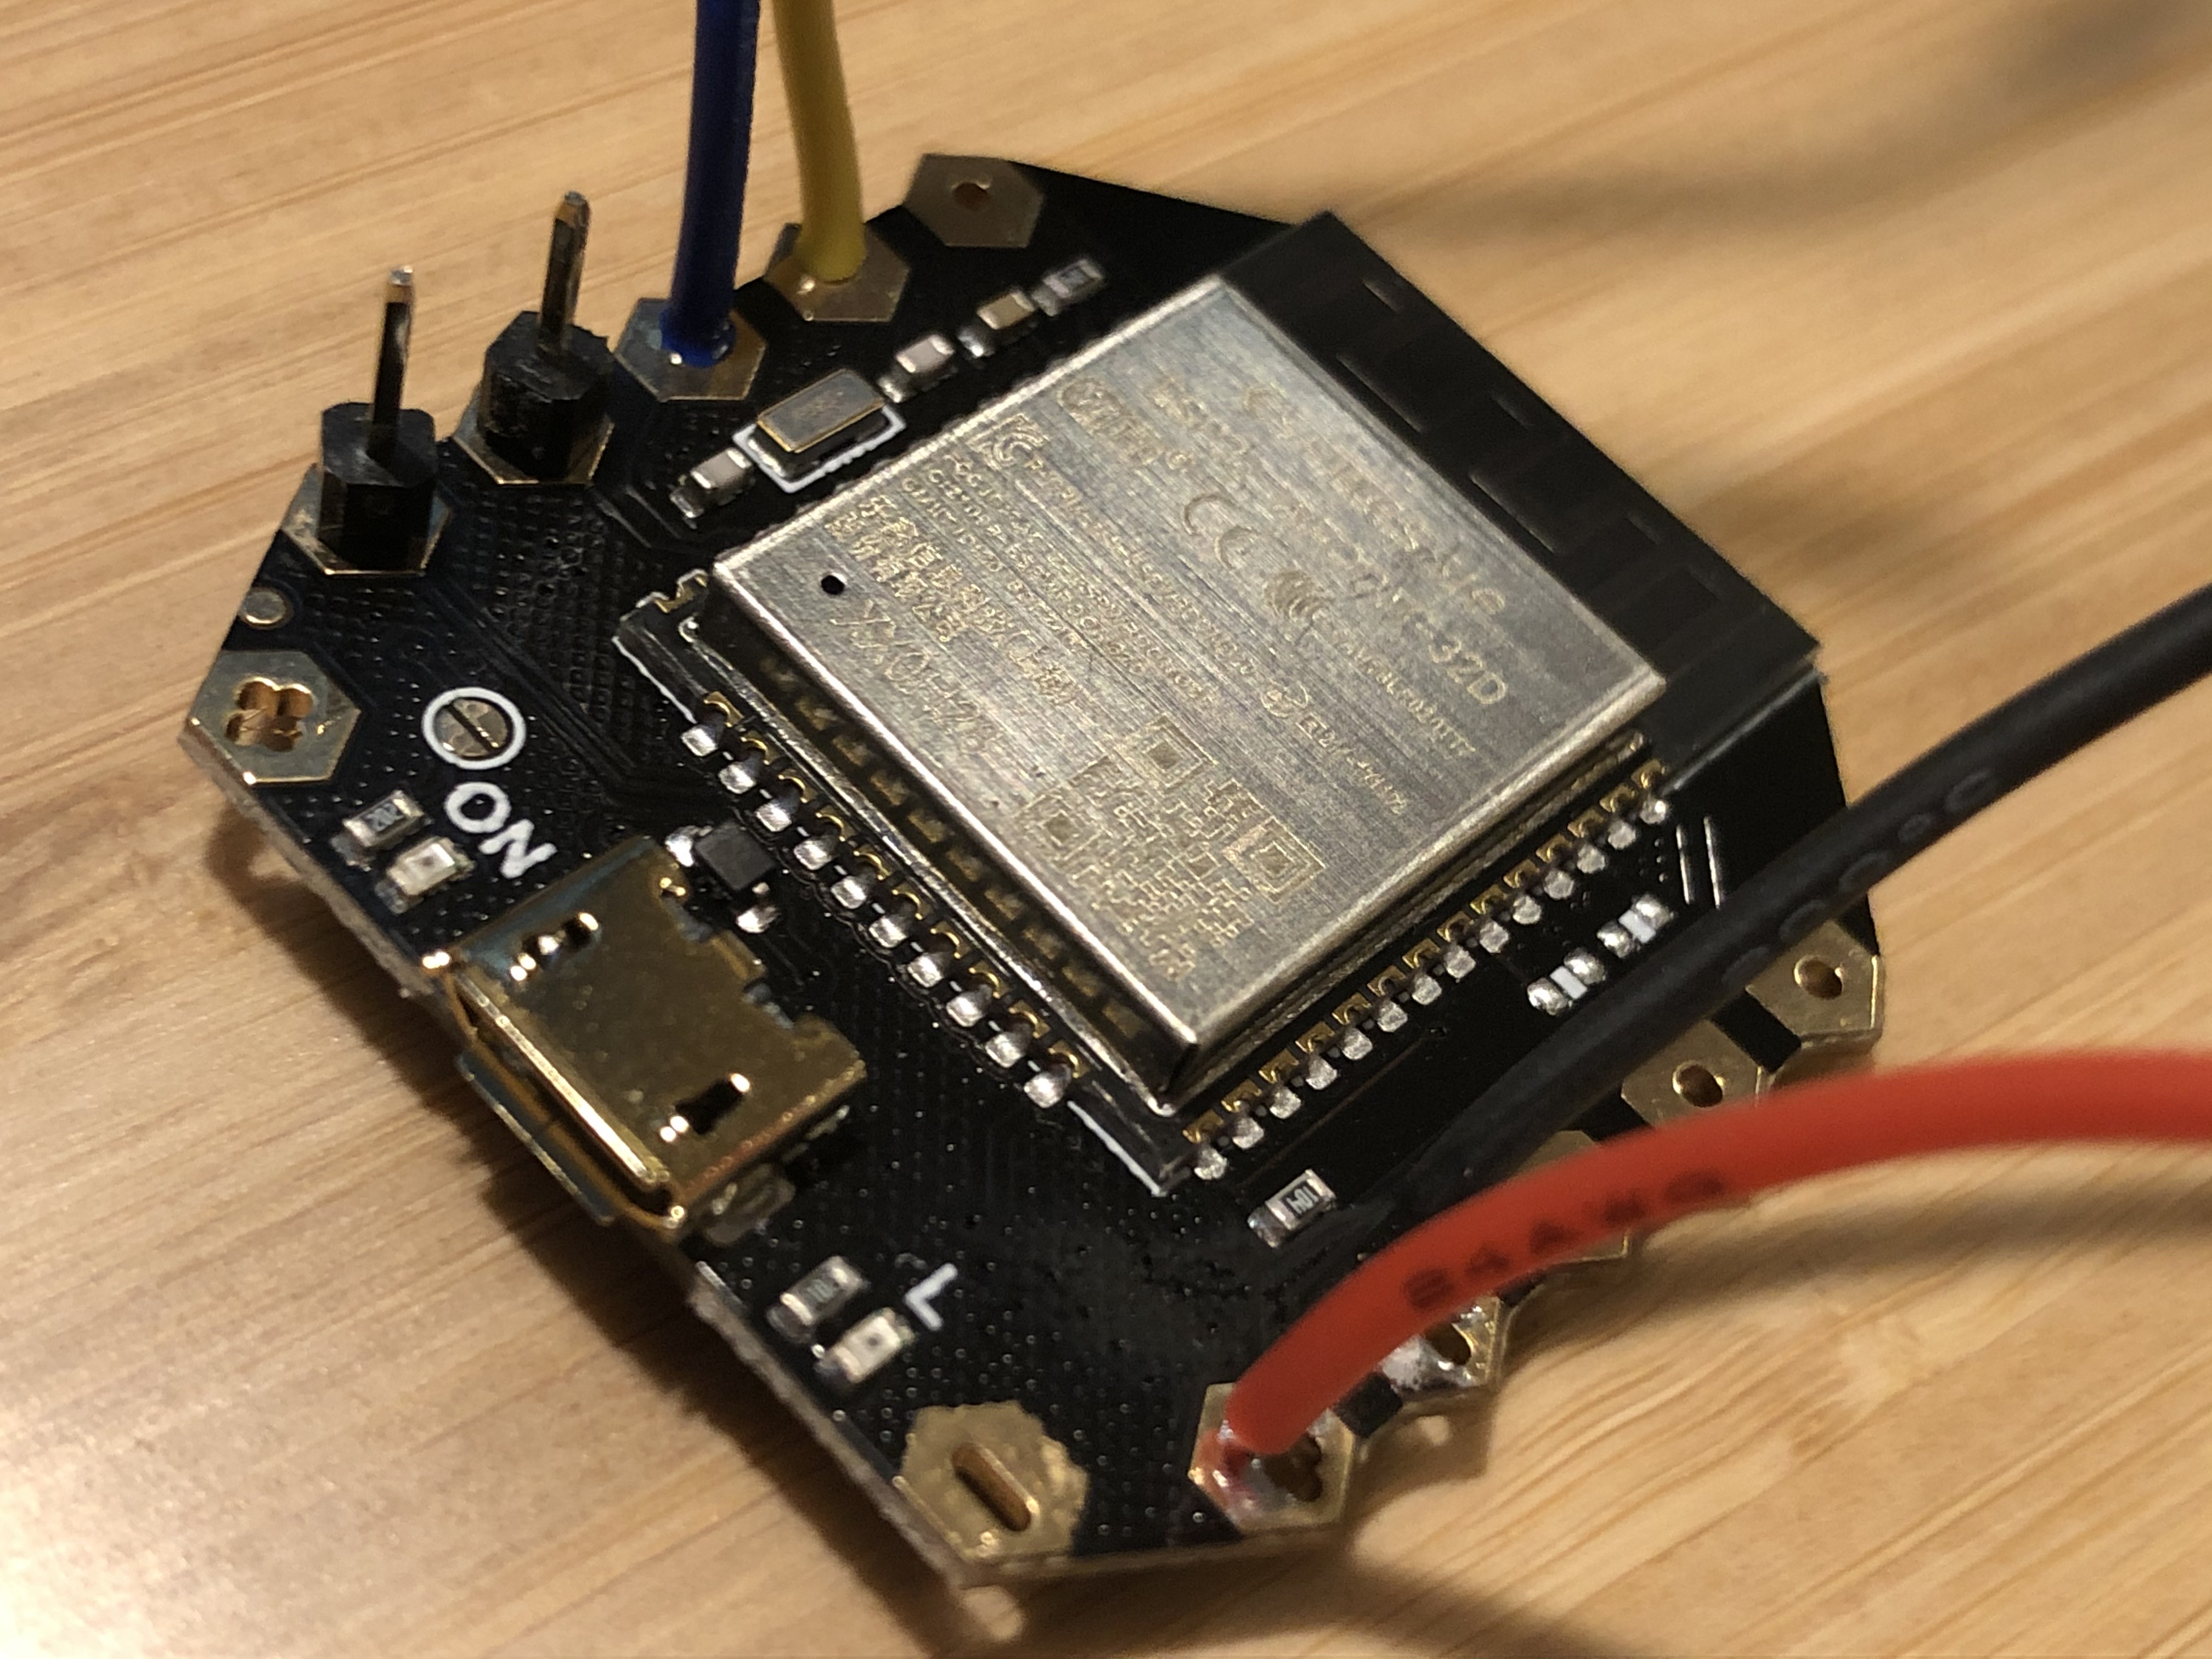
- 1x Beetle ESP32
- 1x MPU-6050 IMU
- 1x 500mAh Lipo battery
- JST-PH female plug
- Copper tape
- Conductive thread
- Assorted lengths of wire
I've been wanting to make an IoT wearable for a while to test out the new ArdNet Nano implementation for ESP32. This proved to be a good opportunity. At first I was essentially planning a remote integrated with a glove, but I decided that wouldn't be enough to truly demonstrate the platform. Sitting at the drawing board once more (read: playing games), I came up with this: What if I could actually aim with my hand while I played? Nobody's ever done that before! Thus was born Hair Trigger.
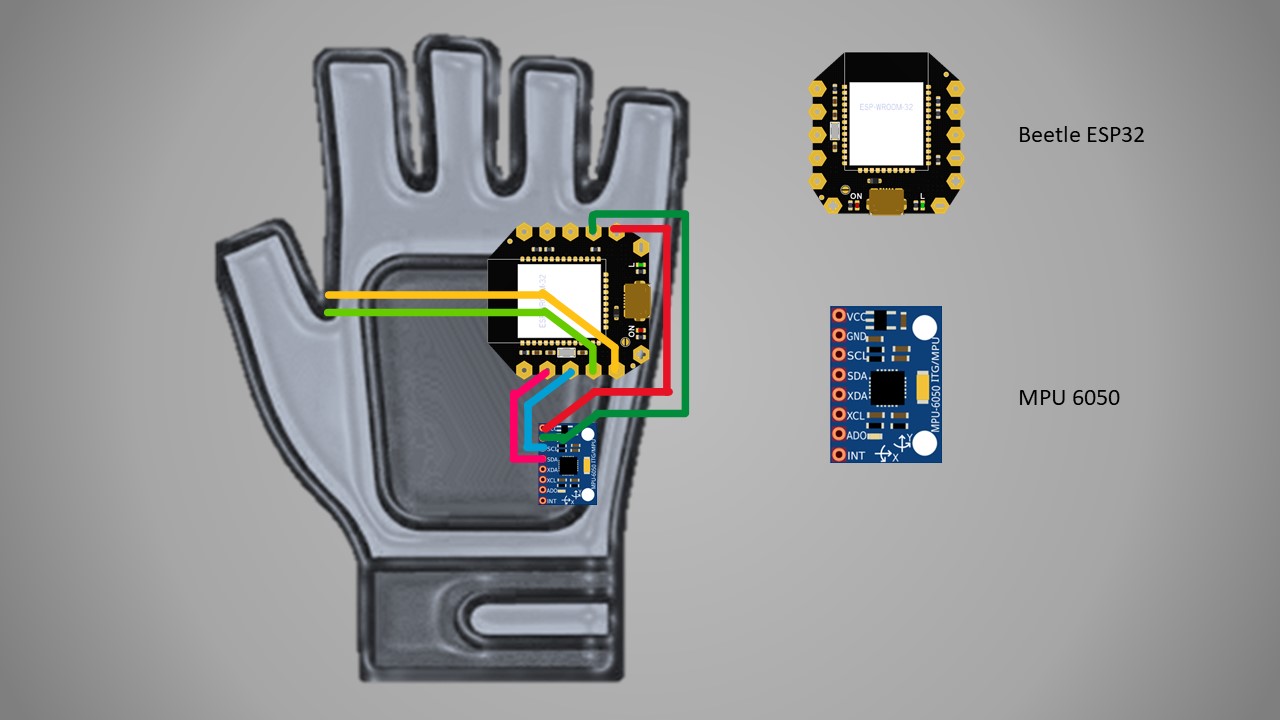
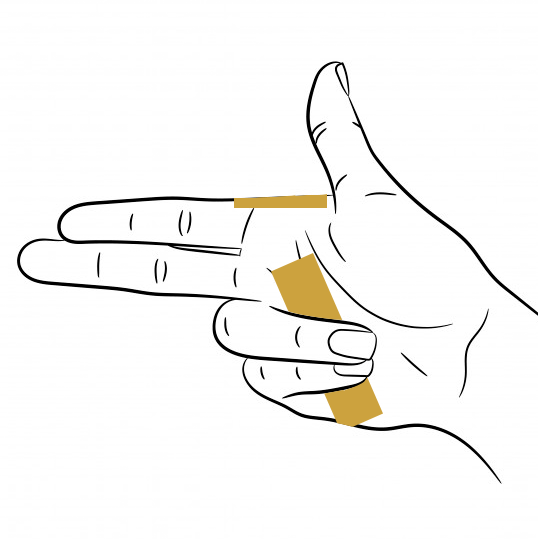
The glove build isn't too complicated, the vast majority of the system complexity lives in the software instead of the hardware. The glove has the controller and MPU sewn on to the back of the hand where they will be unobtrusive. The hardest part here is making sure you get the MPU oriented properly to match the software axis expectations. There is then a strip of conductive tape across the palm to act as a "safety" - user gestures will only be sent when the capacitive touch strip is triggered. Hopefully this will help solve drift problems from unreliable sensors; wearers will be able to release the safety and reposition their hand to get comfortable. Finally, we need a way to shoot, so there will also a capactive touch trigger accessible near the thumb
Hair Trigger was inspired by video games, but really it'll work for any simple PC gesture control needs. Like controlling netflix from bed or logging into meetings from bed or doing work from bed. The possibilities are endless.
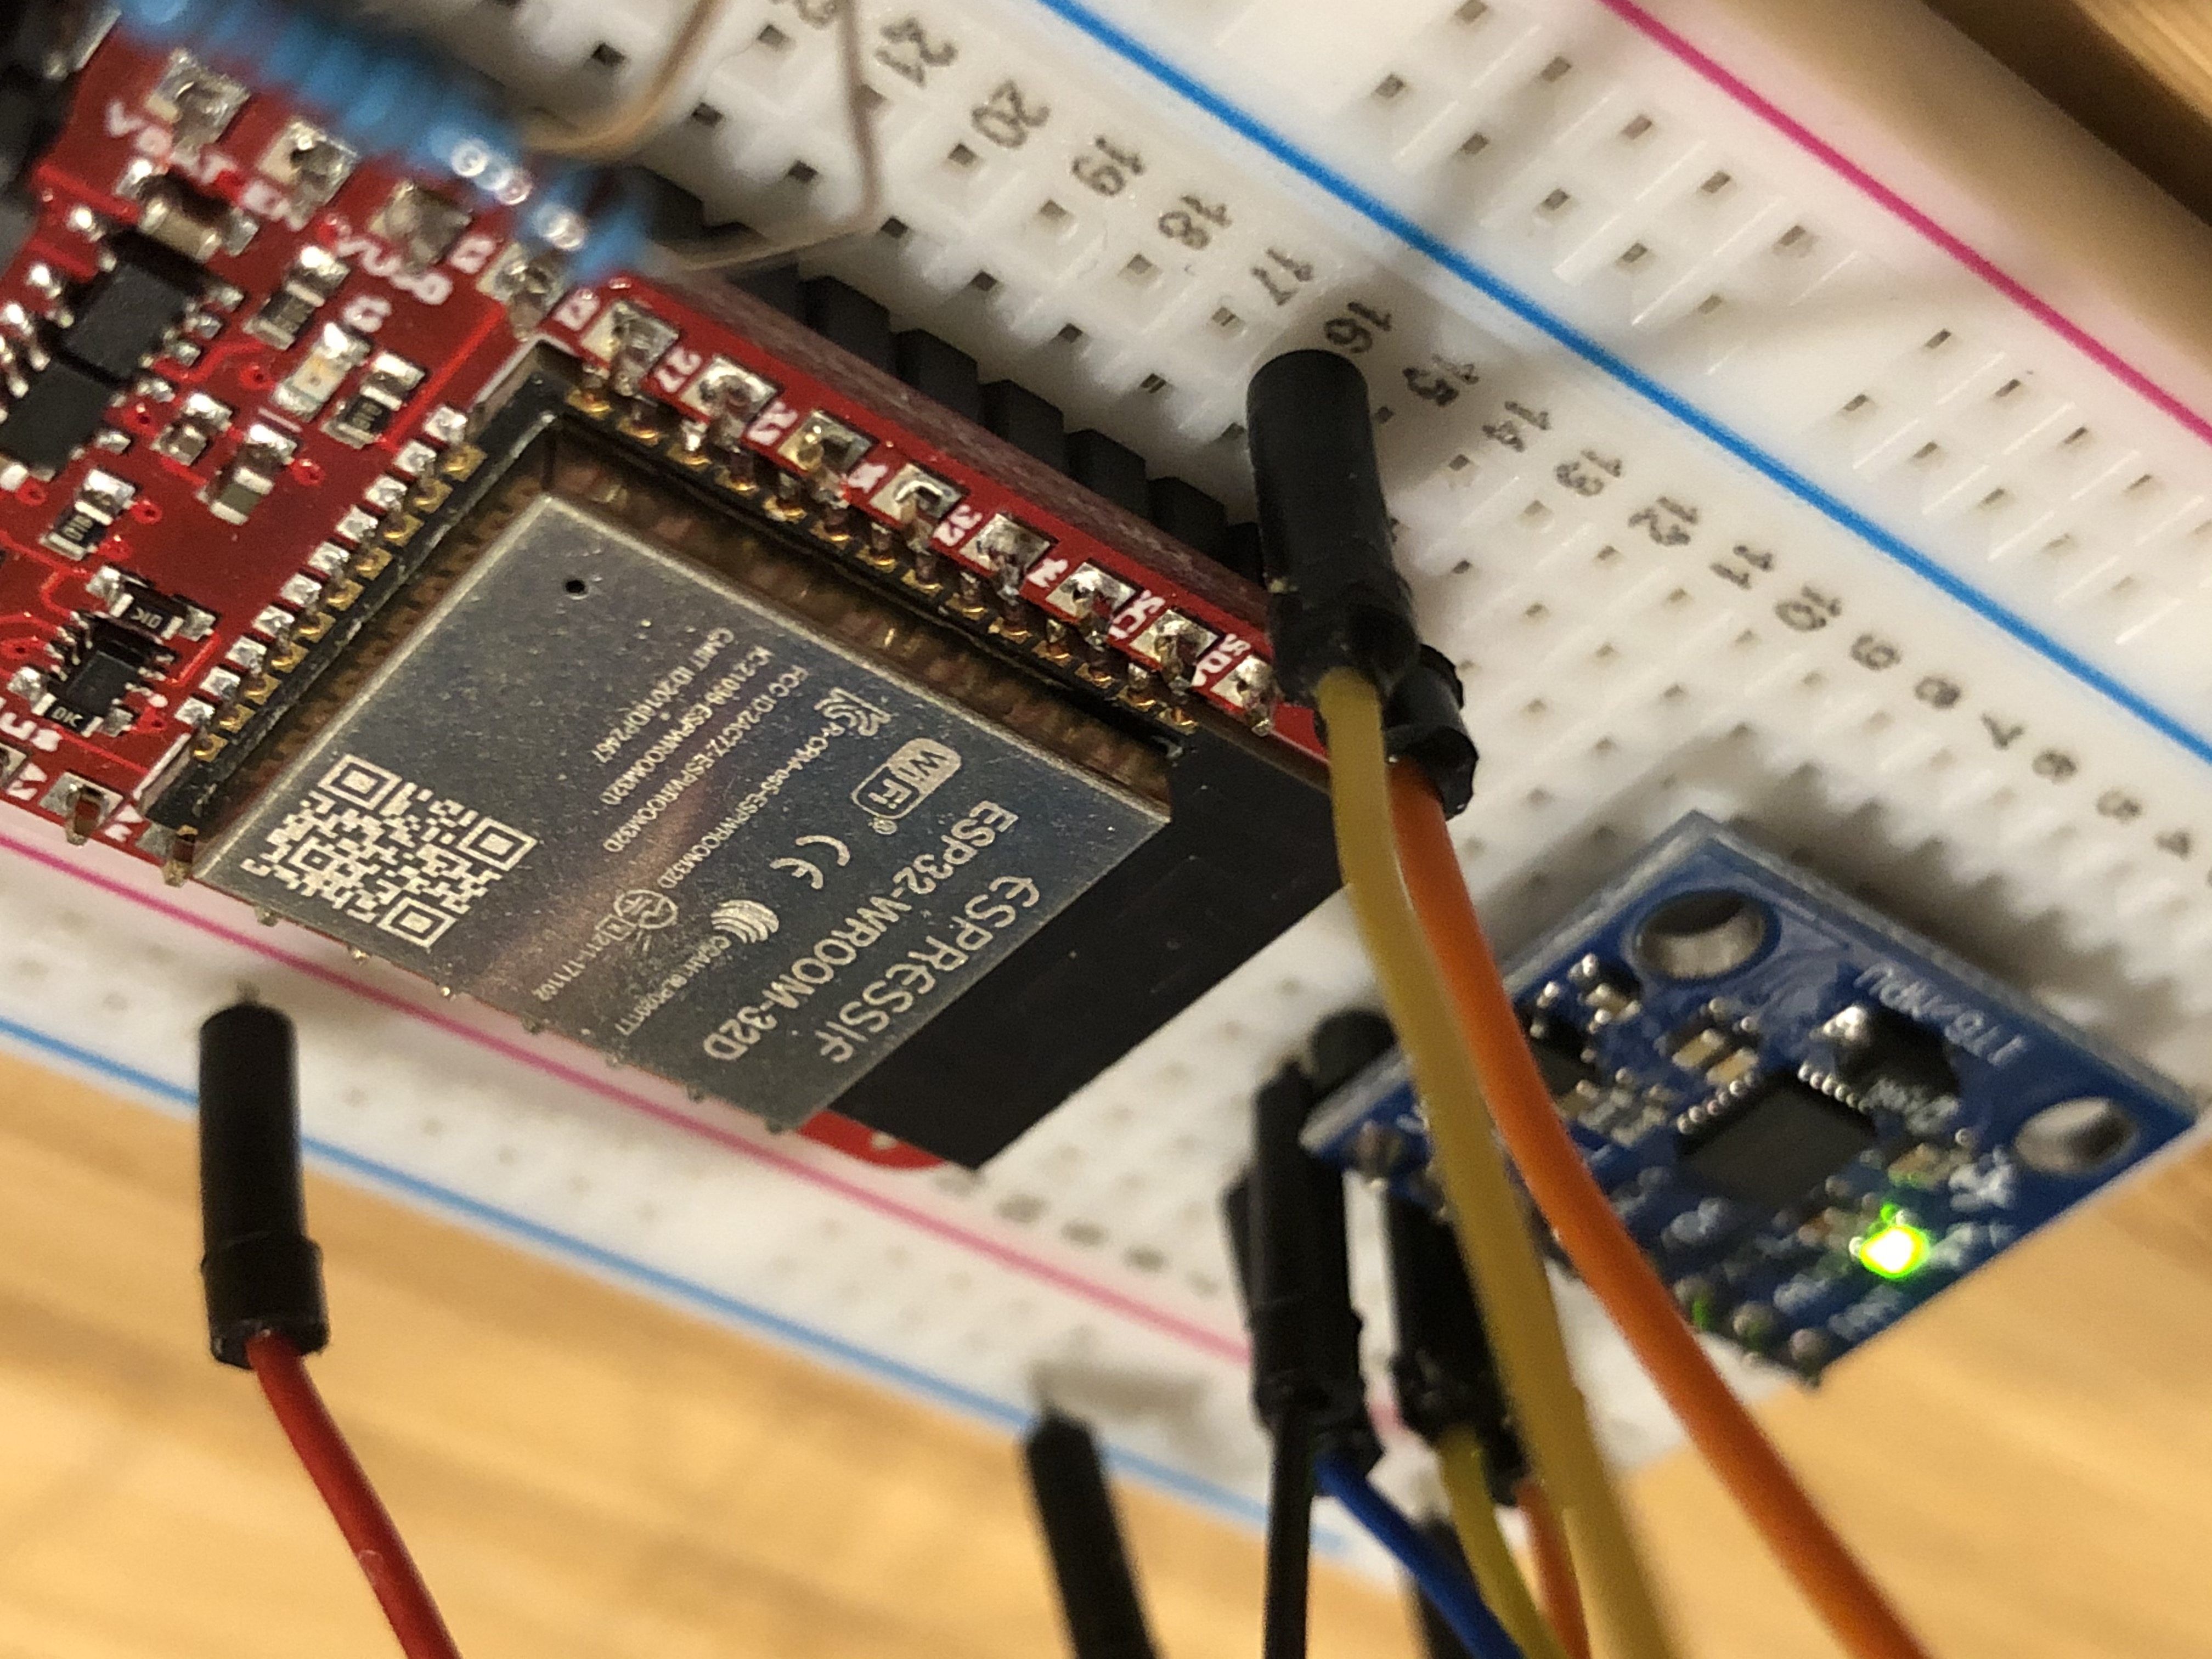
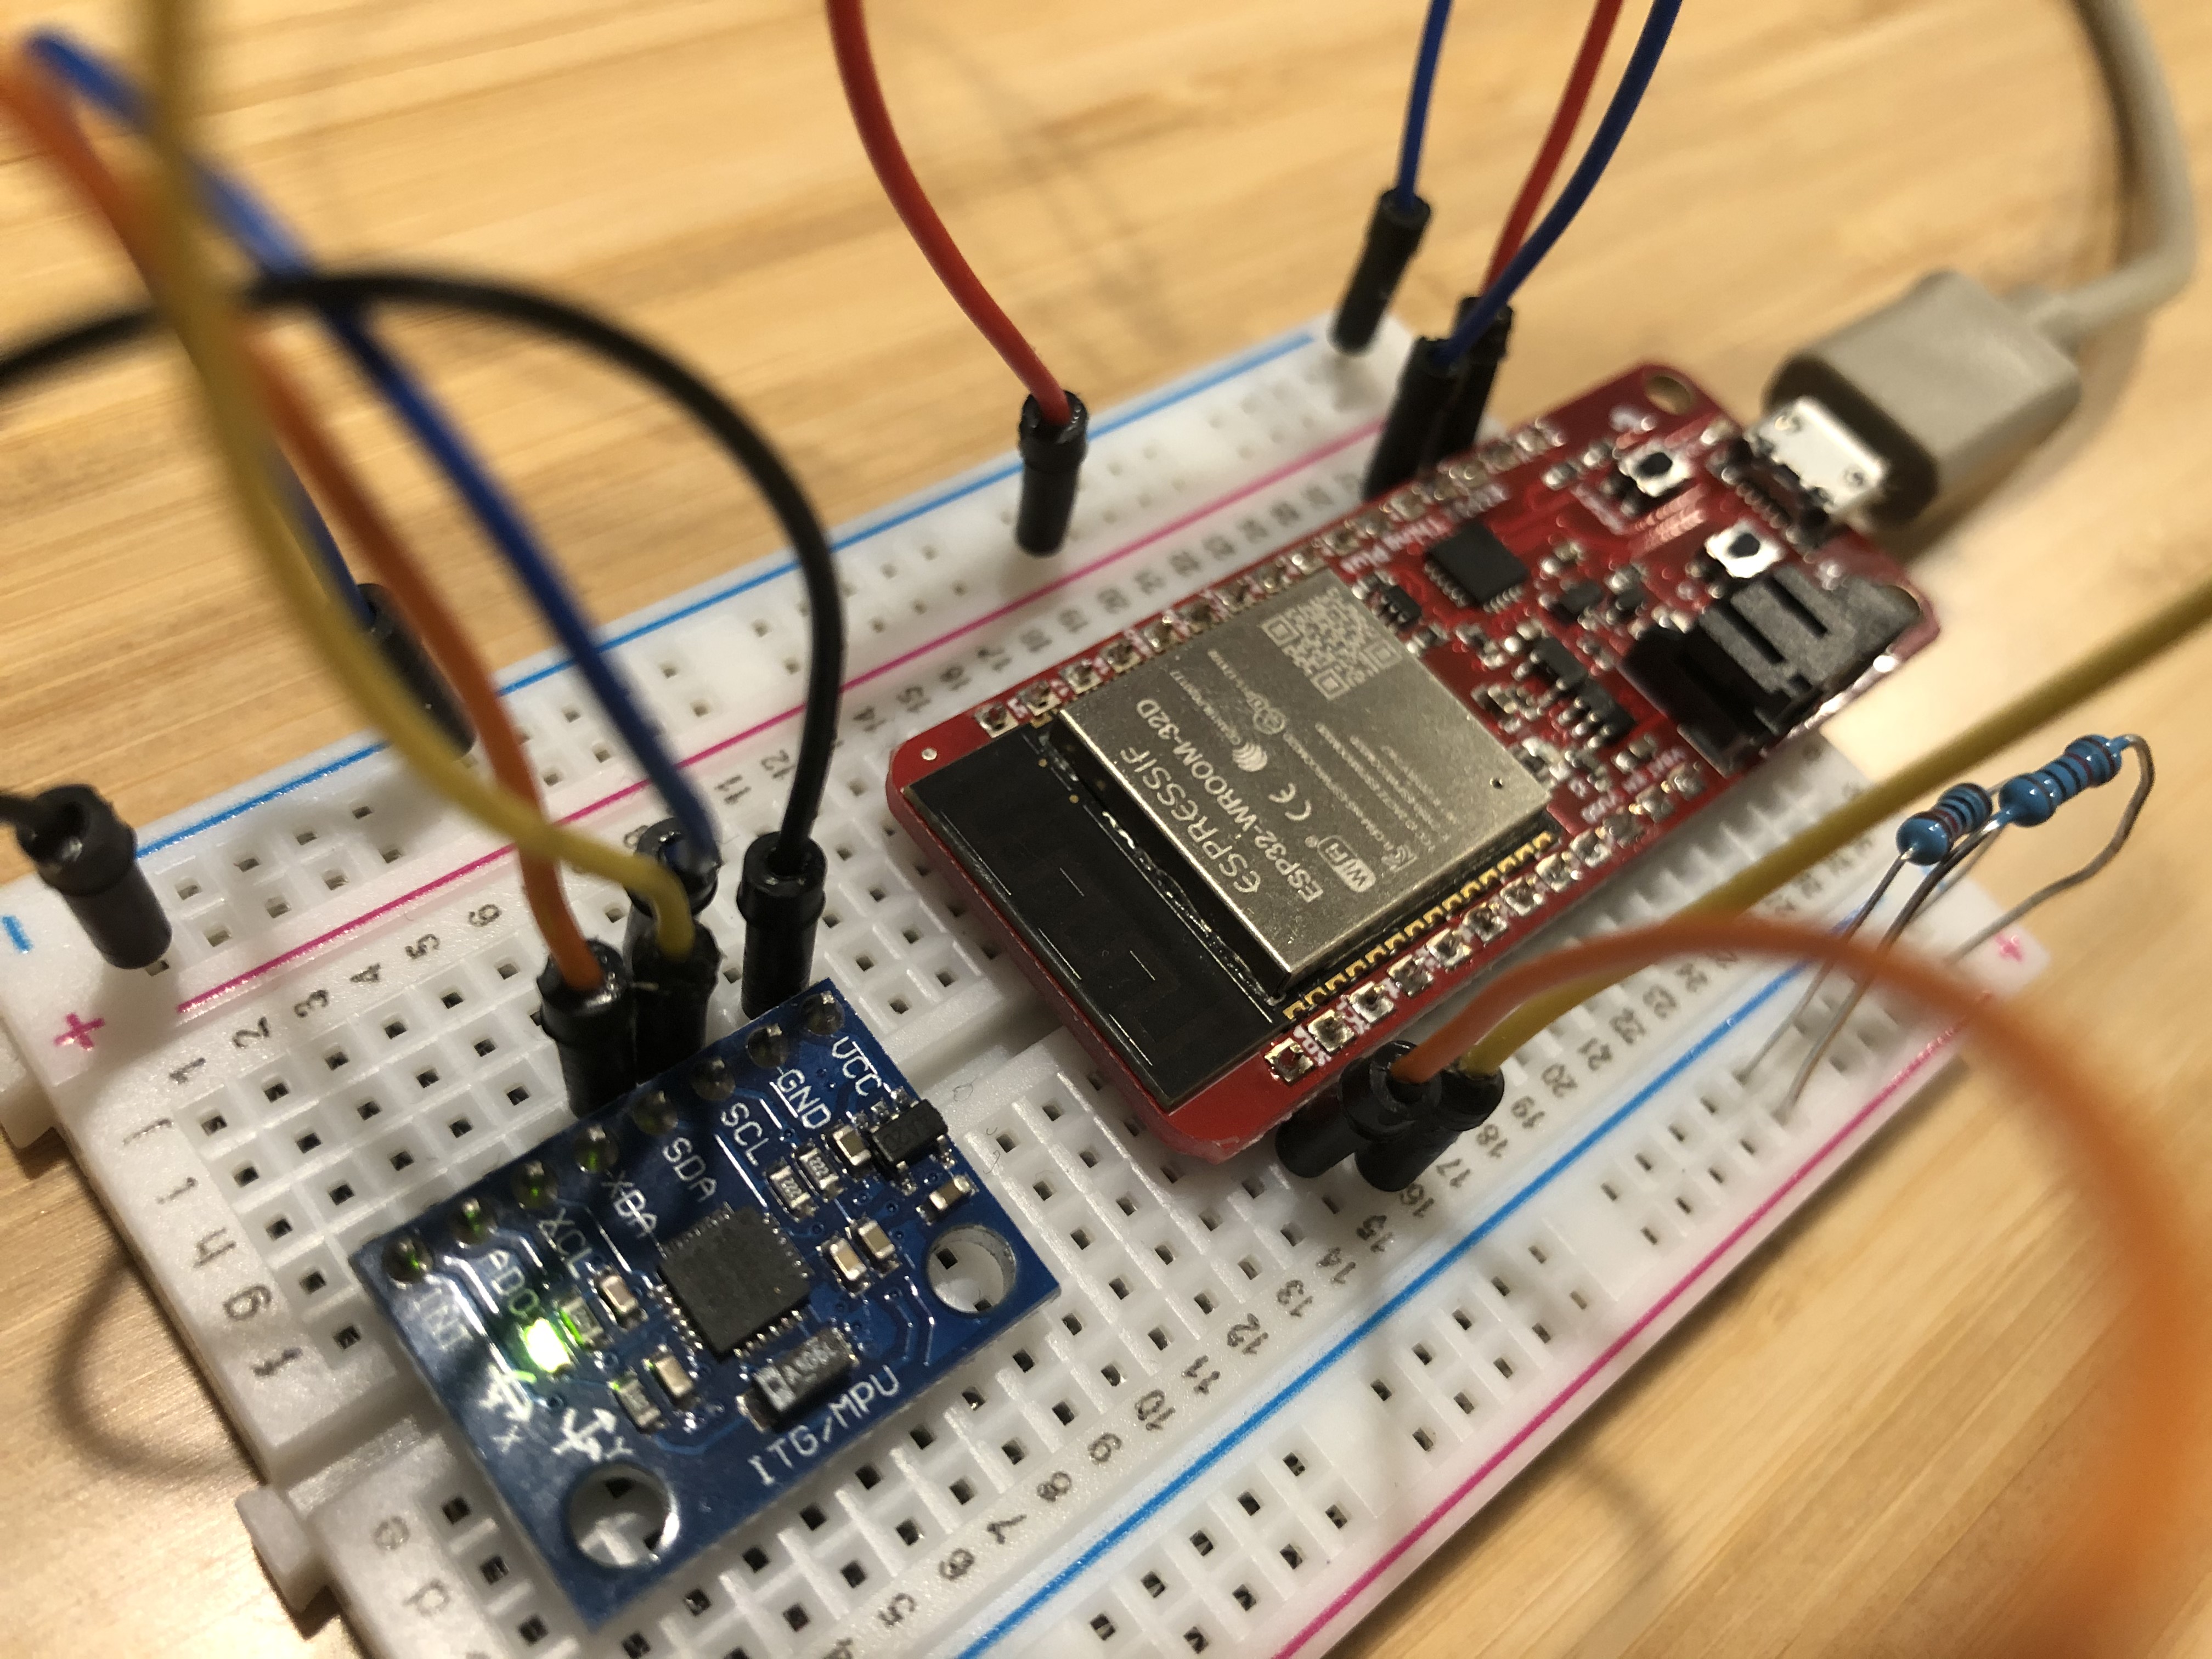
As always, we'll start with a prototype to get the code working before we get too deep into the "wearable" portion of this project. The Beetle devices are great for wearables since they're so small, but they don't fit breadboards very well. Because of that, I'm prototyping with a Sparkfun ESP32 Thing Plus. The electronics are pretty simple here, we only have 2 compoenents so just put them on the board and follow the standard I2C pin connections to link them together.
The software will much more difficult for inexperienced builders. First, we need to flash NanoFramework onto your device. Usually this is pretty easy, but at the time of writing, the firmware image for 16mb devices is broken. So until the official nanoff utility is fixed, you will need to use this fork
The command is also slightly different from normal:
nanoff --update --target ESP32_WROOM_32 --serialport COM## --flashsize 4mb
Getting the capacitive touch sensors working properly also takes a bit of effort. The NF standard library does not yet support capacitive touch, but I have been working on an implementation. Advanced users can build the nanoCLR from source, but less savvy builders might choose to forego the touch sensors for now and use regular buttons. For those brave souls still following, you can clone my nf-interpreter fork, open the repo using a VS Code dev container, and build the project. Here are instructions if that wasn't vague enough for you. Then once again use our custom nanoff utility to upload the nanoCLR patch to the board:
nanoff --target ESP32_WROOM_32 --serialport COM## --deploy --image {YOUR_PATH}\nf-interpreter\build\nanoCLR.bin --address 0x10000
I warned you this would be complicated, didn't I?
I won't blame you if you want to take a break now.
You can use Putty to test the output from the board to see if you did everything right. Use serial baud 115200 to check that the bootloader completes and baud 921600 to see runtime output. Also make sure you can see your device in the Visual Studio Device Explorer.
Now that the device is prepared, we can finally put our own code on the microcontroller.
Open the VS solution in this repo and find the ESP32_HairTrigger project. You will need to add a new file with your WiFi credentials. Name the file SystemConfig.secrets.cs
It should look like this:
using ArdNet.Nano;

namespace ESP32_HairTrigger
{
    public static class SystemConfig
    {
        public static WiFiConfig WiFiCredentials { get; } = new WiFiConfig("WiFi Name", "Wifi Password");
    }
}
You can now build the project and dewploy it to your ESP32 using the NF extension and Device Explorer (If you need to, you can review those instructions here).
If you made it this far, congratulations! Your ESP32 is ready to go!
Now to see the fruits of your labor, find and launch the ArdNet.Server.Tests.CLI.Core project on your computer. This will start a simple server that communicates with your ESP32 and moves your mouse cursr around the screen.
NOTE: You might need add a firewall rule to open TCP 48597
The server app will tell when the ESP32 connects and you'll be able to move your mouse by rotating the MPU. You should take this time to make sure you can orient the MPU so your physical movements match the on-screen movements. It's better to figure that out now rather than after you stich it to a glove.
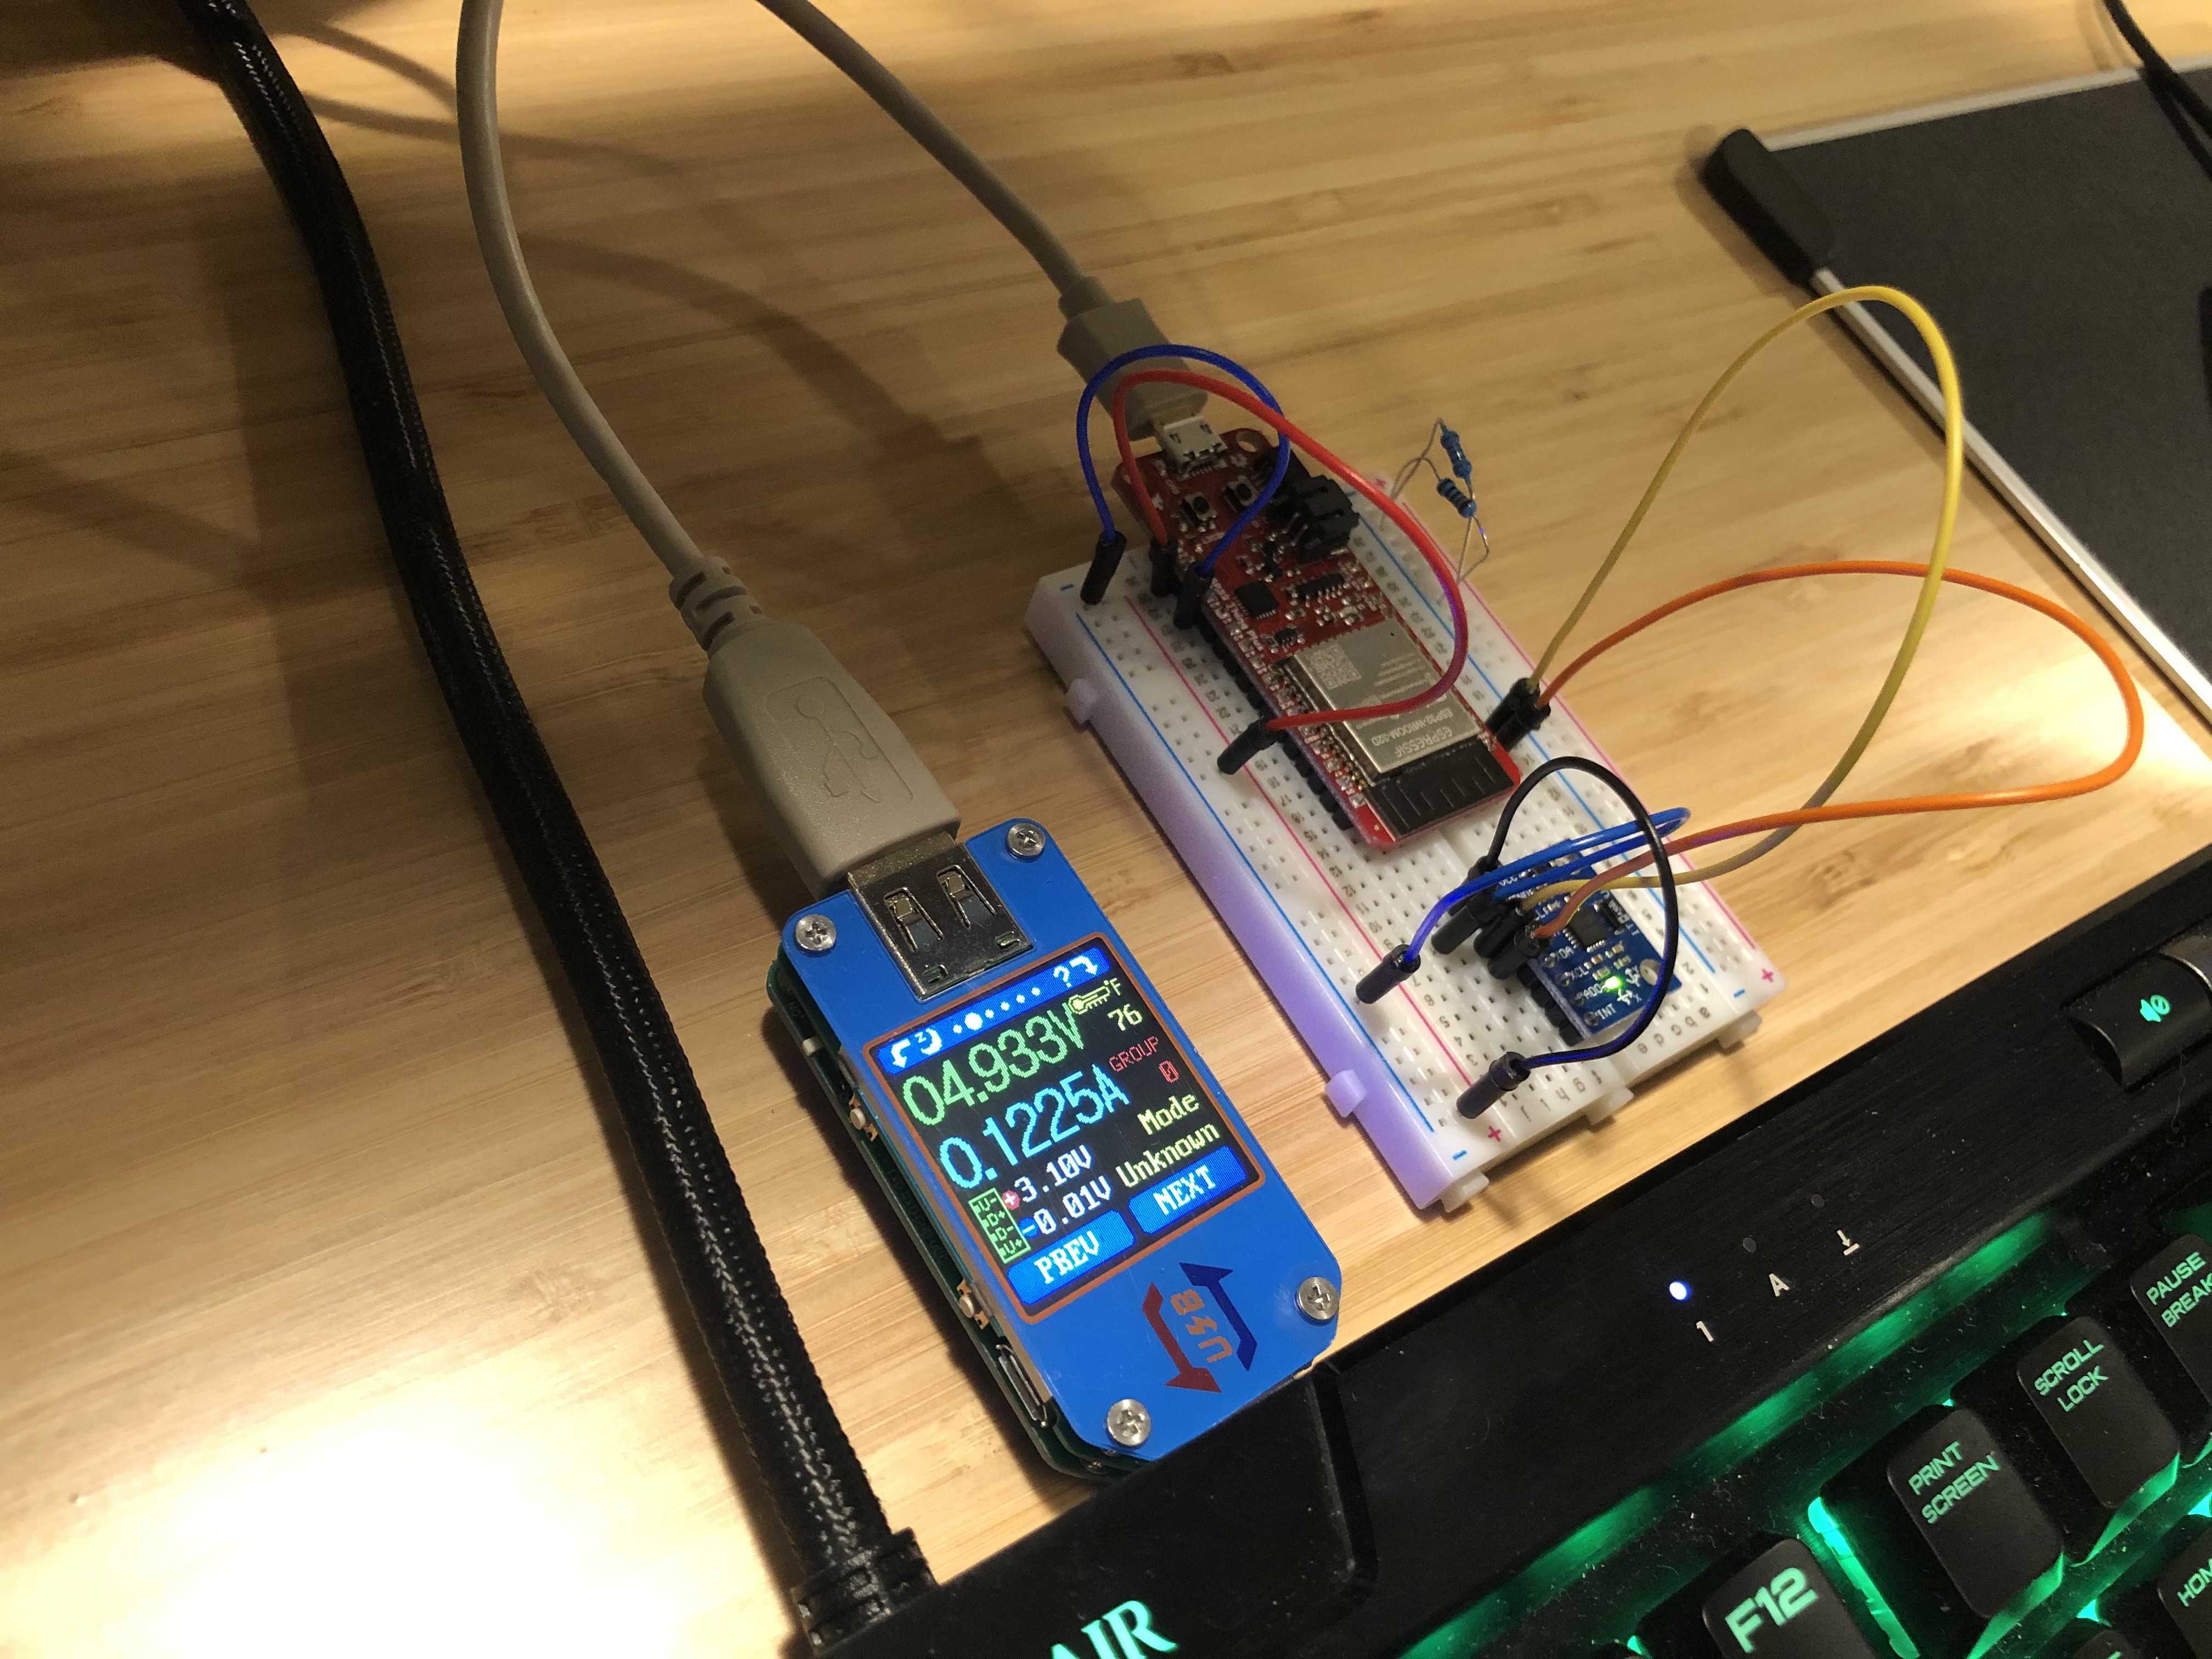
I plugged my test rig into a portable USB multimeter to see the power consumption. It averages around 120 milliamps, which will give us several hours of life on our batteries. It's not great, but it'll work for our purposes.
Putting the glove together is thankfully easier than getting the controller ready.
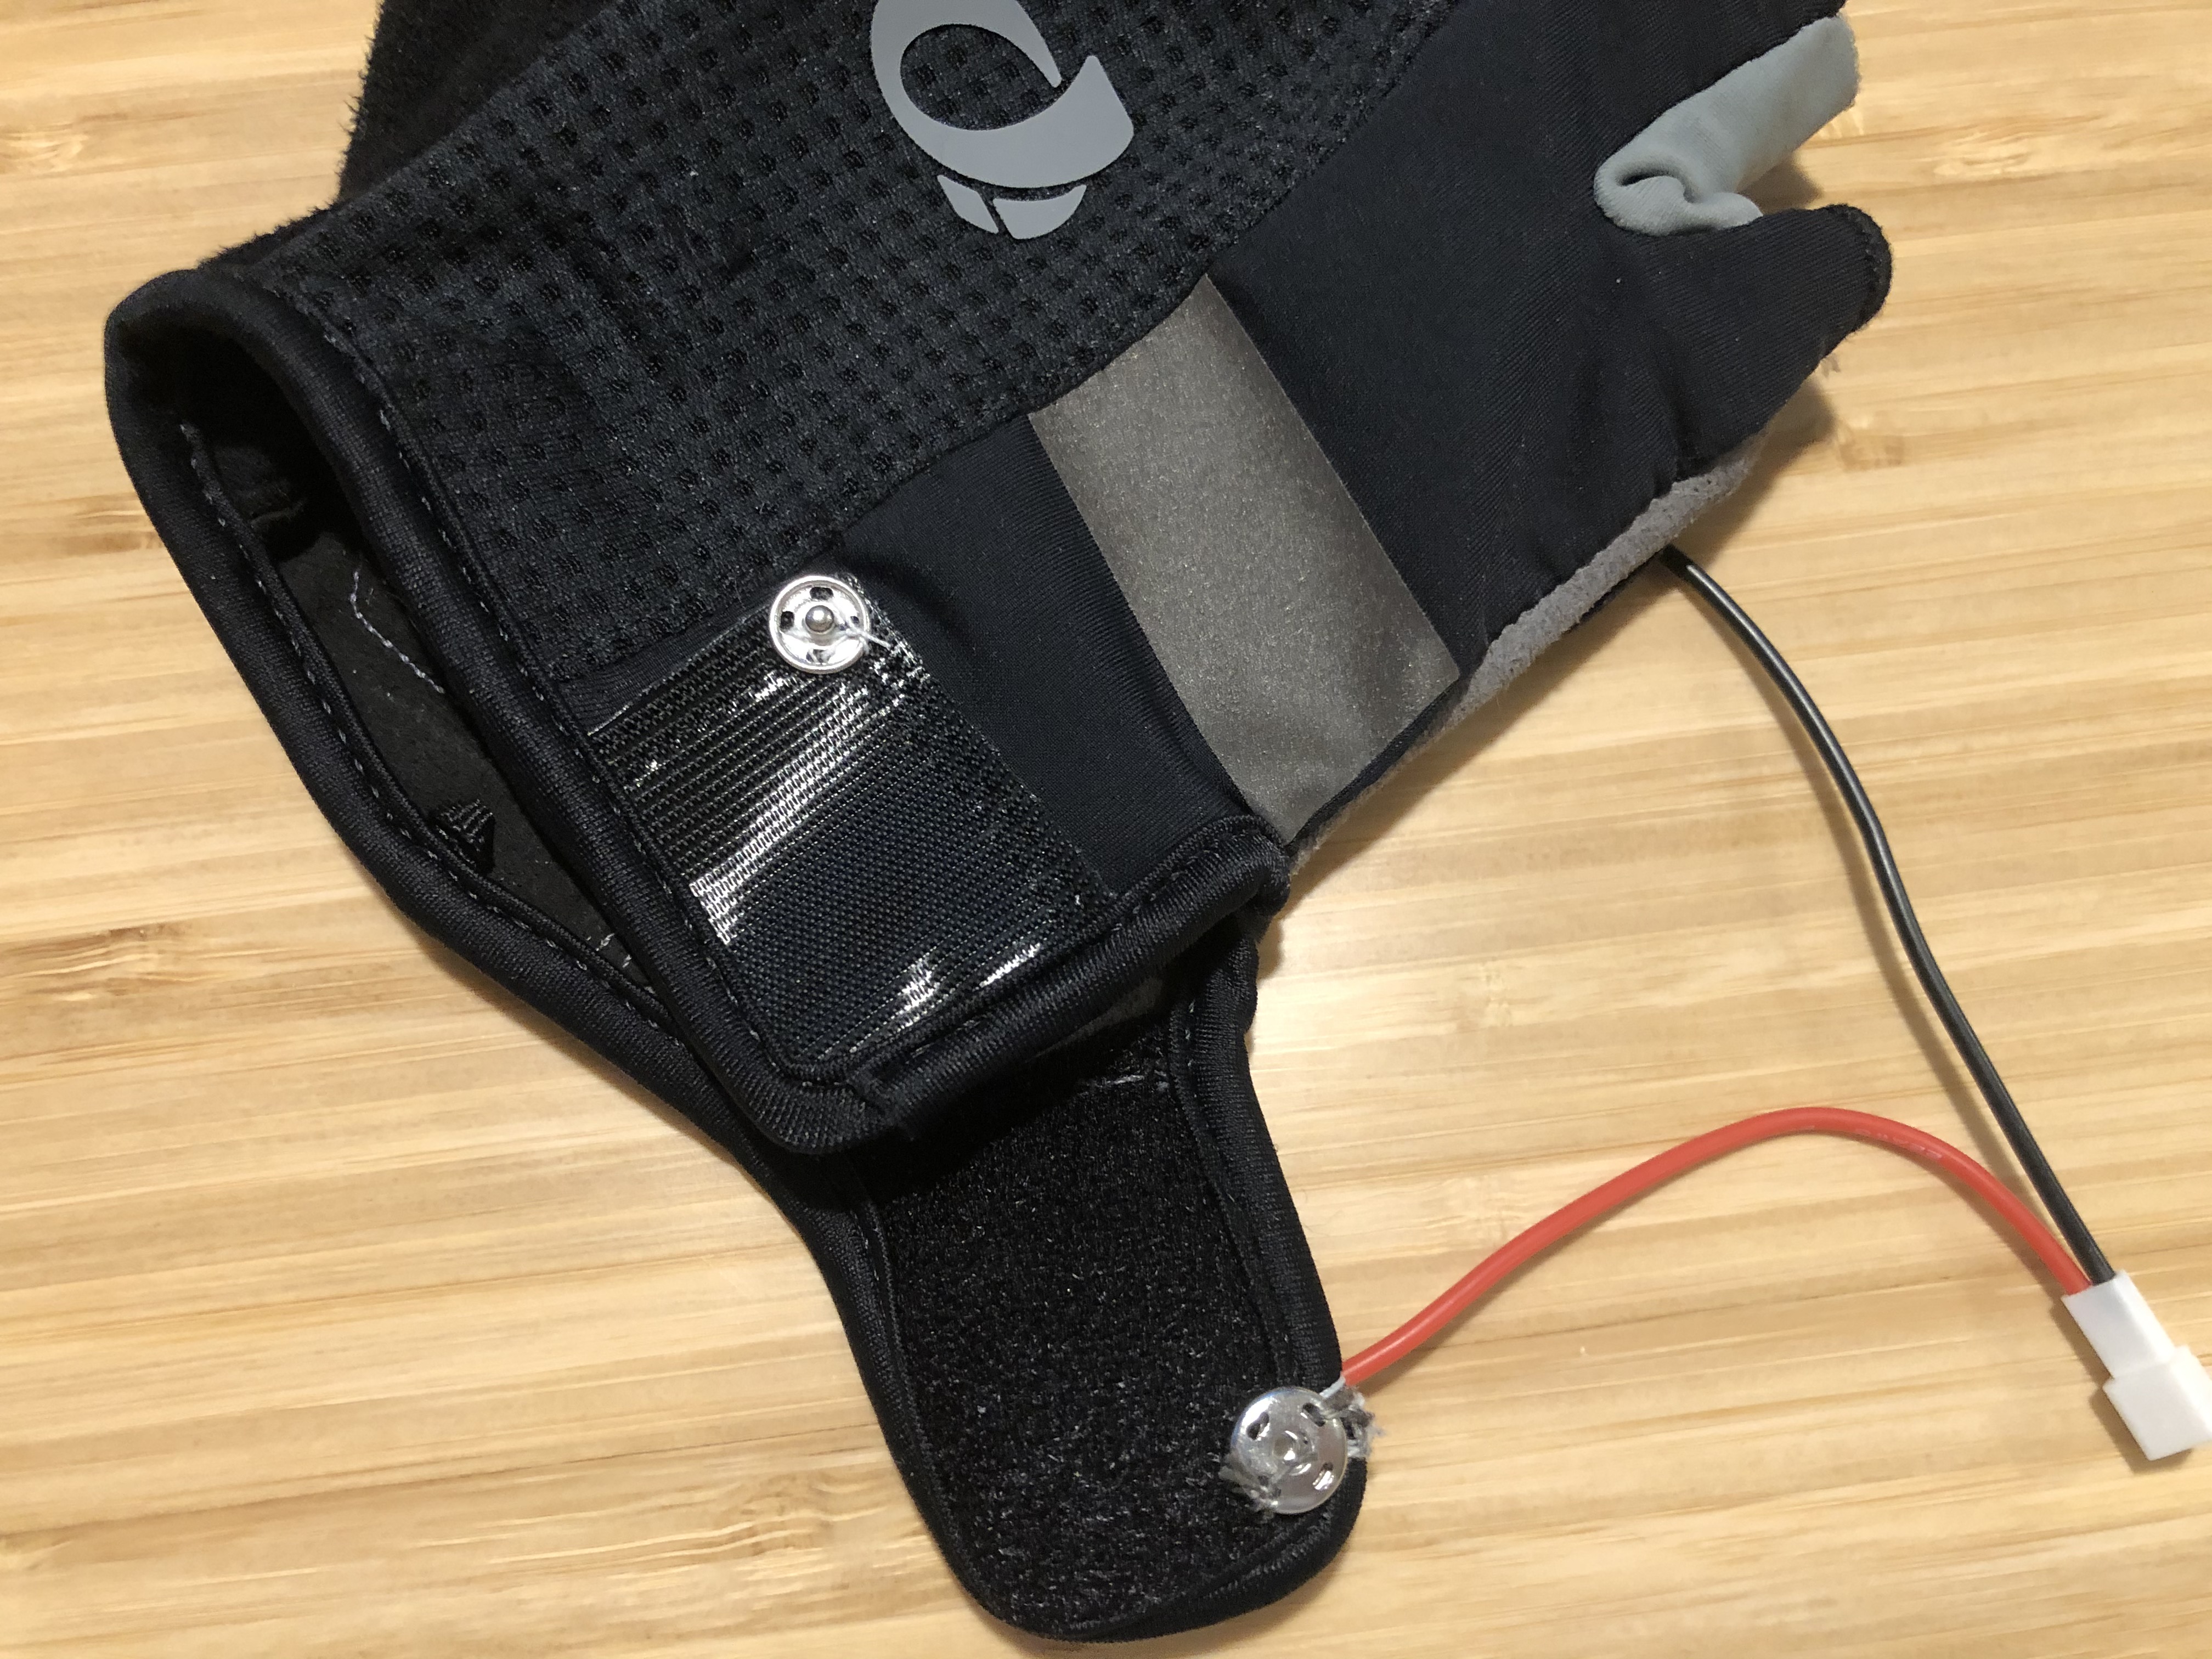
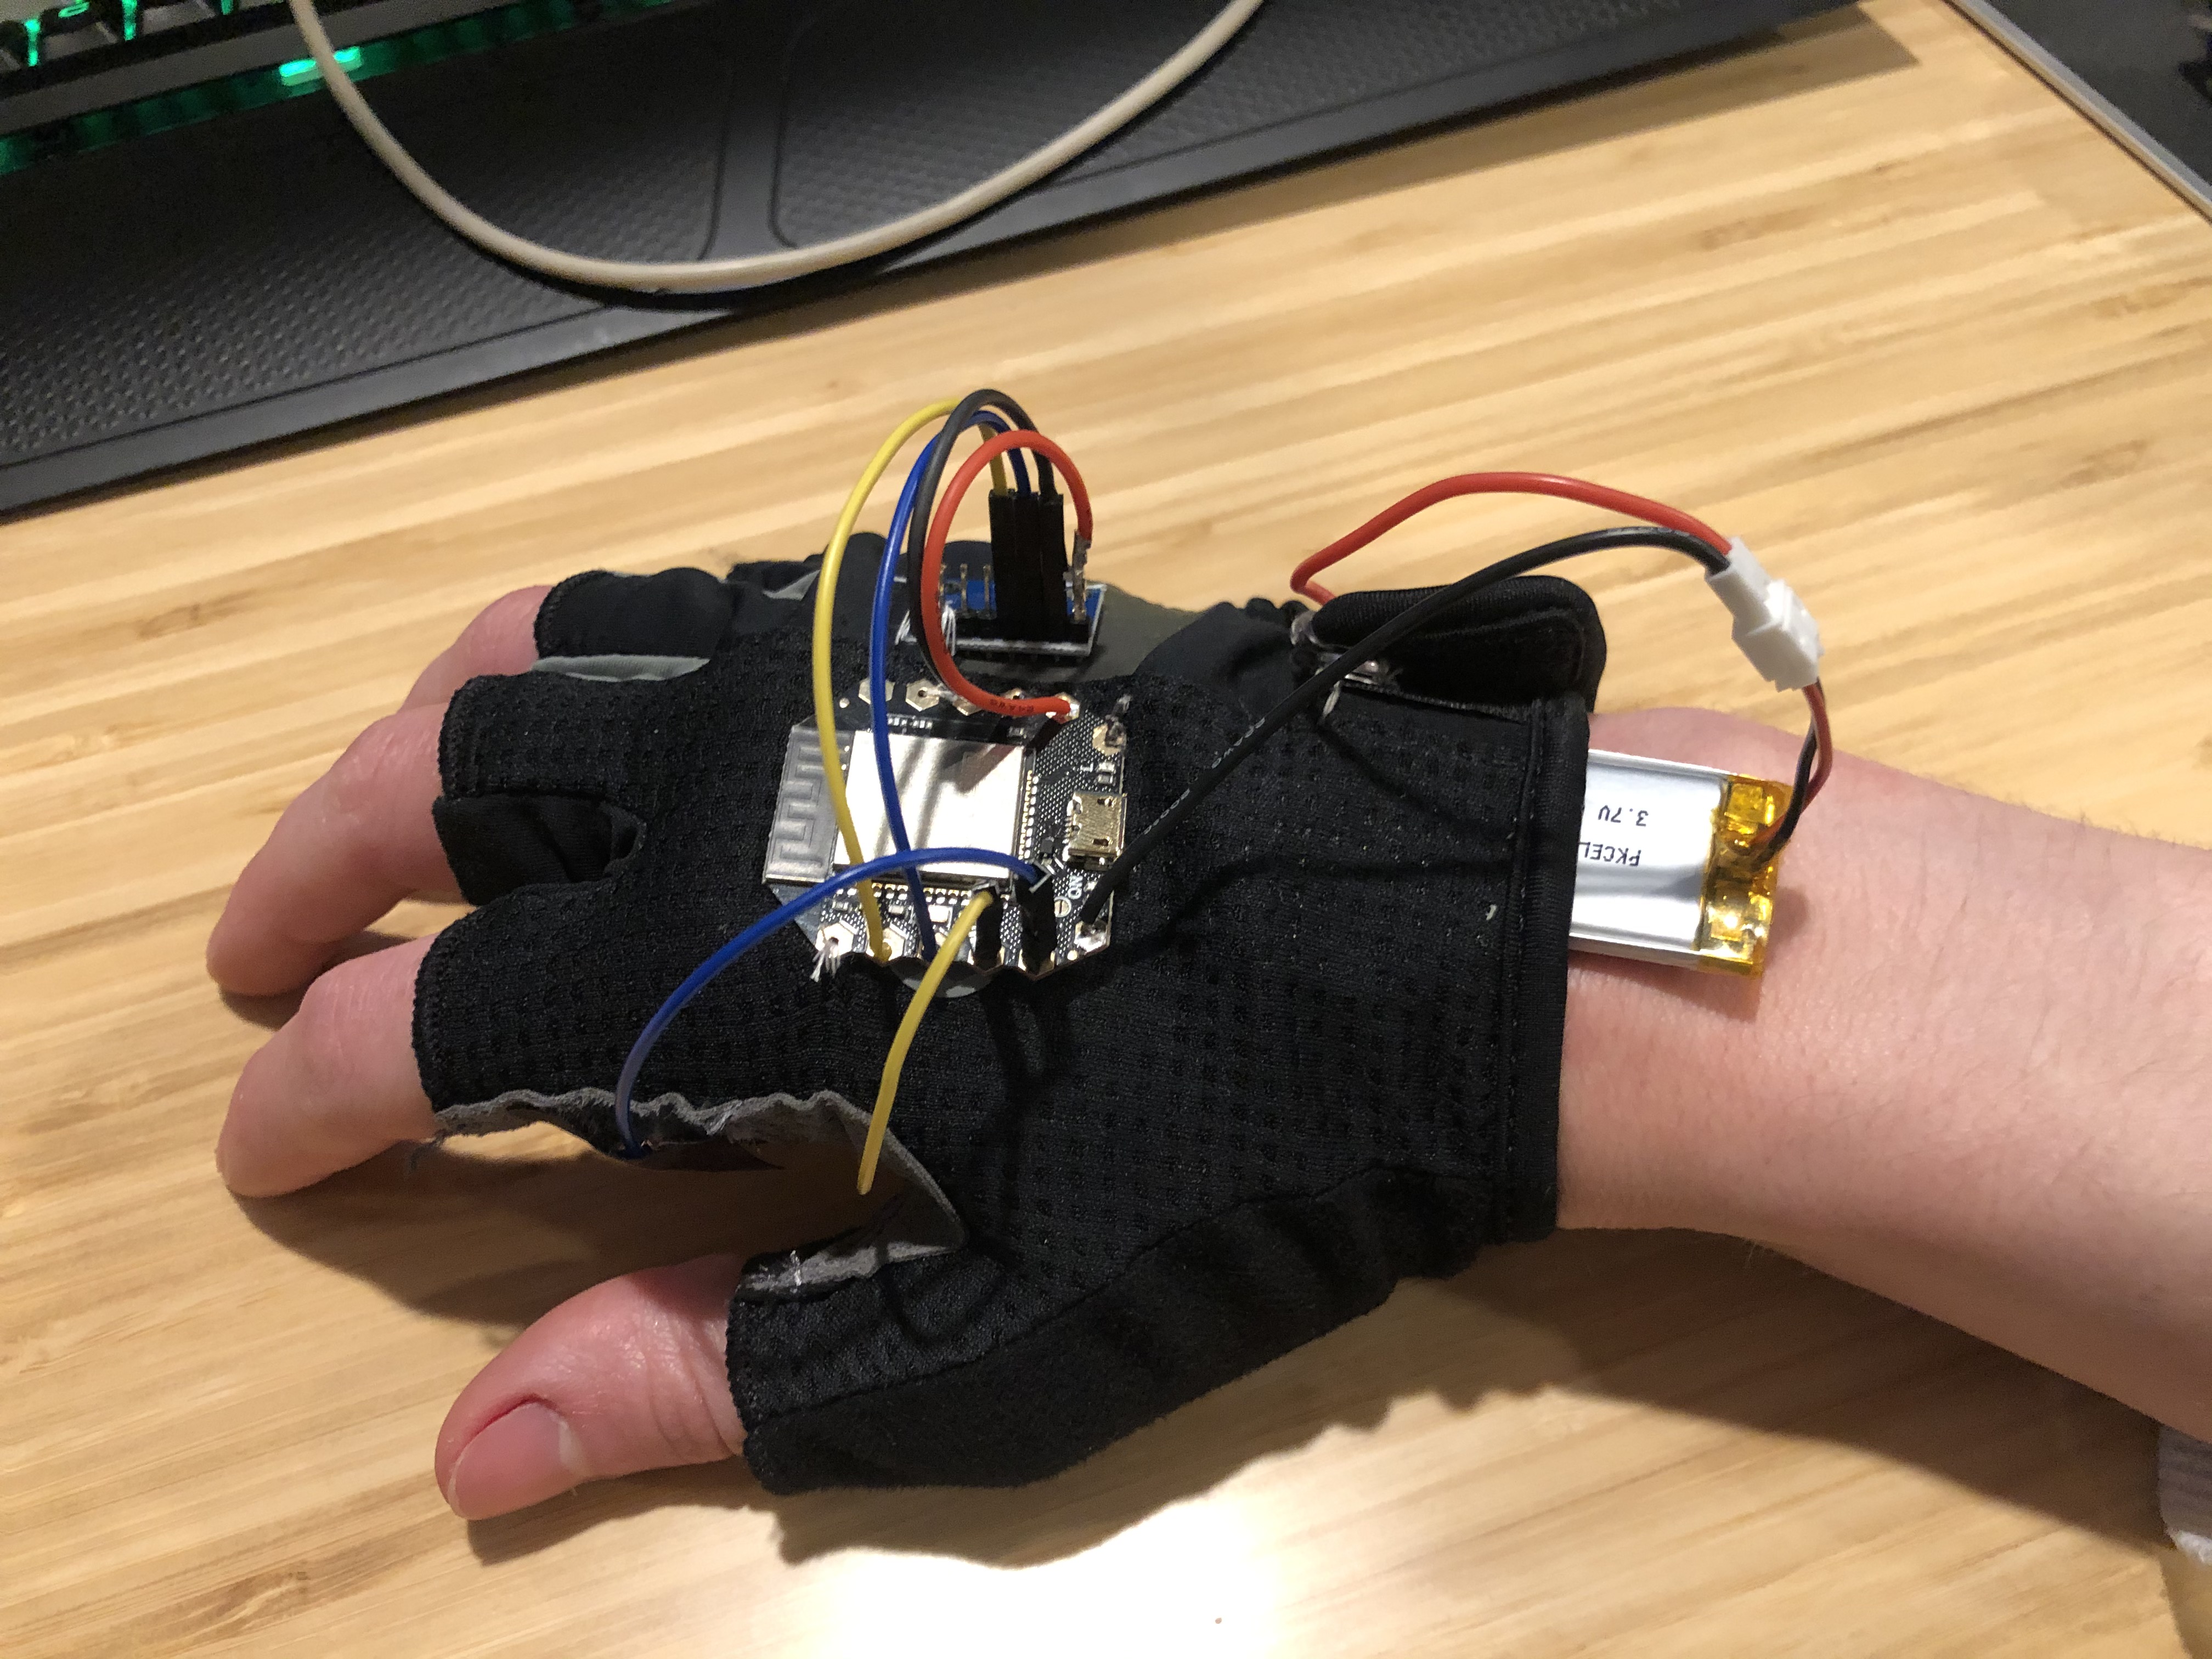
I decided that I wanted to add a built-in power switch to the glove, so I stitched snaps into the velco. The snaps will close the circuit between the battery and the controller when theyre closed.
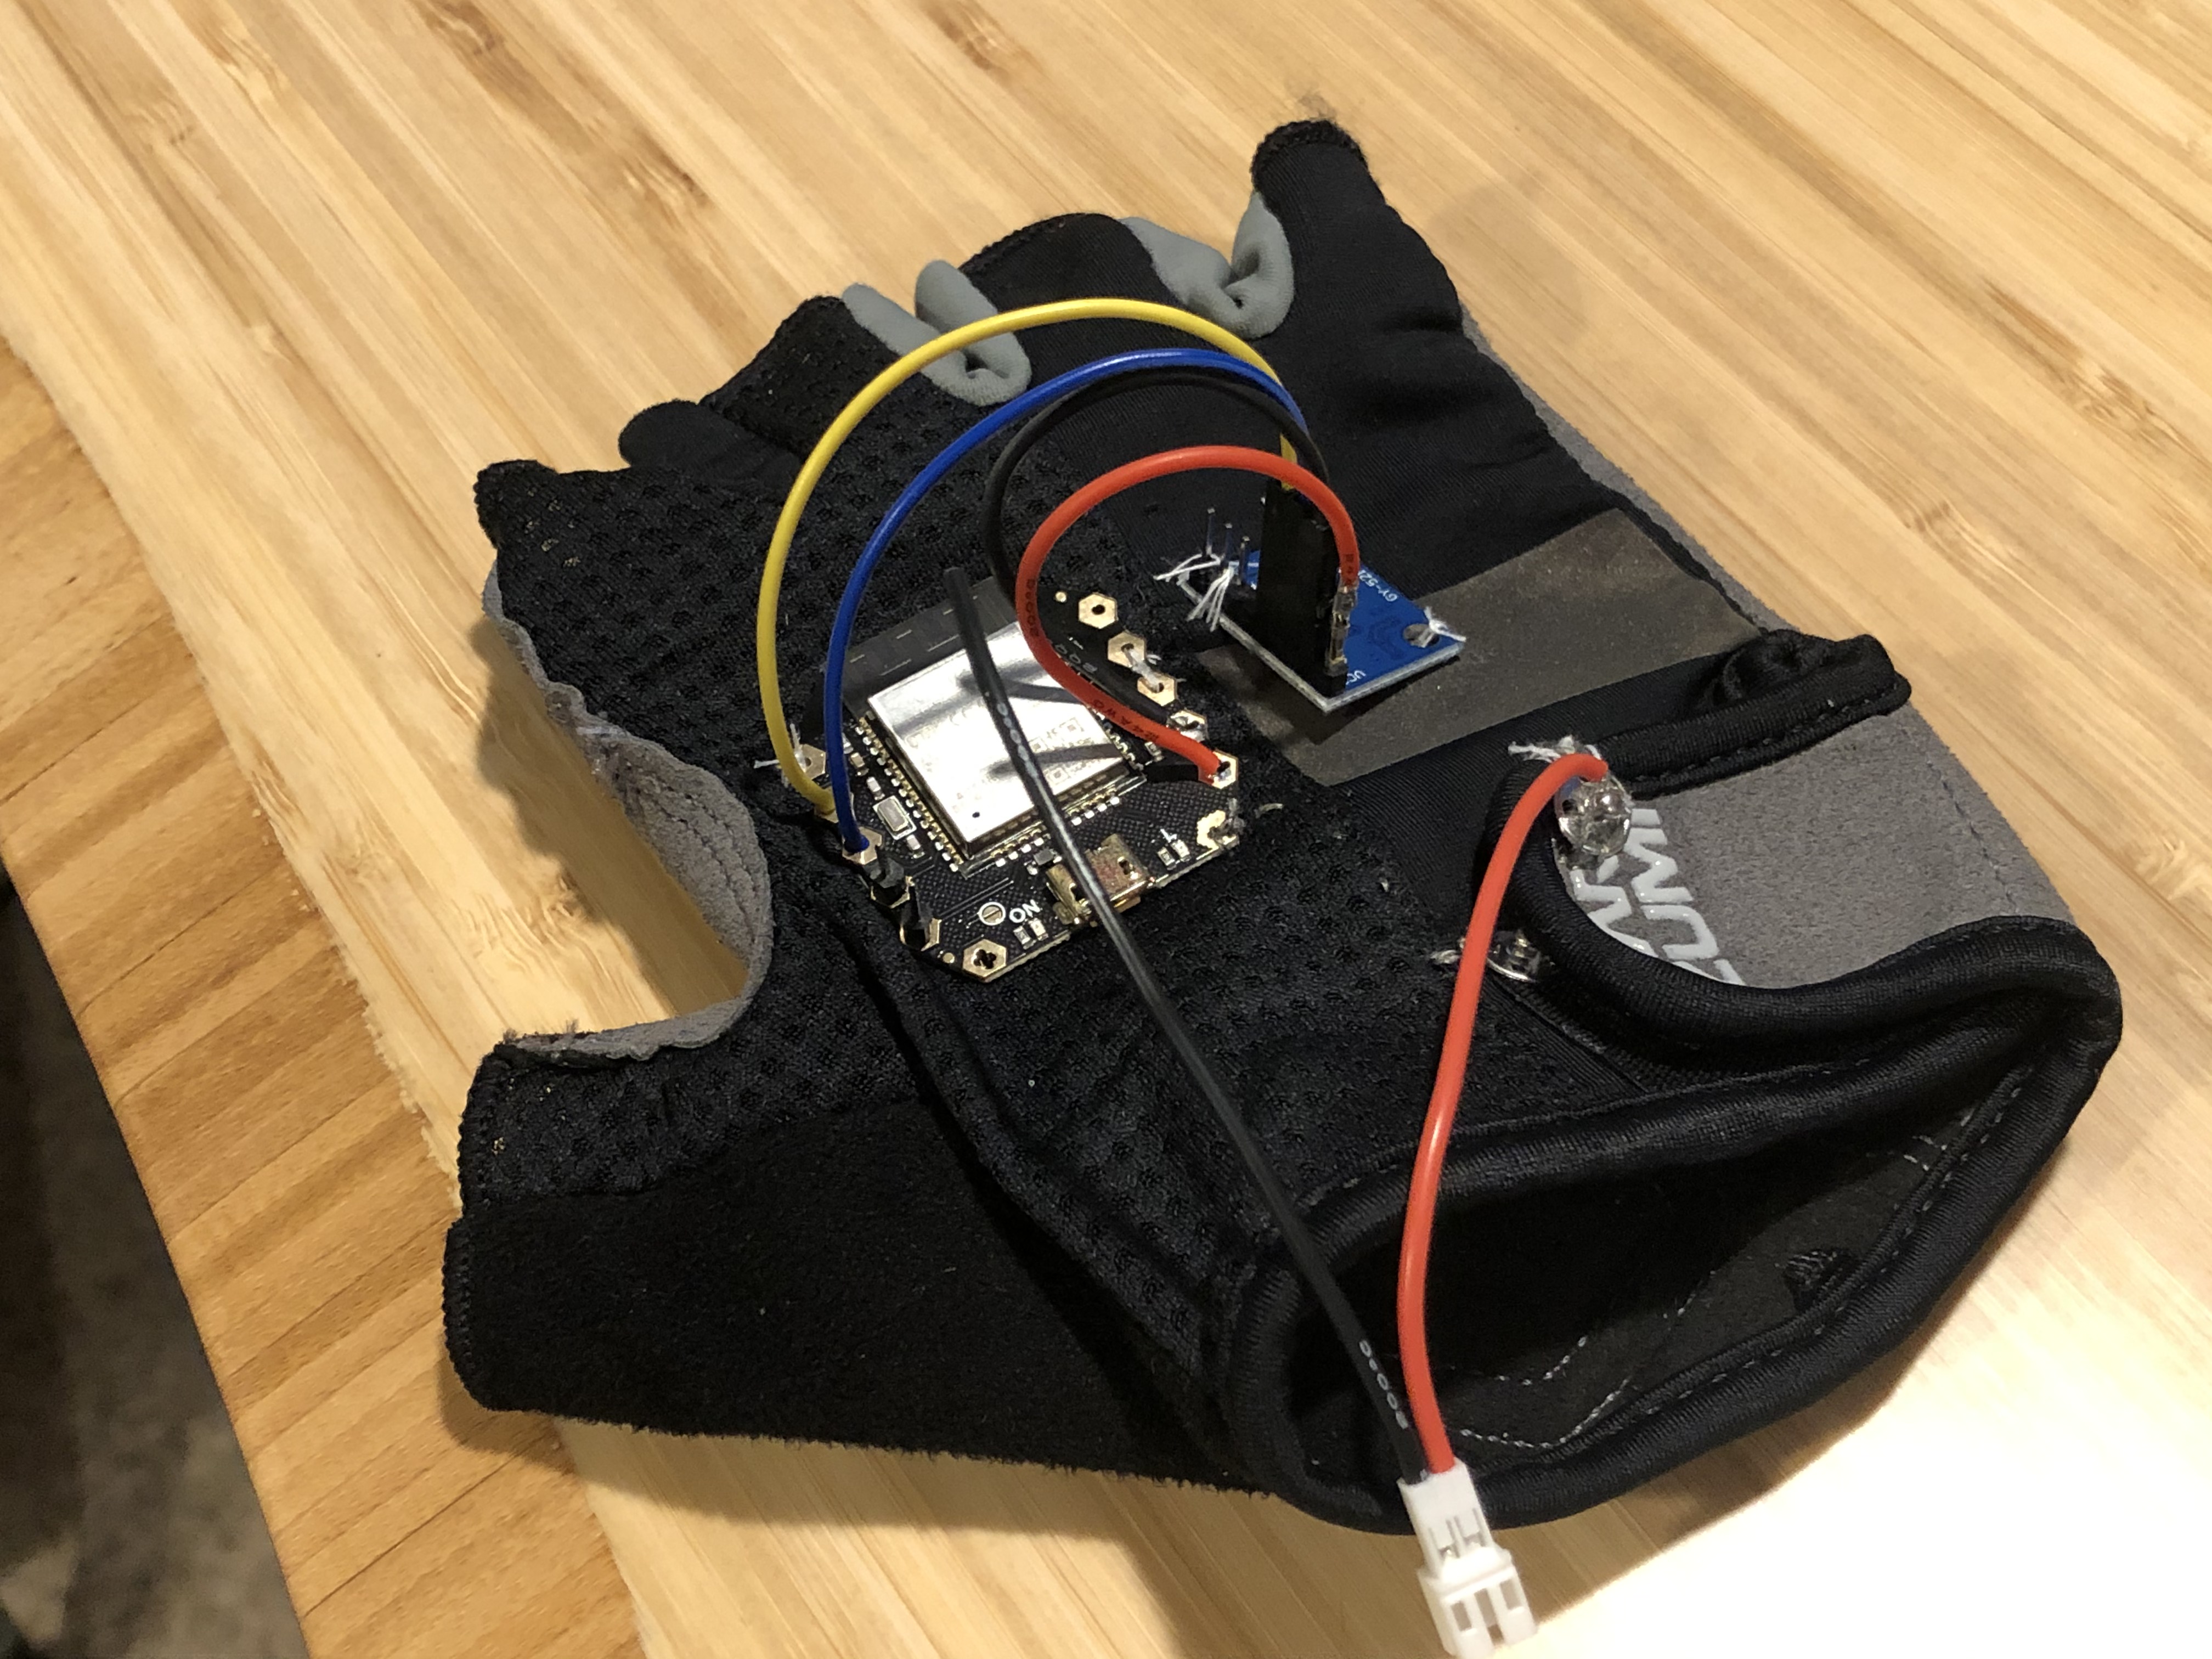
I then soldered female jumper wires onto the ESP32 so I can easily plug it into the MPU. At the sime time, I soldered headers into the capacitive touch pins to make it easy to connect the foil tape later.
The next step is to stitch the components together onto the glove. This takes a while, but as long as you have some basic sewing skills, shouldn't be too difficult. It's important to align the components before you start sewing. You should make sure to put the pieces on wide, flat areas of your hand. That will prevent flexing that could damage the components. You should also make sure that the MPU will not move unintentionally; make sure the MPU is firmly affixed and only moves when your whole hand moves.
NOTE: Make sure that you mount the MPU properly or else the axes will be out of alignment
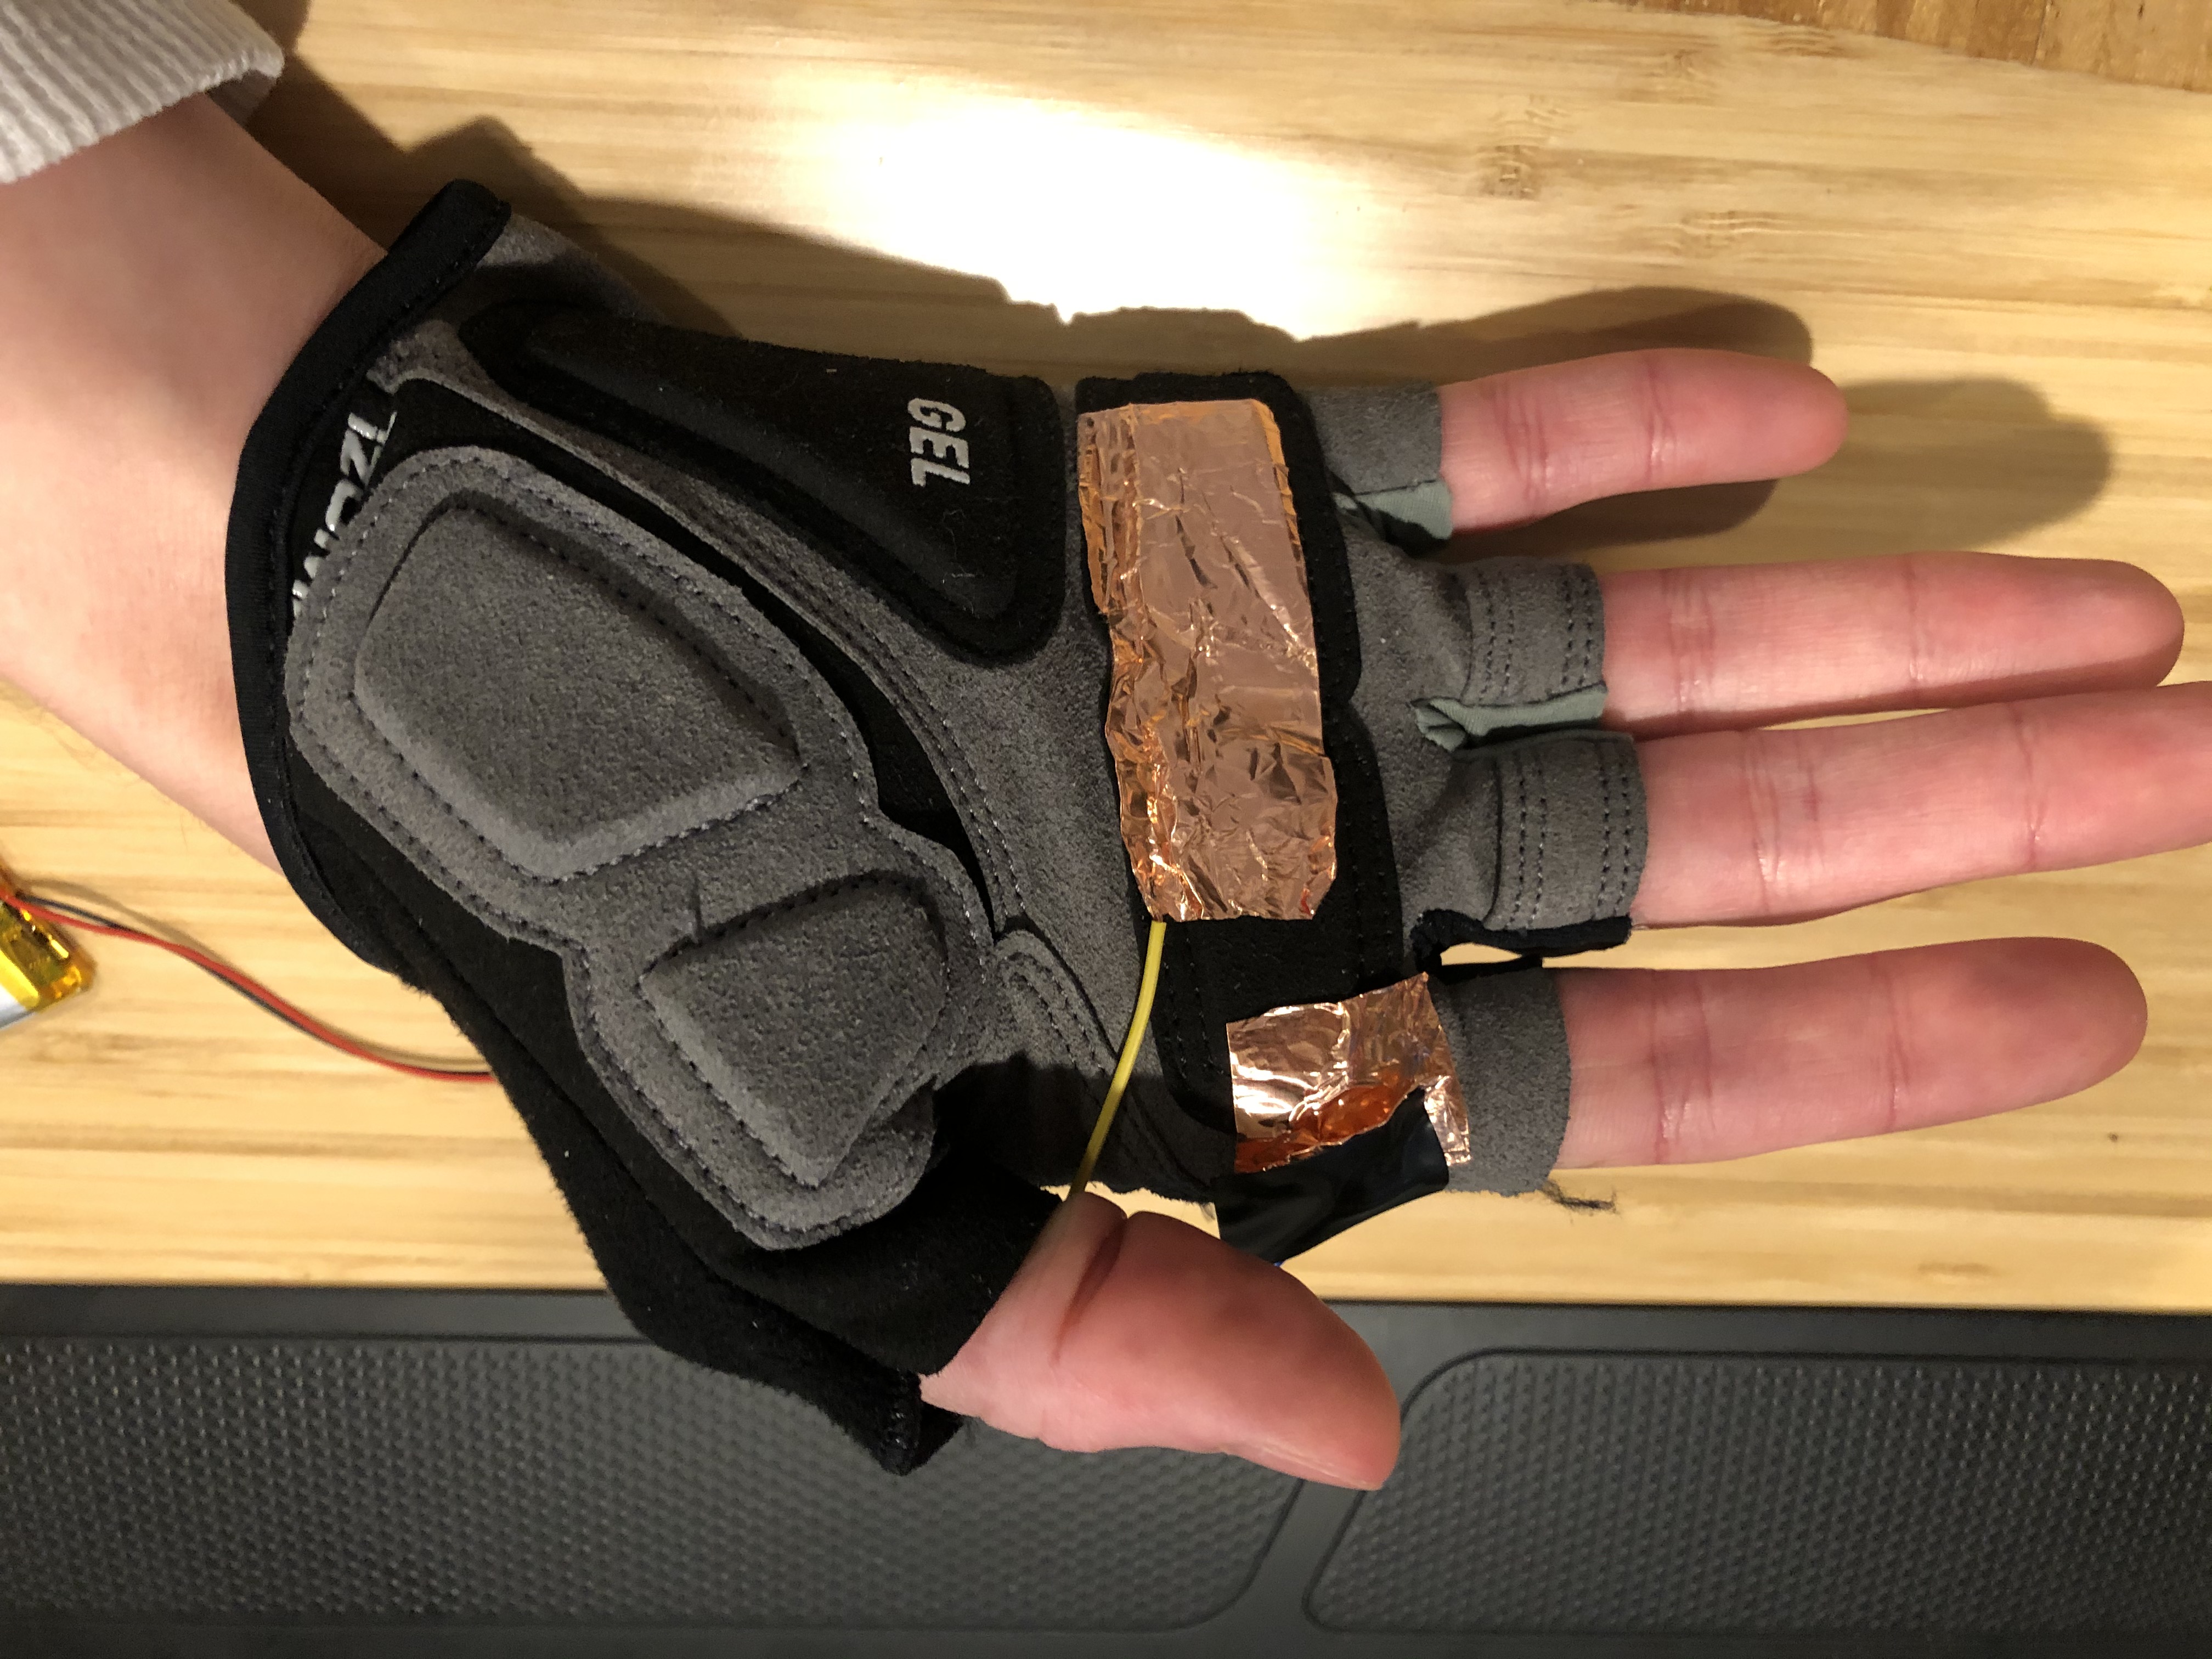
Add the copper foil strips for the safety and trigger. I had some trouble with this part because some areas of the glove are thin enough that the touch sensor is triggered without direct contact. I had to make sure that the touch foil was on the thick gel pads (since this is a biking glove).
Before we plug in the battery, lets test what we have.
The last step is to plug in the battery. We now have a finished glove!
I chose ArdNet because I wanted to experiment with it, not necessarily because its the best choice for this use case. Because of that, the performance of the tool does suffer slightly. The biggest issue seems to be network latency and dropped packets. I am connected to a WiFi router on the other side of the house, which certainly has negative affects. You could probably get a free performance boost by setting the Esp32 to WAP mode and connecting to it directly from your PC. The device is also rather power hungry, again, because it uses WiFi instead of a more efficient data format. It would be nice to explore alternative connections in the future.