Table of Contents
- Web Application Installation
- Installing the web app on an Azure Web Site
- Running the sample end to end
- Resetting the demo environment
- License
Prerequisites
- Office 365 Subscription
- Microsoft Azure Subscription
- Visual Studio 2015 Update 1
- Microsoft Office Developer Tools Update 1 for Visual Studio 2015
- Office 365 Video Portal
- Before you start the installation process, ensure the Office 365 Video Portal is provisioned in your tenancy. Follow the steps below to enable, provision and verify the Office 365 Video Portal is available in your tenancy.
-
In your web browser, open the Tenant Settings page for your Office 365 tenancy. The URL to the Tenant Settings page is shown below.
https://<TENANCY>-admin.sharepoint.com/_layouts/15/online/TenantSettings.aspx Example: https://contoso-admin.sharepoint.com/_layouts/15/online/TenantSettings.aspx -
In the Streaming Video Service section, select Enable streaming video through Azure Media Services and enable the Video Portal (shown below).

-
Click OK.
-
In your web browser, open the page that lists the site collections in your Office 365 tenancy. The URL for the site collections list page is shown below.
https://<TENANCY>-admin.sharepoint.com/_layouts/15/online/SiteCollections.aspx Example: https://contoso-admin.sharepoint.com/_layouts/15/online/SiteCollections.aspx -
Look for the Office 365 Video Portal site collection in the list of site collections in your Office 365 tenancy.
-
The URL to the Office 365 Video portal follows this format:
https://<TENANCY>.sharepoint.com/portals/hub
-
-
If the Office 365 Video Portal site collection is in the list, open it in a web browser to verify it works.
-
If the Office 365 Video Portal is not provisioned in your tenancy you can provision it by appending /_layouts/15/videoredirect.aspx to your tenancy's base URL and opening the page in the web browser, like this.
https://<TENANCY>.sharepoint.com/_layouts/15/videoredirect.aspx

Example: https://contoso.sharepoint.com/_layouts/15/videoredirect.aspx
Important Notes
- Use Internet Explorer or Google Chrome to install and execute the web app portion of the code sample. The Edge browser is not yet supported.
- When you save the PropertyManagerMyApp directory to your local machine, save it to the root of one of your drives to ensure all Nuget functionality will work and your file paths will not become too long.
Installation
To set up and configure the demo, first download the Property Manager web app source code and open it in Visual Studio 2015.
Restore the Nuget packages the web app depends on
- Right click on the PropertyManagerMyApp project and select Build.
Register the Property Manager web app with your Azure Active Directory
To register the Property Manager web app with your Azure Active Directory follow these steps.
- Right click the PropertyManagerMyApp project and select Add -> Connected Service.
- Select Office 365 APIs and then click Configure.
- Type your Azure AD Domain, and then click Next
- Log in with the tenant administrator credentials for your tenancy.
- Make sure Create a new Azure AD application to access Office 365 API services option is checked, and then click Next
- In Calendar section, no operation needed, click Next.
- In Contacts section, no operation needed, click Next.
- In Mail section, no operation needed, click Next.
- In My Files section, no operation needed, click Next.
- In Sites section, make sure Have full control of all site collections option is checked, and then click Next.
- In Users and Groups section, make sure Sign you in and read your profile option is checked, and then click Finish.
- Add Connected Services wizard is done.
At this point Visual Studio will add the appropriate Office 365 Nuget packages to the Visual Studio Solution.
Add Microsoft Graph permissions to the PropertyManagerMyApp AAD app
-
In your web browser, open https://portal.office.com and sign in with a global administrator account.
-
Click the Admin tile.
-
Expand the ADMIN menu item.
-
Click Azure AD.
-
In the left menu, click Active Directory
-
Click your Azure Active Directory
-
Click Applications
-
In the Show dropdown list, select Applications my company owns.
-
Click the checkmark button.
-
Ensure the PropertyManagerMyApp application exists, then click it.
-
Click Configure
-
Scroll down to Permissions to other applications and click Add application
-
Mouse over Microsoft Graph and click the + button
-
Click the checkmark button on the bottom right
-
Open the Delegated Permissions dropdown list for the Microsoft Graph item you just added
-
Select the following permissions:
- Read and write notebooks that the user can access (preview)
- Have full access to user files
- Have full access to user calendars
- Send mail as a user
- Read and write access to user mail
- Access directory as the signed in user
- Read and write directory data
- Read and write all groups
- Read and write all users' full profiles
- Read items in all site collections
-
Click Save
Edit web.config
The Property Manager web app stores configuration settings in the web.config file. These settings must be configured for your environment in order for the Property Manager web app to work. The Add Connected Service wizard creates some of these settings in the web.config file when it registers your app with Azure Active Directory. These settings the Add Connected Service wizard creates include:
- ida:ClientID
- ida:ClientSecret
- ida:AADInstance
In addition to the settings above, other settings exist that you must configure to match your tenancy. These settings include:
-
ServiceResourceId Url for the Office 365 tenant admin site
Example: https://contoso-admin.sharepoint.com
-
DemoSiteServiceResourceId Url for the root Site Collection in the Office 365 Tenancy
Example: https://contoso.sharepoint.com
-
DemoSiteCollectionUrl Url used to create the Site Collection used by Property Manager web app
Example: https://contoso.sharepoint.com/sites/SuiteLevelAppDemo
-
DemoSiteCollectionOwner Email address for Site Collection owner (admin@<Your Tenancy>.onmicrosoft.com)
Example: ADMIN@contoso.onmicrosoft.com
-
DispatcherName Display Name for Dispatcher (Katie Jordan)
Example: Katie Jordan
-
DispatcherEmail Email address for Dispatcher (katiej@<Your Tenancy>.onmicrosoft.com)
Example: katiej@contoso.onmicrosoft.com
-
VideoPortalEndpointUri Api Endpoint for the Video Portal which comes with your Office 365 tenancy
- Configure these settings in the web.config file to match your Office 365 / Azure Tenancy by replacing the TENANCY placeholders in the web.config with your tenancy name. In the examples above, the TENANCY placeholder was replaced with contoso.
- Edit the DemoSiteCollectionOwner setting in the web.config file to match your Office 365 global administrator account.
- Right click the PropertyManagerMyApp project and select Manage Nuget Packages.
- Click the Updates tab and select nuget.org.
- Select all packages listed under Updates tab, click Update.
- Click I Accept.
- Click Close.
- Save the web.config file.
Configure Trusted Sites
- Add https://localhost and http://localhost to the Trusted Sites list in Internet Explorer.
Site Collection Provisioning
The O365SiteProvisingController is used to create the Site Collection used to store data and facilitate workflows for the Property Manager web app.
First, this controller retrieves an access token for the tenancy admin Site Collection. Then it uses the access token to authenticate the call to determine if the demo Site Collection exists.
If the demo Site Collection exists this controller then redirects to the DashboardController.
If the Site Collection does not exist then the controller creates the Site Collection.
After the Site Collection is created the controller retrieves an access token to interact with the new demo Site Collection.
Then controller uses the access token to authenticate the calls to create the information architecture and supporting components in the new Site Collection.
Finally, the controller creates content in the new site collection to support the demo and redirects to the DashboardController.
These files contain the code which implements the Site Collection provisioning functionality:
- /Controllers/O365SiteProvisioningController.cs
- /Util/csomUtil.cs
- /Util/SiteProvisioning.cs
- /Views/O365SiteProvisioning/Index.cshtml
- /Views/O365SiteProvisioning/ProvisioningDemoData.cshmtl
- /Content/SampleData.xml
After you have performed the configuration steps described above, provision the Site Collection and content.
-
In Visual Studio, press F5 to run the project.
When you are prompted to log in you must use your Office 365 admin account. This allows you to grant consent to the Azure Active Directory application so the demo users will be able to use it.
-
When prompted, click the Accept button.
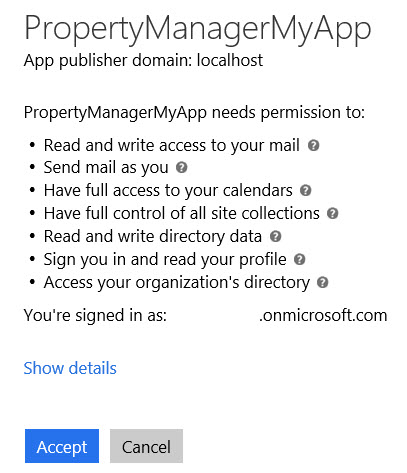
After you successfully build and run the project and login, ignore the error you see in the web browser. The error occurs because the Site Collection has not been provisioned yet.
Provision Site Collection and information architecture
-
In your web browser, navigate to https://localhost:44312/O365SiteProvisioning
-
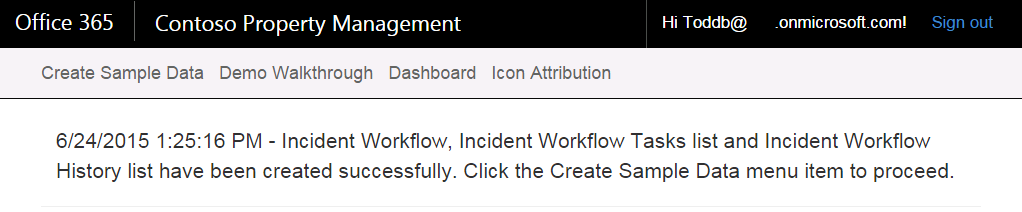
Click Create Demo Site Collection to invoke the O365SiteProvisioning controller and create the Site Collection, information architecture, and workflows.
Note: This process can take up to 20 minutes to complete. Do not refresh the page during this process. The page will refresh every minute and display the current time to let you know it is still running. When the process completes you will see this screen:
Provision Azure Active Directory Groups, Users, and demo data
Finally, you will create the Azure Active Directory Groups, Users, and demo data to support the demo. This process creates the following AD Users and Groups.
Groups
- Repair People
- Inspectors
Users
-
Inspector: Rob Barker - alias: robb
-
Dispatcher: Katie Jordan - alias: katiej
-
Repair Person: Ron Gabel - alias: rong
-
Property Owner: Margaret Au - alias: marga
-
Inspector: Alisa Lawyer - alias: alisal
-
Repair Person: Chris Gray - alias: chrisg
-
Property Owner: Steven Wright - alias: stevenw
-
Property Owner: Dan Jump - alias: danj
-
Property Owner: Chris Johnson - alias: chrisj
-
Property Owner: Carol Troup - alias: carolt
Running Demo With A Single User Account
If your tenancy does not support multiple users because you do not have 10 licenses available you can run the demo with a single user account. In this case, the account must meet the following requirements:
- User is a global tenant admin
- User is is granted the licenses necessary to support the scenario
- User is added to the Inspectors and Repair People Azure Active Directory Groups
Additionally, in a single user scenario, the accounts set in the web.config file for the web app, as well as all the configuration variables for all the mobile apps should use the single user account.
-
Next, click the Create Sample Data link in the top menu. Then, click the Populate button.
-
Enter the date when you plan to execute the demo, then click the Populate button.
When the process completes you will see this screen. Click the Click here to initialize OneNote site for demo Office 365 Groups button.
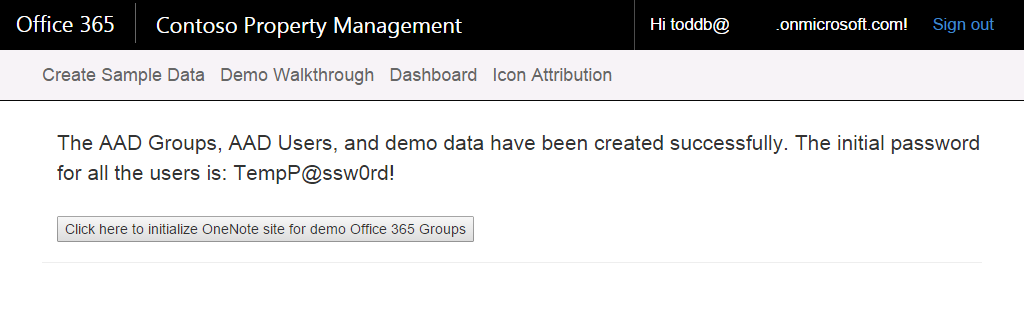
Note: You need to wait 24-48 hours for all the OneNote Notebooks corresponding to the Office 365 Groups to be completely created.
If you navigate to the Site Contents page in the Site Collection you will see the lists and libraries which indicate they just had sample data added to them.
Use this URL to access the Site Contents page:
https://<Your Tenancy>.sharepoint.com/sites/SuiteLevelAppDemo/_layouts/15/viewlsts.aspx
If you open the Admin app and browse to your active directory you will see the groups and users are created.
Passwords
The initial password for all the users is TempP@ssw0rd!
Office 365 Video Portal Permissions You must grant the repair person's account the permission to upload videos to Office 365 Video Portal so the repair person can upload a video from the Repair mobile app. To do this, follow these steps:
- In your web browser, open and sign in with the Global Administrator account for your tenancy.
- Click the Channels link.
- Click the Incidents link.
- Click the Channel Settings link.
- Click the Permissions link.
- Add Rob Barker to the Editors group.
- Click Save.
IMPORTANT NOTE! READ THIS!
When users and groups are created with the Unified API there is some lag time associated with provisioning all of the associated Office 365 functionality. You may have to wait up to 24 hours for the groups to become fully functional with all Office 365 services. Items specifically related to this code sample include:
Users:
- It may take 15 minutes for files, messages, and events are available for use for each user. This includes OneDrive, Email, and Calendar functionality.
Groups:
- The ability to list the group conversations in the web app
- The ability to list the group files in the web app
- The ability to upload files from the web app to groups
See the Office 365 REST API release notes for April 2015 for more details.
Mailbox setup
- Next, log in with each user to your tenancy and access Outlook web access to set up their email accounts.
Time Zone Setup
This step is essential to ensure the Find Meeting Times Graph API call returns free times correctly for repair people on the incident details web page in the web app dashboard.
- Click the Settings button in the top right of the web page (it looks like a gear).
- In the My app settings section, click Mail
- In the Options section (on the left), expand General
- Click Region and time zone
- Set the Current time zone dropdown list value to the same time zone you specified in the WEBSITE_TIME_ZONE setting value in the PropertyManagerMyApp web.config file.
- Click Save
Note: It may take up to 24 hours for the Office 365 infrastructure to create an Exchange Mailbox and Calendar. Usually, it takes 10 seconds.
Add people to Katie Jordan
-
Open a web browser and go to https://portal.office.com
-
Login with the Katie Jordan user account
-
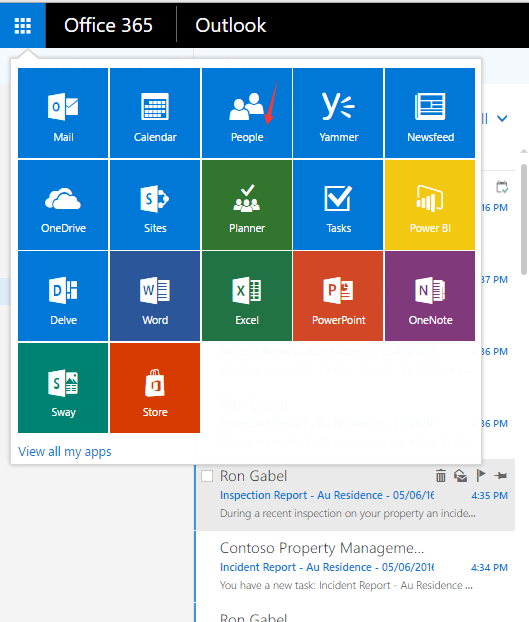
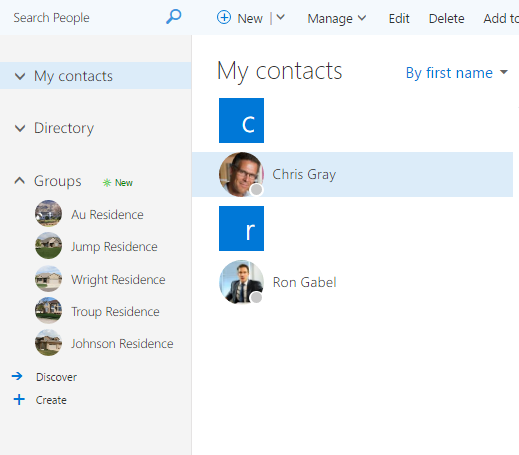
Click the launcher button, then click the People button
-
Add Ron Gabel and Chris Gray to Katie Jordan's contacts list.
Property Manager web app Configuration This step is optional. If you wish to add a custom logo to your Property Manager web app you can update the logo corresponding to the AAD App Visual Studio creates in your AAD.
- To do this, access the AAD App in the Azure Management Portal and use the image file you can find in the PropertyManagementMyApp Visual Studio Solution. /Content/Images/AADAppLogos/logo-prop-man.jpg
Property Manager web app Installation Complete! You can now install and run the mobile apps.
Important Authentication Note
The web app uses REST APIs to return list item data and pictures from the SharePoint site collection and video metadata from the Office 365 Video Portal. The REST APIs use a different token to authenticate than the token used to authenticate to Exchange in Office 365.
Signing into Office 365 and viewing the web app does not obtain the token used to authenticate to the SharePoint site.
Since this is the case you must first log into the SharePoint site collection before you try to access the web app.
In future releases the Graph API will include the ability to query SharePoint list items and document libraries and the Video Portal. Once the Unified API includes this functionality the web app will be updated to use the Graph API. After the web app has been converted to use the Unified API the separate token needed to access the REST APIs is no longer needed and there will be no need to log into the SharePoint site collection before accessing the web app.
Access the property management web app dashboard
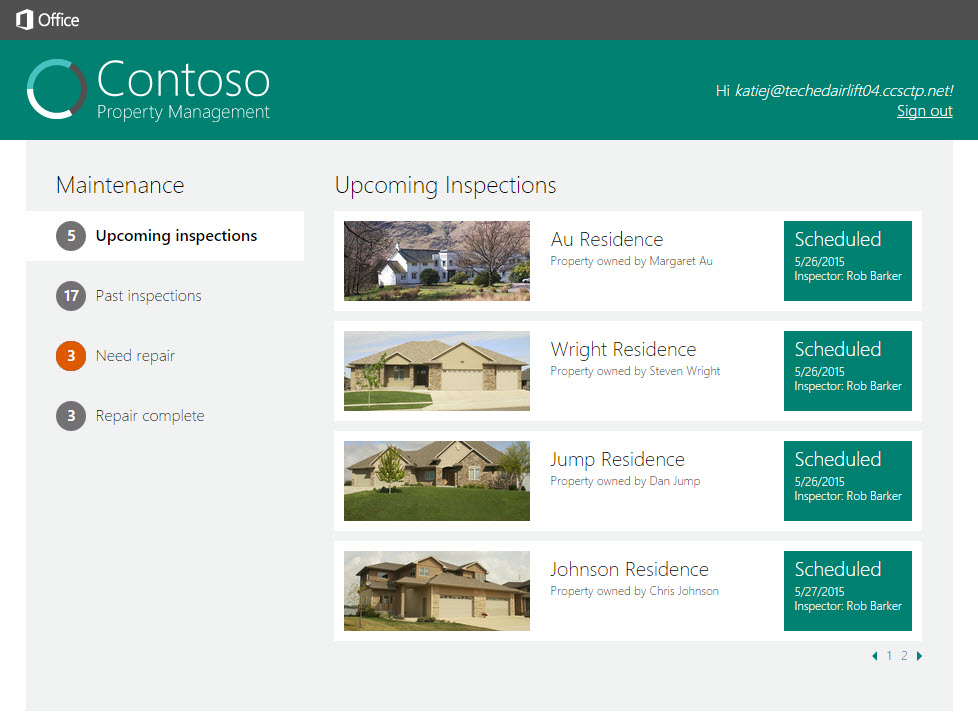
- Access the Property Manager web app dashboard landing page by clicking the Dashboard link in the top menu. You can also access the dashboard by navigating to http://localhost:44312/Dashboard in your web browser.
This is what the dashboard looks like.
Configure a listener, create a subscription, test and view notifications, and delete subscriptions
The following link contains more detailed information about webhook subscriptions. link
Follow these steps to configure a listener, create a subscription, test and view notifications, and delete subscriptions.
Configure a Listener
-
Open the PropertyManagerMyApp Solution with Visual Studio 2015.
-
Open the web.config file.
-
Configure the NotificationUrl setting in the web.config:
- NotificationUrl is the URL of the endpoint that will receive the notifications. This URL has to make use of the HTTPS protocol and be accessible from the Internet.
IMPORTANT NOTE! READ THIS!
- You need use your site URL instead of the placeholder PropertyManagerMyAppSiteURL.
- Example: https://promantest.azurewebsites.net/Notification/Listen Example: https://localhost:44312/Notification/Listen
Create a Subscription
- The page load event in the Incident Details page checks to see if a subscription exists in the session. You do not have to do anything except go about using the demo normally and the subscription is created for your automatically. When the Incident Details page loads...
- if the subscription does not exist, the code creates it and stores it in the session.
- if the subscription exists, but it has expired, then the code deletes it and recreates it and stores it in the session.
- if the subscription exists and it has not expire then the code does nothing.
- each subscription's ExpirationDateTime is set to 2 hours from the time it is created.
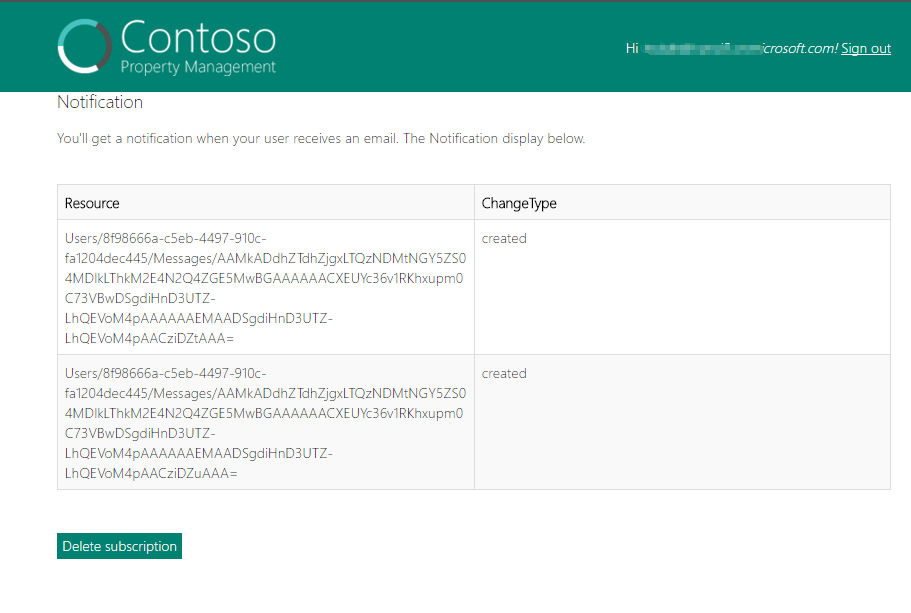
Test and View Notifications
To view notifications, follow these steps:
-
In a web browser go to https://YourPropertyManagerMyAppSiteURL/WebHooks/notification.
-
Send two emails to the user that is currently logged into the PropertyManagerMyApp site. View the notifications on the page.
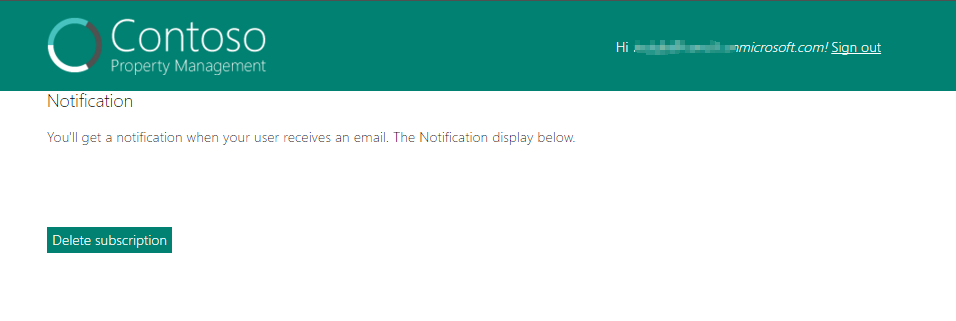
Delete a Subscription
To delete a subscription, follow these steps:
- In a web browser go to https://YourPropertyManagerMyAppSiteURL/WebHooks/notification.
- Click the Delete subscription button. This will delete the subscription and unsubscribe the notification.
In addition to your localhost development environment, the web app may also run on an Azure Web Site.
If you wish to publish the web app to an Azure Web Site it is recommended that you create another AAD application for your Azure Web Site. This ensures that the registration for the App in the My Apps list in Office 365 has the appropriate Sign-On URL.
The following article describes how to use Visual Studio Publishing Profiles to set up publishing to an Azure Web Site and how to create separate a web.config file for your Azure Web Site.
Managing Multiple Windows Azure Web Site Environments using Visual Studio Publishing Profiles
The PowerPoint slide deck describes how to prep your environment with sample data and execute the sample scenario end to end. It also describes all of the different places where data is created or updated throughout the entire scenario. This is an another excellent resource to see what this demo really does and how the scenario in it unfolds.
There are two different ways you can reset the demo so you can run it multiple times with the pre-populated demo data.
- Re-provisioning demo data only
- Re-provisioning the entire information architecture and demo data
IMPORTANT NOTE: If you wish to delete all the users and user groups and run the entire provisioning process again you must ensure you follow these steps to ensure the user accounts are recreated successfully and all their Office 365 components work properly.
For each user, do the following.
- Remove all the SharePoint site permissions for each user. Make sure you remove their permissions from all SharePoint site collections so they are not granted access to any SharePoint sites.
- Open the Office 365 Admin add-in and delete all of the users.
- Wait 48 hours for all the Office 365 timer jobs to completely remove all traces of the user account.
- Follow the steps in this README to re-provision the users and all demo components.
To re-provision (reset) the demo data to the original state it was in after you run through the setup process follow these steps:
Note: This procedure deletes list items and documents and re-creates them.
- In your web browser, navigate to http://localhost:44312/O365SiteProvisioning/ProvisionDemoData
- Log in with the tenant administrator credentials for your tenancy.
- Enter the date when you plan to execute the demo, then click the Populate button.
- When the process completes, the demo data is re-provisioned.
To re-provision (reset) the entire information architecture and demo data to the original state it was in after you run through the setup process follow these steps:
Note: This procedure deletes site columns, content types, lists, workflows, list items and documents and re-creates them.
-
In your web browser, navigate to https://-admin.spoppe.com/_layouts/15/online/SiteCollections.aspx
-
Log in with the tenant administrator credentials for your tenancy.
-
Delete the demo site collection you previously created.
Note: The site collection will go to the recycle bin after you delete it. Office 365 does not currently support manually deleting the site collection from recycle bin, so you have to execute PowerShell script to do it.
-
Refer to Set up the SharePoint Online Management Shell environment (Office 365 support article) to set up the SharePoint Online Management Shell.
-
Open the SharePoint Online Management Shell, and then execute the following PowerShell scripts to delete the demo site collection from the recycle bin.
$msolcred = get-credential <Your Office 365 admin account> connect-msolservice -credential $msolcred Remove-SPODeletedSite –Identity "<Your Demo Site URL>" -
In this document, go to the Provision Site Collection and information architecture sub section in the Web app Installation section and re-execute all the steps up to the Office Add-in for Outlook Installation section.
Copyright (c) Microsoft, Inc. All rights reserved. Licensed under the Apache License, Version 2.0.