Data Collection for .NET shows how a robust application can be built with the ArcGIS Platform using the ArcGIS Runtime SDK for .NET, WPF, and UWP. It demonstrates best practices around some simple but key functionality of the ArcGIS Runtime. Using your organization's web maps, you can use Data Collection as-is, or extend it to meet your specific needs.

- Take your web map and data offline
- Edit your data both offline and online
- Synchronize offline edits
- View and edit your data with Popups
- Work with Features, Popups, Attachments, and PopupManager
- Edit and query Feature Tables
- Work with related records
- Identify map features
- Authenticate with Portal using OAuth
- Use the World Geocoder service
- Use Popup configuration to drive app behavior
The project also demonstrates some patterns for building real-world apps around the ArcGIS Runtime SDK.
- Map-centric UI design
- ArcGIS asynchronous service pattern
- Cross-platform application design
- Model-View-ViewModel pattern
You will need Visual Studio 2017 or later. You can use the ArcGIS Runtime SDK extension (v100.7 or later) installed locally or install the Runtime packages from Nuget.org.
Fork the Data Collection repo.
Once you have forked the repo, you can make a clone and open DataCollection.sln in Visual Studio.
- Clone Data Collection
cdinto into the cloned repository's directory- Make your changes and create a pull request
If you make changes in the fork and would like to sync those changes with the upstream repository, you must first configure the remote. This will be required when you have created local branches and would like to make a pull request to your upstream branch.
- In the Terminal (for Mac users) or command prompt (for Windows and Linux users) type
git remote -vto list the current configured remote repo for your fork. git remote add upstream https://github.com/Esri/data-collection-dotnet.gitto specify new remote upstream repository that will be synced with the fork. You can typegit remote -vto verify the new upstream.
If there are changes made in the original repository, you can sync the fork to keep it updated with upstream repository.
- In the terminal, change the current working directory to your local project
- Type
git fetch upstreamto fetch the commits from the upstream repository git checkout masterto checkout your fork's local master branch.git merge upstream/masterto sync your localmasterbranch withupstream/master. Note: Your local changes will be retained and your fork's master branch will be in sync with the upstream repository.
The app can be run as-is, but it's recommended you do some configuration to set up OAuth to be relevant to your users. At minimum, the app should not be deployed without these changes:
- Register an ArcGIS Portal Application.
- Configure Data Collection project to reference that application.
- License the app to remove the Developer Mode watermark and for deployment.
For OAuth configuration, create a new Application in your ArcGIS Portal to obtain a Client ID and configure a Redirect URL. The Client ID configures the ArcGIS Runtime to show your users, during the login process, that the application was built by you and can be trusted. The Redirect URL configures the OAuth process to then return to your app once authentication is complete.
- Log in to https://developers.arcgis.com with either your ArcGIS Organizational Account or an ArcGIS Developer Account.
- Register a new Application.

- In the Authentication tab, note the Client ID and add a Redirect URL, e.g.
data-collection://auth. We will use this URL in the Configuring the project section below.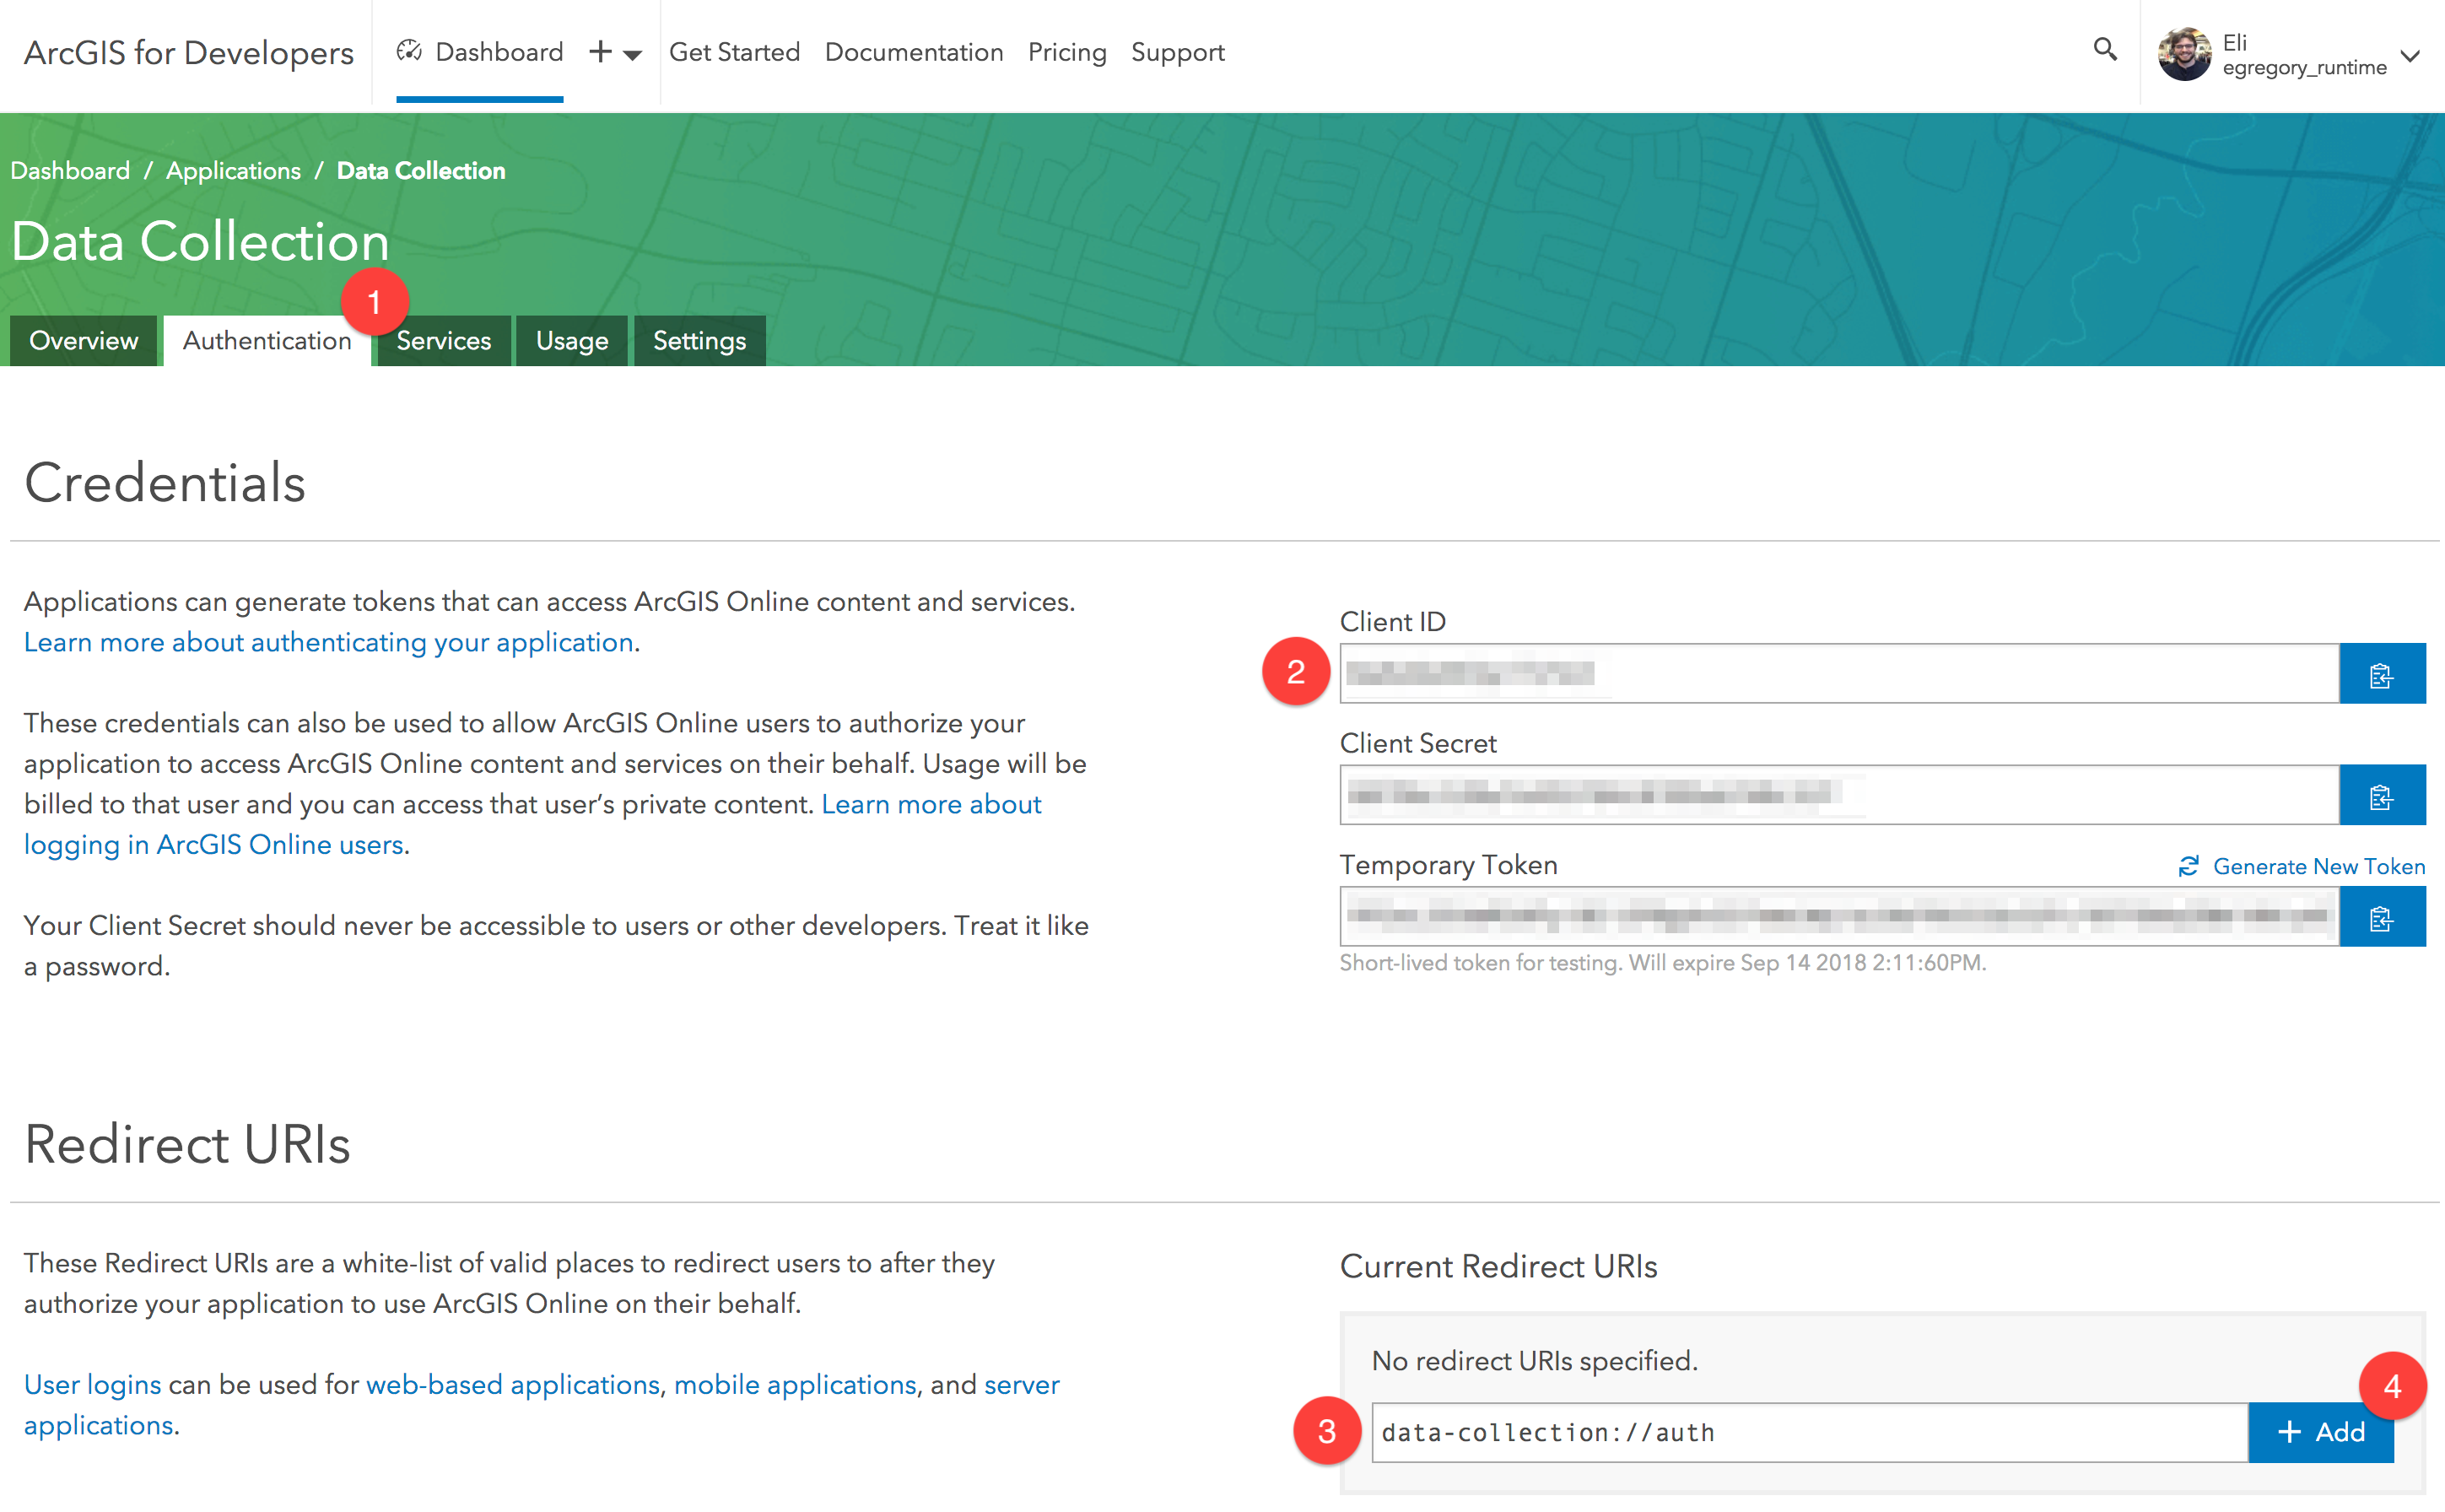
- Open the solution in Visual Studio and browse to the file named
Configuration.xmllocated in thePropertiesdirectory of theDataCollection.Sharedproject. - (Optionally) configure the
WebmapURLto match your organization's webmap. - Configure the OAuth Redirect URL.
- Set the
RedirectURLproperty to match the Redirect URL you have set up when you registered your application (see section above).
- Set the
- Configure the Client ID.
- Set the
ClientIDproperty with the Client ID generated when you registered your application (see section above).
- Set the
Learn more about Esri Open Source Apps here.
- Visual Studio 2017 or later
- Visual Studio 2019 is required if you want to use the .NET Core version of the WPF app.
- ArcGIS Runtime SDK for .NET
- To edit records or take a web map offline you will need an ArcGIS Online Organizational account, an ArcGIS Online Developer account or an ArcGIS Online account authenticated using a social login.
- To consume your own web map you will need an ArcGIS Online Organizational account.
Anyone and everyone is welcome to contribute. We do accept pull requests.
- Get involved
- Report issues
- Contribute code
- Improve documentation
Copyright 2019 Esri
Licensed under the Apache License, Version 2.0 (the "License"); you may not use this file except in compliance with the License. You may obtain a copy of the License at
http://www.apache.org/licenses/LICENSE-2.0
Unless required by applicable law or agreed to in writing, software distributed under the License is distributed on an "AS IS" BASIS, WITHOUT WARRANTIES OR CONDITIONS OF ANY KIND, either express or implied. See the License for the specific language governing permissions and limitations under the License.
A copy of the license is available in the repository's LICENSE file.
For information about licensing your deployed app, see License your app.
This project uses the following 3rd-party components:
- Extended WPF Toolkit by XCeed is licensed under the Microsoft Public License
- Humanizer - MIT License